- •contents
- •preface
- •acknowledgments
- •about this book
- •Special features
- •Best practices
- •Design patterns in action
- •Software directory
- •Roadmap
- •Part 1: JUnit distilled
- •Part 2: Testing strategies
- •Part 3: Testing components
- •Code
- •References
- •Author online
- •about the authors
- •about the title
- •about the cover illustration
- •JUnit jumpstart
- •1.1 Proving it works
- •1.2 Starting from scratch
- •1.3 Understanding unit testing frameworks
- •1.4 Setting up JUnit
- •1.5 Testing with JUnit
- •1.6 Summary
- •2.1 Exploring core JUnit
- •2.2 Launching tests with test runners
- •2.2.1 Selecting a test runner
- •2.2.2 Defining your own test runner
- •2.3 Composing tests with TestSuite
- •2.3.1 Running the automatic suite
- •2.3.2 Rolling your own test suite
- •2.4 Collecting parameters with TestResult
- •2.5 Observing results with TestListener
- •2.6 Working with TestCase
- •2.6.1 Managing resources with a fixture
- •2.6.2 Creating unit test methods
- •2.7 Stepping through TestCalculator
- •2.7.1 Creating a TestSuite
- •2.7.2 Creating a TestResult
- •2.7.3 Executing the test methods
- •2.7.4 Reviewing the full JUnit life cycle
- •2.8 Summary
- •3.1 Introducing the controller component
- •3.1.1 Designing the interfaces
- •3.1.2 Implementing the base classes
- •3.2 Let’s test it!
- •3.2.1 Testing the DefaultController
- •3.2.2 Adding a handler
- •3.2.3 Processing a request
- •3.2.4 Improving testProcessRequest
- •3.3 Testing exception-handling
- •3.3.1 Simulating exceptional conditions
- •3.3.2 Testing for exceptions
- •3.4 Setting up a project for testing
- •3.5 Summary
- •4.1 The need for unit tests
- •4.1.1 Allowing greater test coverage
- •4.1.2 Enabling teamwork
- •4.1.3 Preventing regression and limiting debugging
- •4.1.4 Enabling refactoring
- •4.1.5 Improving implementation design
- •4.1.6 Serving as developer documentation
- •4.1.7 Having fun
- •4.2 Different kinds of tests
- •4.2.1 The four flavors of software tests
- •4.2.2 The three flavors of unit tests
- •4.3 Determining how good tests are
- •4.3.1 Measuring test coverage
- •4.3.2 Generating test coverage reports
- •4.3.3 Testing interactions
- •4.4 Test-Driven Development
- •4.4.1 Tweaking the cycle
- •4.5 Testing in the development cycle
- •4.6 Summary
- •5.1 A day in the life
- •5.2 Running tests from Ant
- •5.2.1 Ant, indispensable Ant
- •5.2.2 Ant targets, projects, properties, and tasks
- •5.2.3 The javac task
- •5.2.4 The JUnit task
- •5.2.5 Putting Ant to the task
- •5.2.6 Pretty printing with JUnitReport
- •5.2.7 Automatically finding the tests to run
- •5.3 Running tests from Maven
- •5.3.2 Configuring Maven for a project
- •5.3.3 Executing JUnit tests with Maven
- •5.3.4 Handling dependent jars with Maven
- •5.4 Running tests from Eclipse
- •5.4.1 Creating an Eclipse project
- •5.4.2 Running JUnit tests in Eclipse
- •5.5 Summary
- •6.1 Introducing stubs
- •6.2 Practicing on an HTTP connection sample
- •6.2.1 Choosing a stubbing solution
- •6.2.2 Using Jetty as an embedded server
- •6.3 Stubbing the web server’s resources
- •6.3.1 Setting up the first stub test
- •6.3.2 Testing for failure conditions
- •6.3.3 Reviewing the first stub test
- •6.4 Stubbing the connection
- •6.4.1 Producing a custom URL protocol handler
- •6.4.2 Creating a JDK HttpURLConnection stub
- •6.4.3 Running the test
- •6.5 Summary
- •7.1 Introducing mock objects
- •7.2 Mock tasting: a simple example
- •7.3 Using mock objects as a refactoring technique
- •7.3.1 Easy refactoring
- •7.3.2 Allowing more flexible code
- •7.4 Practicing on an HTTP connection sample
- •7.4.1 Defining the mock object
- •7.4.2 Testing a sample method
- •7.4.3 Try #1: easy method refactoring technique
- •7.4.4 Try #2: refactoring by using a class factory
- •7.5 Using mocks as Trojan horses
- •7.6 Deciding when to use mock objects
- •7.7 Summary
- •8.1 The problem with unit-testing components
- •8.2 Testing components using mock objects
- •8.2.1 Testing the servlet sample using EasyMock
- •8.2.2 Pros and cons of using mock objects to test components
- •8.3 What are integration unit tests?
- •8.4 Introducing Cactus
- •8.5 Testing components using Cactus
- •8.5.1 Running Cactus tests
- •8.5.2 Executing the tests using Cactus/Jetty integration
- •8.6 How Cactus works
- •8.6.2 Stepping through a test
- •8.7 Summary
- •9.1 Presenting the Administration application
- •9.2 Writing servlet tests with Cactus
- •9.2.1 Designing the first test
- •9.2.2 Using Maven to run Cactus tests
- •9.2.3 Finishing the Cactus servlet tests
- •9.3 Testing servlets with mock objects
- •9.3.1 Writing a test using DynaMocks and DynaBeans
- •9.3.2 Finishing the DynaMock tests
- •9.4 Writing filter tests with Cactus
- •9.4.1 Testing the filter with a SELECT query
- •9.4.2 Testing the filter for other query types
- •9.4.3 Running the Cactus filter tests with Maven
- •9.5 When to use Cactus, and when to use mock objects
- •9.6 Summary
- •10.1 Revisiting the Administration application
- •10.2 What is JSP unit testing?
- •10.3 Unit-testing a JSP in isolation with Cactus
- •10.3.1 Executing a JSP with SQL results data
- •10.3.2 Writing the Cactus test
- •10.3.3 Executing Cactus JSP tests with Maven
- •10.4 Unit-testing taglibs with Cactus
- •10.4.1 Defining a custom tag
- •10.4.2 Testing the custom tag
- •10.5 Unit-testing taglibs with mock objects
- •10.5.1 Introducing MockMaker and installing its Eclipse plugin
- •10.5.2 Using MockMaker to generate mocks from classes
- •10.6 When to use mock objects and when to use Cactus
- •10.7 Summary
- •Unit-testing database applications
- •11.1 Introduction to unit-testing databases
- •11.2 Testing business logic in isolation from the database
- •11.2.1 Implementing a database access layer interface
- •11.2.2 Setting up a mock database interface layer
- •11.2.3 Mocking the database interface layer
- •11.3 Testing persistence code in isolation from the database
- •11.3.1 Testing the execute method
- •11.3.2 Using expectations to verify state
- •11.4 Writing database integration unit tests
- •11.4.1 Filling the requirements for database integration tests
- •11.4.2 Presetting database data
- •11.5 Running the Cactus test using Ant
- •11.5.1 Reviewing the project structure
- •11.5.2 Introducing the Cactus/Ant integration module
- •11.5.3 Creating the Ant build file step by step
- •11.5.4 Executing the Cactus tests
- •11.6 Tuning for build performance
- •11.6.2 Grouping tests in functional test suites
- •11.7.1 Choosing an approach
- •11.7.2 Applying continuous integration
- •11.8 Summary
- •Unit-testing EJBs
- •12.1 Defining a sample EJB application
- •12.2 Using a façade strategy
- •12.3 Unit-testing JNDI code using mock objects
- •12.4 Unit-testing session beans
- •12.4.1 Using the factory method strategy
- •12.4.2 Using the factory class strategy
- •12.4.3 Using the mock JNDI implementation strategy
- •12.5 Using mock objects to test message-driven beans
- •12.6 Using mock objects to test entity beans
- •12.7 Choosing the right mock-objects strategy
- •12.8 Using integration unit tests
- •12.9 Using JUnit and remote calls
- •12.9.1 Requirements for using JUnit directly
- •12.9.2 Packaging the Petstore application in an ear file
- •12.9.3 Performing automatic deployment and execution of tests
- •12.9.4 Writing a remote JUnit test for PetstoreEJB
- •12.9.5 Fixing JNDI names
- •12.9.6 Running the tests
- •12.10 Using Cactus
- •12.10.1 Writing an EJB unit test with Cactus
- •12.10.2 Project directory structure
- •12.10.3 Packaging the Cactus tests
- •12.10.4 Executing the Cactus tests
- •12.11 Summary
- •A.1 Getting the source code
- •A.2 Source code overview
- •A.3 External libraries
- •A.4 Jar versions
- •A.5 Directory structure conventions
- •B.1 Installing Eclipse
- •B.2 Setting up Eclipse projects from the sources
- •B.3 Running JUnit tests from Eclipse
- •B.4 Running Ant scripts from Eclipse
- •B.5 Running Cactus tests from Eclipse
- •references
- •index
Running the Cactus test using Ant |
265 |
|
|
11.5 Running the Cactus test using Ant
Let’s run the Cactus test using Ant. But first, let’s review the project directory structure.
11.5.1Reviewing the project structure
Figure 11.8 shows the project directory structure for the Cactus testing. You cleanly separate the main classes (in src/java) from the Cactus test classes (in src/test-cactus). Plain JUnit test classes would go in src/ test to separate them from the other type of classes. Of course, you’re free to use whatever directory structure you like. The one we show here is a commonly used structure that we consider a best practice.
Table 11.1 describes the files for the project. The last files in table 11.1 are new to the project, so let’s discuss what they do.
Figure 11.8 Project directory structure for the database integration unit-testing project
Table 11.1 The project directory for the database unit tests using Cactus and Ant contains seven files.
File |
Description |
|
|
JdbcDataAccessManager.java |
The class you’re testing |
|
|
TestJdbcDataAccessManagerIC.java |
The Cactus test case class |
|
|
data.xml |
The data to preset in the database, read by the |
|
TestDataAccessManagerIC class |
|
|
data.sql |
Used to create the database schema; contains the com- |
|
mands to create the CUSTOMER table |
|
|
web.xml |
The web application descriptor |
|
|
build.xml |
The Ant build file |
|
|
build.properties |
The properties file for the build, which contains Ant proper- |
|
ties that are environment dependent |
|
|
266CHAPTER 11
Unit-testing database applications
The conf/data.sql file creates the database schema. Although DbUnit sets up the data in the database tables, it doesn’t create the schema. Happily, you can get Ant to create the schema using the Ant sql task. To get you started, data.sql needs only a single SQL command:
CREATE TABLE CUSTOMER (lastname varchar primary key,
firstname varchar);
If you execute the data.sql file a second time, you need to remove the table before creating it again, or you’ll get an error. To remove the table first, you can insert another SQL command:
DROP TABLE CUSTOMER;
CREATE TABLE CUSTOMER (lastname varchar primary key,
firstname varchar);
You’ll use the Ant war task to create the web application. Unsurprisingly, the Ant war task requires a web.xml file. For this example, you can leave the file empty:
<?xml version="1.0" encoding="ISO-8859-1"?>
<!DOCTYPE web-app
PUBLIC "-//Sun Microsystems, Inc.//DTD Web Application 2.3//EN" "http://java.sun.com/dtd/web-app_2_3.dtd">
<web-app> </web-app>
In production, the web.xml file would register the servlets (like the AdminServlet) and taglibs, among other things.
11.5.2Introducing the Cactus/Ant integration module
The Cactus/Ant integration module is a jar containing a set of Ant tasks that you can use in your own Ant buildfiles to run Cactus tests. It provides the following tasks:
■cactifywar—Transforms an ordinary war file into a Cactus-ready war. This means adding all Cactus-required jars to the original war, adding the Cactus tests, and modifying the web.xml descriptor to add the definition for the Cactus redirectors and other miscellaneous entries. This process is called cactification.
■cactus—Executes Cactus tests. The cactus task performs several actions: It configures the container in which running you’re the Cactus tests, deploys a cactified war into the container, starts the container, runs the tests, and stops
Running the Cactus test using Ant |
267 |
|
|
the running container. The cactus task is an extension of the Ant junit task used to automatically run Cactus tests.
You can obtain the Cactus/Ant integration jar by downloading the jakarta-cactus- 13-<version>.zip file from the Cactus web site (http://jakarta.apache.org/ cactus/). The 13 stands for the J2EE API 1.3, which you are using here. The zip contains a cactus-ant-<version>.jar file with the Ant tasks we discussed. You can use these tasks directly in your Ant buildfile via the Ant taskdef syntax. For more about the Cactus/Ant integration module, see http://jakarta.apache.org/cactus/ integration/ant/index.html.
11.5.3Creating the Ant build file step by step
Let’s create the Ant buildfile step by step. Because the Cactus/Ant integration module does 99% of the work for you, the steps are neither long nor complex:
1Create the database schema.
2Create the web application war.
3Compile the Cactus tests.
4Run the Cactus tests.
Creating the database schema
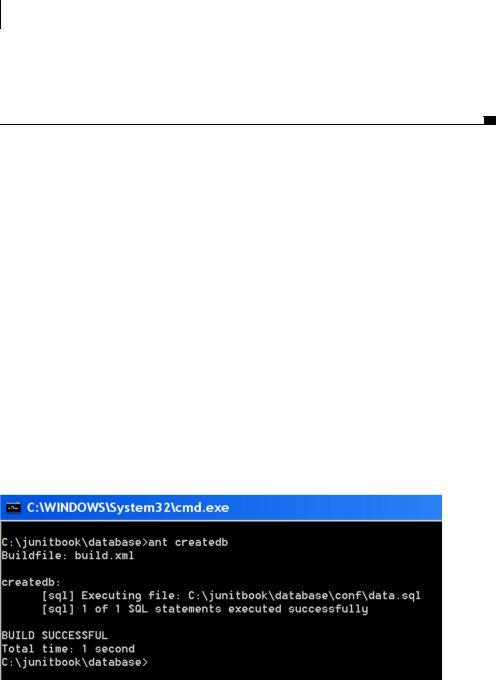
Ant’s sql task makes this step easy, because it can execute arbitrary SQL commands. The Ant target shown in listing 11.17 reads the SQL from the data.sql file and executes it against the Hypersonic SQL database defined by the ${database} property.
Listing 11.17 Ant target to create the database schema
<?xml version="1.0"?>
<project name="Database" default="createdb" basedir=".">
<property file="build.properties"/> <property name="conf.dir" location="conf"/>
<target name="createdb">
<sql driver="org.hsqldb.jdbcDriver" url="jdbc:hsqldb:${database}" userid="sa"
password="">
<fileset dir="${conf.dir}"> <include name="data.sql" />
</fileset>
<classpath>
<pathelement location="${hsqldb.jar}"/>
268CHAPTER 11
Unit-testing database applications
</classpath>
</sql>
</target>
</project>
To set this up, you use the build.properties file to define two Ant properties: ${database} (location of the Hypersonic database) and ${hsqldb.jar} (location of the Hypersonic jar):
cactus.home.jboss3x = C:/Apps/jboss-3.2.1
hsqldb.jar = ${cactus.home.jboss3x}/server/default/lib/hsqldb.jar database =
→${cactus.home.jboss3x}/server/default/data/hypersonic/default
You use the Hypersonic default database, located in the JBoss directory hierarchy. You also use the Hypersonic jar (hsqldb.jar) located in the JBoss directory hierarchy.
If you open a command shell and run the createdb target by entering ant createdb, you get the result shown in figure 11.9.
Creating the web application war
This is a web application. So, you need a target to create a war to deploy the application. You don’t need to include anything related to Cactus in the war, because you’ll use the Cactus Ant integration cactifywar task to Cactus-enable the war.
To create the war, you need to compile the sources first. Thus you create two targets: compile and war, shown in listing 11.18.
Figure 11.9 Result of executing the createdb Ant target
Running the Cactus test using Ant |
269 |
|
|
Listing 11.18 Ant targets to create the application war
<?xml version="1.0"?>
<project name="Database" default="war" basedir=".">
[...]
<target name="compile">
<mkdir dir="target/classes"/>
<javac destdir="target/classes" srcdir="src/java"> <classpath>
<pathelement location="${beanutils.jar}"/> <pathelement location="${servlet.jar}"/>
</classpath>
</javac>
</target>
<target name="war" depends="compile"> <war destfile="target/database.war"
webxml="src/webapp/WEB-INF/web.xml"> <classes dir="target/classes"/>
<lib file="${beanutils.jar}"/> <lib file="${collections.jar}"/>
</war>
</target>
</project>
To set this up, you define three Ant properties in the build.properties file—
${beanutils.jar}, ${servlet.jar}, and ${lib.dir} (the location of the jars):
lib.dir = ../repository
beanutils.jar =
→${lib.dir}/commons-beanutils/jars/commons-beanutils-1.6.1.jar collections.jar =
→${lib.dir}/commons-collections/jars/commons-collections-2.1.jar servlet.jar = ${lib.dir}/servletapi/jars/servletapi-2.3.jar
Compiling the Cactus tests
Before you can run the Cactus tests, you need to add a target to compile them, like the one shown here:
<target name="compile.cactustest">
<mkdir dir="target/cactus-test-classes"/> <javac destdir="target/cactus-test-classes"
srcdir="src/test-cactus"> <classpath>
<pathelement location="target/classes"/> <pathelement location="${beanutils.jar}"/>
270CHAPTER 11
Unit-testing database applications
<pathelement location="${dbunit.jar}"/> |
|
|
b |
<pathelement location="${cactus.jar}"/> |
|
|
|
</classpath> |
|
|
|
</javac> |
|
|
|
<copy todir="target/cactus-test-classes"> |
|
c |
|
|
|||
<fileset dir="src/test-cactus"> |
|
|
|
<include name="**/*.xml"/> |
|
|
|
</fileset> |
|
|
|
</copy> |
|
|
|
|
|
|
|
</target> |
|
|
|
bYou need to add the jars for DbUnit and Cactus to the compilation classpath, because classes from these jars are used in the test cases. So, you define two more
properties in the build.properties file, ${dbunit.jar} and ${cactus.jar}:
cactus.jar = ${lib.dir}/cactus/jars/cactus-13-1.5.jar
dbunit.jar = ${lib.dir}/dbunit/jars/dbunit-1.5.5.jar
cBack in listing 11.15, you loaded the data.xml file as a Java resource. This means it has to be in the test classpath when you execute the tests. So, here you copy any
XML file in the test source directory structure (src/test-cactus) to the target compilation directory (where the compiled test classes are put).
Running the Cactus tests
You’re almost ready to execute the tests using the cactus Ant task from the Cactus/Ant integration module. However, you need to pass a cactified war to the cactus task. The cactifywar Ant task can handle this for you. Before you can use the Cactus/Ant integration tasks, you need to define them in your buildfile as follows:
<target name="test" depends="war,compile.cactustest">
<taskdef resource="cactus.tasks"> <classpath>
<pathelement location="${cactus.ant.jar}"/> <pathelement location="${cactus.jar}"/> <pathelement location="${logging.jar}"/> <pathelement location="${aspectjrt.jar}"/> <pathelement location="${httpclient.jar}"/>
</classpath>
</taskdef>
You have added all the Cactus jars to the classpath of the taskdef. This classpath will be used by both cactifywar and cactus. The cactifywar task puts the Cactus jars in the cactified war, and the cactus task puts the Cactus jars in the test execution classpath.
As usual, you create Ant properties to hold the path to your jars in the build.properties file:
Running the Cactus test using Ant |
271 |
|
|
cactus.ant.jar = ${lib.dir}/cactus/jars/cactus-ant-13-1.5.jar
aspectjrt.jar = ${lib.dir}/aspectj/jars/aspectjrt-1.0.6.jar logging.jar =
→${lib.dir}/commons-logging/jars/commons-logging-1.0.3.jar httpclient.jar =
→${lib.dir}/commons-httpclient/jars/commons-httpclient-2.0.jar
Writing the cactification task is easy:
<target name="test" depends="war,compile.cactustest">
<taskdef resource="cactus.tasks"> [...]
</taskdef>
<cactifywar srcfile="target/database.war" destfile="target/test.war">
<classes dir="target/cactus-test-classes"/> <lib file="${dbunit.jar}"/>
<lib file="${exml.jar}"/> </cactifywar>
The cactifywar task transforms the target/database.war war into a Cactusenabled target/test.war war. This task adds all the jars you have defined in the taskdef to the war. Here, you use the nested lib element to add the ${dbunit.jar} and ${exml.jar} jars.
DbUnit needs the Electric XML jar (exml.jar) at runtime. So, you add it to the build.properties file:
exml.jar = ${lib.dir}/dbunit/jars/exml-dbunit-1.5.5.jar
The content of the resulting test.war is shown in figure 11.10.
The last step is to execute the Cactus tests by using the cactus task:
<target name="test" depends="war,compile.cactustest">
<taskdef resource="cactus.tasks"> [...]
</taskdef>
<cactifywar srcfile="target/database.war" [...]
</cactifywar>
<cactus warfile="target/test.war" fork="yes" printsummary="yes" haltonerror="true" haltonfailure="true">
<containerset>
<jboss3x dir="${cactus.home.jboss3x}" output="target/jbossresult.txt"/>
</containerset>
<formatter type="brief" usefile="false"/> <batchtest>
272CHAPTER 11
Unit-testing database applications
<fileset dir="src/test-cactus">
<include name="**/TestJdbcDataAccessManagerIC.java"/> </fileset>
</batchtest>
<classpath>
<pathelement location="target/classes"/> <pathelement location="target/cactus-test-classes"/> <pathelement location="${dbunit.jar}"/>
</classpath>
</cactus>
</target>
The cactus task extends the junit Ant task. Thus, all attributes available to the junit task are also directly available to the cactus task. For example, you use the fork, printsummary, haltonerror, and haltonfailure attributes from the junit task. You also use the formatter, batchtest, and classpath elements from the junit task.
You need to tell the cactus task what container you wish to run the tests with. In this case, you’re using JBoss 3.2.1; hence the jboss3x element. The cactus task supports several other containers, such as Tomcat (3.x, 4.x, 5.x),
Figure 11.10 Content of the cactified war. The jspRedirector.jsp file, the test classes, and the Cactus-related jars have been added by the cactification. In addition, the web.xml file has been modified to include the Cactus redirector definitions and mappings.
Running the Cactus test using Ant |
273 |
|
|
Orion (1.x, 2.x), Resin (2.x), and WebLogic (7.x), to name a few. (See the Cactus web site for full information.)
The output attribute of the jboss3x element redirects all container output to the target/jbossresult.txt file. This keeps stdout from becoming cluttered.
The cactus task automatically adds the jars you have defined in the taskdef to the execution classpath (the classpath of the JVM where the JUnit test runner executes). You need to explicitly add the DbUnit jar because it’s referenced from your Cactus TestJdbcDataAccessManagerIC test case class.
The full listing of the test target is shown in listing 11.19.
Listing 11.19 Ant target that calls the Cactus/Ant integration module to run the tests
<?xml version="1.0"?>
<project name="Database" default="test" basedir=".">
[...]
<target name="test" depends="war,compile.cactustest">
<taskdef resource="cactus.tasks"> <classpath>
<pathelement location="${cactus.ant.jar}"/> <pathelement location="${cactus.jar}"/> <pathelement location="${logging.jar}"/> <pathelement location="${aspectjrt.jar}"/> <pathelement location="${httpclient.jar}"/>
</classpath>
</taskdef>
<cactifywar srcfile="target/database.war" destfile="target/test.war">
<classes dir="target/cactus-test-classes"/> <lib file="${dbunit.jar}"/>
<lib file="${exml.jar}"/> </cactifywar>
<cactus warfile="target/test.war" fork="yes" printsummary="yes" haltonerror="true" haltonfailure="true">
<containerset>
<jboss3x dir="${cactus.home.jboss3x}" output="target/jbossresult.txt"/>
</containerset>
<formatter type="brief" usefile="false"/> <batchtest>
<fileset dir="src/test-cactus">
<include name="**/TestJdbcDataAccessManagerIC.java"/> </fileset>
</batchtest>
<classpath>