

72 |
Part I: Leaping into Logic Pro X |
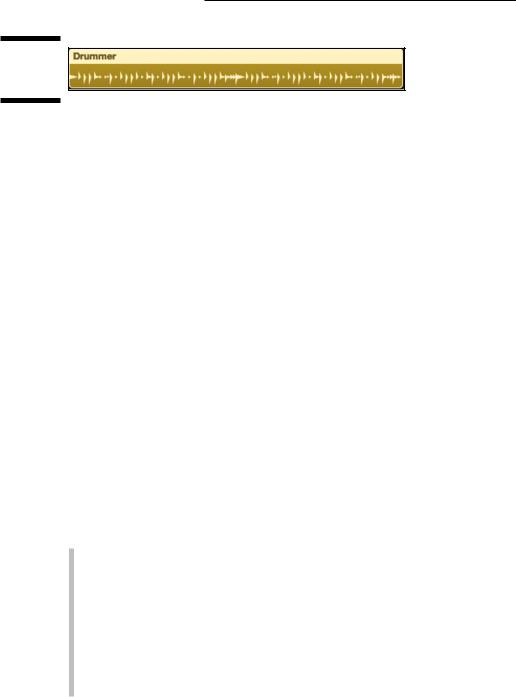
Figure 4-13:
A drummer region.
\\
Drummer regions don’t allow MIDI input from an external MIDI controller. The drummer editor controls the contents of a drummer region. Think of these regions as virtual drummers. Drummer is great for songwriting.
Editing Regions
The bulk of your Logic Pro arranging and editing will probably consist of working with regions in the tracks area. In this section, you discover the basics of editing regions.
Dragging, moving, and resizing regions
Regions can be dragged to different locations on the timeline. They can be moved also to different tracks entirely, and they can be resized.
To drag a region, use the pointer or pencil tool to select the region and drag it left and right in the tracks area or up and down to a different track. You can move regions to tracks of a different type, but they won’t play. Regions must be on the correct track type to make a sound. But it’s nice to be able to move regions out of the way temporarily on any track and then move them back again.
You can also move regions by using the Edit Move menu. Here are your options:
\\To Playhead: Move all selected regions to the current playhead position.
\\To Recorded Position: Move a region back to its original recorded posi-
tion. This command works only on time-stamped audio regions.
\\First Transient to Nearest Beat: Move the first transient of an audio
region to the nearest beat. A transient is a loud and short sound in a waveform. This command is useful when the region starts on the beat but the first audio waveform transient is after the start of the region.
\\To Selected Track: Move regions to a selected track. The regions will
keep their current time position.
Chapter 4: Embracing Tracks and Regions |
73 |
\\Shuffle Left/Shuffle Right: Align regions so that their start or end points
are aligned with the neighboring region.
\\Nudge Left/Nudge Right: Nudge the region left or right. First set the
nudge value in Edit Move Set Nudge Value To.
To resize a region, move your cursor to the lower left or right of the region until the cursor changes to the resize cursor, as shown in Figure 4-14. Then click and drag to resize the region. A help tag pops up to give you the details on your edit.
Figure 4-14:
The resize cursor.
\\
Several other ways to move and resize regions are available only as key commands. For example, press Control-\ (backslash) for the Set Optimal Region Sizes Rounded by Bar. This command is useful when you want your selected region’s start and end points to align with the bar.
To find more key commands that move and resize regions, choose Logic Pro X Key Commands Edit. Then search by using the keywords region, move, and length or just browse the categories.
\If you have overlapped regions, you can choose Track Other New Track for
Overlapped Regions to put the regions in their own track lane.
Splitting, joining, and deleting regions
Sometimes you want to make two regions out of a single region. This is called splitting regions. You can split regions in several ways:
\\Use the scissors tool to split a region wherever you click.
\\Choose Edit Split Regions at Playhead.
\\Press Control while clicking a region to display an edit menu with sev-
eral split commands.

74 |
Part I: Leaping into Logic Pro X |
You can join regions to make a single region. This is useful when you’ve done a lot of editing and want to simplify your edits into a single region. To join regions:
\ |
1.\ Select the regions you want to join. |
\2.\ Use the glue tool to click one of the selected regions.
You can join regions also by pressing J or by choosing Edit Join Regions.
You can delete a region from the tracks area or from the project entirely. To delete regions:
\ |
1.\ Select the regions you want to delete. |
\2.\ Use the eraser tool to click one of the selected regions.
You can delete regions also with the Delete key or by choosing Edit Delete.
Deleting MIDI regions automatically deletes them from the project. Deleting audio regions removes the audio from the tracks area but not from the project. You can find the audio files that have been deleted from the tracks area in your project audio browser, as detailed in Chapter 8.
Snapping regions to a grid
When you move regions, they snap to the grid based on the snap settings in the tracks area menu bar. The following snap values are available:
\\Smart: The Smart setting snaps regions to the nearest value on the grid
and depends on the current ruler division and level of zoom. This setting is usually all you need except when you want to get specific.
\\Bar: This setting snaps regions to the nearest bar.
\\Beat: This setting snaps regions to the nearest beat.
\\Division: This setting snaps regions to the nearest division based on the
project time signature.
\\Ticks: This setting snaps regions to the nearest clock tick, which is
1/3840 of a beat.
\\Frames/Quarter Frames: These settings snap regions to the nearest
SMPTE (Society of Motion Picture and Television Engineers) timecode frame.
\\Samples: This setting snaps regions to the nearest sample, which
depends on your project sample rate.
\\Off: This setting turns off the snap function.
|
|
Chapter 4: Embracing Tracks and Regions |
75 |
|
|
||
|
Looping and copying regions |
|
|
|
Want to hear a musical part again? And again? And again? Copy or loop your |
|
|
|
regions. |
|
|
|
Repetition is an important part of music composition, so Logic Pro enables |
|
|
|
you to repeat regions in the tracks area. To place a copy of a region at a new |
|
|
|
location, Option-drag the region to the new location on the track. Here’s |
|
|
|
another way to copy and paste regions: |
|
|
\ |
1.\ Select the region you want to copy. |
|
|
\ |
2.\ Press -C or choose Edit Copy. |
|
|
\ |
3.\ Place the playhead where you want to paste the region. |
|
|
\ |
4.\ Press -V or choose Edit Paste. |
|
|
If you want the region to repeat continuously for any length of time, you can loop it. The benefit of looping is that if you edit the original region, all the loops are edited as well. Loops reference the original region; they aren’t copies of the region.
To create a loop, place the cursor in the upper-right corner of the region you want to loop, and the cursor turns into the loop cursor, as shown in Figure 4-15. Drag the cursor as far as you want the region to loop.
Figure 4-15:
The loop cursor.
\\
You can loop both audio and MIDI regions. Looping regions saves a lot of time when you’re mocking up your arrangement.
Tracks and regions are fundamental to your workflow. With just a little experience, you’ll understand how to get the most from them. And now you know some basic editing as well as how to save track settings for instant recall by using track stacks. With these fundamental skills, you’re ready to dive in to digital audio and MIDI and begin recording some music.

76 |
Part I: Leaping into Logic Pro X |

Part II
Digital Recording and Using
Prerecorded Media
|
|
|
\ |
Want to find out how to use more than one audio interface at the same time? Read the |
|
|
free article online at www.dumies.com/extras/logicprox. |
|

In this part...
\\ Understand the fundamentals of digital audio and get highquality audio from Logic Pro. Set up and connect your audio and MIDI hardware.
\\ Set up Logic Pro for recording audio, record audio tracks and multiple takes, and set up separate monitor mixes. Discover advanced recording techniques such as multitrack recording, overdubbing, and punch recording.
\\ Record external MIDI instruments and software instrument tracks. Use musical typing and onscreen keyboards to record MIDI.
\\ Import audio and MIDI into your project and use Apple loops. Navigate the Logic Pro browsers and import video into your project.