

Chapter 15: Editing MIDI Tracks 255
The MIDI transform window, shown in Figure 15-6, alters your MIDI and can save you from time-consuming and repetitive editing tasks. Whenever you want to automate the transformation of large amounts of MIDI data, use the MIDI transform window. You can open the MIDI transform window in a couple of ways:
\\Choose Window Open MIDI Transform to open the MIDI Transform
\\Press -9 to open the MIDI transform window.window in a new window.
Figure 15-6:
The MIDI transform window.
\\
\ |
|
To enable the full MIDI editing features of Logic Pro X, you must have Show |
|
|
Advanced Tools selected in the Advanced Preferences pane. Choose Logic Pro |
|
|
X Preferences Advanced Tools, and then select Show Advanced Tools and |
|
|
the other additional options. |
|
|
Editing MIDI in the Piano Roll Editor
In the piano roll editor, MIDI notes are displayed as colored bars on a grid, as shown in Figure 15-7. MIDI notes correspond to a vertical keyboard on the left side of the editor. Like the tracks area, there’s a time grid, a ruler, and a menu bar to help you locate your position in the project and make precise edits.

256 Part IV: Arranging and Editing Your Project
Figure 15-7:
The piano roll editor.
\\
\You can show the global tracks or just the marker track in the piano roll editor by clicking the hide/show global tracks or hide/show marker track icon above
the piano roll keyboard. Showing the global tracks is particularly useful when you’re viewing the piano roll editor in a separate window from the tracks area.
Adding and editing notes
In addition to recording MIDI (see Chapter 7) you can add notes directly in the piano roll editor with the pencil tool by clicking the location on the grid where you want to create the note. New notes are created using the same length as the previously created note or currently selected note. You can adjust the length of a note as you create it by holding and dragging the note.
Edit MIDI notes just like you edit a region (described in Chapter 4). You can drag the ends of the notes to resize them. Copy notes by Option-clicking and then dragging the note to the new position. Delete notes by selecting the note and then pressing Delete.
The piano roll editor makes selecting notes easy by providing several commands in the Edit Select menu. You can select the highest and lowest notes and select overlapped notes. You can also move to the previous note (Optionleft arrow) and the next note (Option-right arrow).
Chapter 15: Editing MIDI Tracks 257
After you have selected the notes you want to edit, you can move them left or right on the grid by choosing Edit Move Nudge Left or Nudge Right. You can move them up or down a semitone or an octave by choosing the appropriate option on the Edit Transpose menu.
\When you’re starting out with Logic Pro, it’s a good idea to display Quick Help. Click the quick help icon in the control bar or choose Help Quick Help. Quick
Help shows you the name and function of anything your cursor hovers over. The quick help window is displayed at the top of your inspector or in a movable floating window if the inspector isn’t open. Quick help is useful when you can’t remember what all the nameless icons do in the menu bar and other areas.
|
Editing the velocity of notes |
|
Inside each note bar is a line that indicates the velocity level, which deter- |
|
mines how loud or soft a note will be played. Longer lines indicate higher |
|
velocity. If you hover your cursor over a note, a help tag displays the pitch |
|
and the exact velocity level. You can edit the note velocity in these ways: |
\ |
\Click a note and drag up or down with the velocity tool. Editing velocity |
|
is the parameter you will probably edit secondmost, after pitch, so set |
|
the velocity tool as your -click tool. For details on setting the -click |
|
tool, see Chapter 3. |
\\Select the notes and drag the Velocity slider in the piano roll local
inspector. If the local inspector isn’t displayed, choose View Show Local Inspector on the piano roll editor menu.
\\You can set all the selected notes to the same velocity by pressing Shift-
Option while dragging any one of the notes with the velocity tool.
\\Use MIDI Draw to edit the velocity by choosing View Midi Draw Note
Velocity. MIDI Draw is covered later in this section.
\To select multiple notes of the same velocity, select one note, Control-click the
note, and then choose Select Equal Colored Regions/Events (Shift-C).
Quantizing notes
Got timing problems? Not anymore. As described in Chapter 14, Logic Pro X can quantize your audio, which is pretty amazing. But MIDI data is even more flexible because it won’t suffer from audio artifacts after you adjust the timing. You can adjust the quantization of notes in the following ways:
\\Select the notes you want to quantize and use the Time Quantize param-
eters in the piano roll local inspector. Adjust the Strength slider to make the quantization sound more natural and not too perfect. Use the Swing slider to adjust the level of swing feel.
258 Part IV: Arranging and Editing Your Project
\\Select and click notes with the Quantize tool. The quantize note value is
chosen on the Time Quantize menu in the local inspector.
\\Select the notes you want to quantize and choose Functions Quantize
|
Notes or press Q. |
\ |
Quantizing is nondestructive, so you can undo the quantization by choosing |
|
Functions Undo Quantization or pressing Shift- -Q. |
Muting notes
The jazz legend Thelonious Monk once said, “What you don’t play can be more important that what you do.” If MIDI sequencing were around when he said it, he could have been talking about muting notes. You can be sure that Monk would have loved muting notes. To mute and unmute notes in the piano roll editor, do one of the following:
\\Use the mute tool to click the note you want to mute or unmute. You can
tell when notes are muted because they have no color. You can mute and unmute several notes at once by selecting the notes and clicking with the mute tool.
\\Select the notes you want to mute or unmute, and choose Functions Mute
Notes on/off or press Control-M.
\You can select all the notes of the same pitch by clicking the corresponding key in the piano roll keyboard. You can select multiple notes by Shift-clicking
the keys in the piano roll keyboard. You can also select all muted notes by choosing Edit Select Muted Notes or by pressing Shift-M.
Using MIDI draw
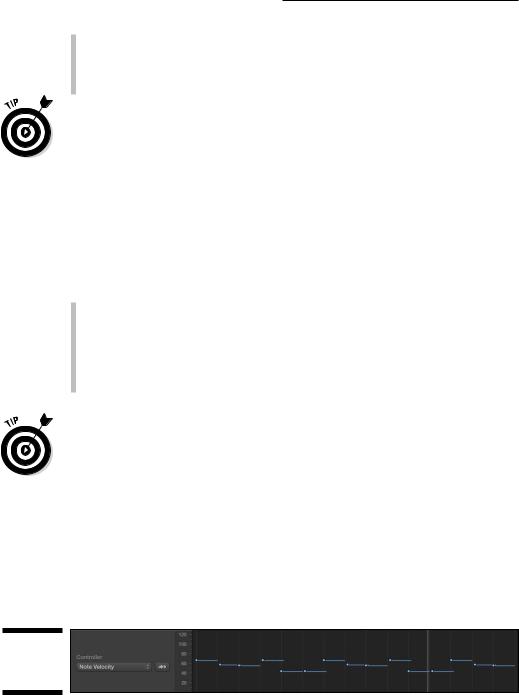
Choose an option on the View MIDI Draw menu and a lane opens at the bottom of the piano roll editor, as shown in Figure 15-8. This MIDI draw lane makes it easy to graphically draw and edit MIDI controller data. MIDI draw is especially useful for quickly editing the velocity of multiple note events.
Figure 15-8:
The MIDI draw lane.