


Chapter 15
Editing MIDI Tracks
In This Chapter
\Getting to know the MIDI editors \Inputting and editing MIDI notes and data \Adjusting the timing of your MIDI recordings \Viewing and editing your MIDI as notation
Logic Pro began as a MIDI sequencer. Even today, it stands alone in its superior handling of MIDI data. MIDI is much more flexible than audio.
You can change sounds, notes, velocity, and length, and tweak until you’re happy. Yes, Logic Pro can make you happy.
MIDI has many benefits. The small file sizes make it easy to share and use when space is a concern, such as in game music. It’s an excellent tool for composition, film scoring, and music notation. Unlike acoustic instruments, MIDI controllers can take the shape of keyboards, drums pads, wind instruments, and guitars and other stringed instruments, but they can sound like anything at all. And MIDI makes music preproduction much easier because you can build songs before you record them.
In this chapter, you take advantage of your MIDI studio. You discover how to input and edit MIDI, learn timesaving editing tips, and make your music look and sound exactly how you want.
Knowing Your MIDI Editors
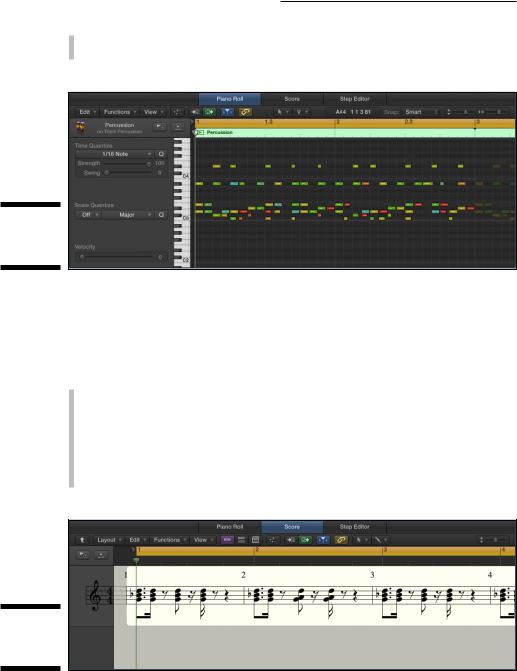
The piano roll editor, shown in Figure 15-1, is the default Logic Pro MIDI editor. It has the most features and is designed for speed and complete control. Inspired by player pianos, which use grid-based punch cards to make music, this editor is user friendly and your go-to MIDI editor. To open the piano roll editor, do one of the following:
\\Double-click a MIDI region.
\\Choose View Show Editor or press E with a MIDI region selected.
252 Part IV: Arranging and Editing Your Project
\\Choose Window Open Piano Roll or press -4 to open the piano roll
editor in a new window.
Figure 15-1:
The piano roll editor.
\\
The score editor, shown in Figure 15-2, is the choice for notation and traditional music representation. It is great for composition and scoring, and is a requirement for getting your music played by other professional musicians. If you enjoy reading music, you’ll appreciate the score editor. To open the score editor, you can
\\Double-click a MIDI region to open the MIDI editors, and then click the
Score tab.
\\Choose View Show Editor with a MIDI region selected, and then click
\\Choose Window Open Score Editor or press -5 to open the scorethe Score tab or press N.
editor in a new window.
Figure 15-2:
The score editor.
\\
Chapter 15: Editing MIDI Tracks 253
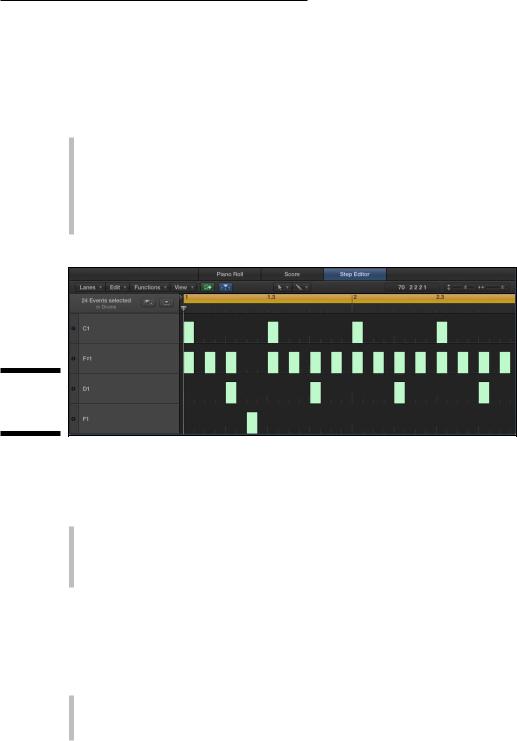
The step editor, shown in Figure 15-3, works well at building musical patterns, especially drum patterns. It mimics step sequencers, in which you build a sequence of notes by using a grid. Even though it’s grid-based like the piano roll editor, the step editor has a different layout that allows you to quickly edit MIDI event types other than notes, such as velocity or MIDI controller data. To open the step editor, do the following:
\\Double-click a MIDI region to open the MIDI editors, and then click the
Step Editor tab.
\\Choose View Show Editor with a MIDI region selected, and then click
the Step Editor tab.
\\Choose Window Open Step Editor to open the step editor in a new
window.
Figure 15-3:
The step editor.
\\
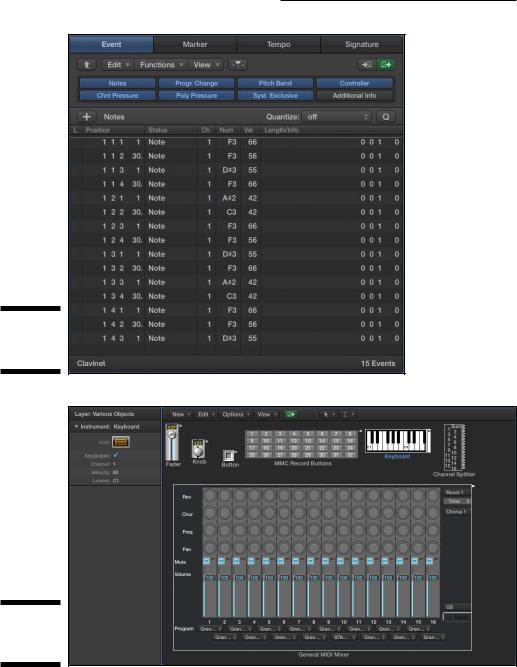
The event list editor, shown in Figure 15-4, might not be the most attractive MIDI editor, but it’s probably the most complete editor, listing every MIDI event you record. To open the event list editor, you can
\\Choose View Show List Editors with a MIDI region selected, and then
click the Event tab or press D.
\ |
\Choose WindowOpen Event List to open the event list editor in a new |
|
window or press -7. |
|
The MIDI environment, shown in Figure 15-5, used to be a more fundamental, |
|
and often intimidating, part of the Logic Pro workflow. With Logic Pro X, the |
|
environment has been pushed into the background, but you wouldn’t be able to |
|
sequence without it. The MIDI environment is integral to the input and output of |
|
your audio and MIDI. Do one of the following to open the MIDI environment: |
\\Choose Window Open MIDI Environment to open the MIDI environment
\\Press -0 to open the MIDI environment window.in a new window.
254 Part IV: Arranging and Editing Your Project
Figure 15-4:
The event list editor.
\\
Figure 15-5:
The MIDI environment.
\\