

168 Part III: Making Music with Virtual Instruments
Getting the Tone of Tines with the Vintage Electric Piano
The sound of the Rhodes and Wurlitzer electric pianos are iconic and flexible. No matter what genre of music you enjoy, you’ll be able to find a place in your track for some vintage electric piano. To use the vintage electric piano, create a software instrument track as described previously, in the “Loading and playing vintage instruments” section. The default instrument is the vintage electric piano.
Exploring tines, reeds, and tone bars
In a Rhodes electric piano, every key strikes a long, thin, metal tuning-fork– like bar called a tine. The Wurlitzer is similar to a Rhodes but uses steel instead of metal tines. A third electric piano available, the Electra-Piano,
is modeled after the Hohner Electra-Piano and has a sound similar to the Rhodes and Wurlitzer.
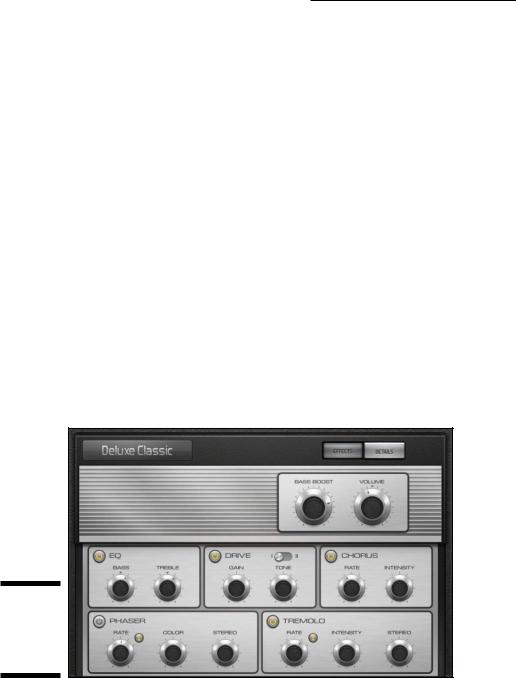
You can choose between nineteen electric piano models on the Model pop-up menu at the top of the vintage electric piano interface, which is shown in Figure 10-5.
Figure 10-5:
Vintage electric piano main window.
\\

Chapter 10: Playing Virtual Vintage Instruments 169
Producing great sounds with timeless effects
Every electric piano model gives you access to the following classic and great sounding effects:
\\EQ: A simple EQ can adjust your bass and treble frequencies.
\\Drive: Two types of drive distort and crunch your electric piano.
\\Chorus, phaser, and tremolo: The chorus, phaser, and tremolo modu-
late your sound into a shimmery and pulsating piano. Chorus uses multiple delays to give you a thick and rich sound. Phasing is a narrow-band EQ cut that is swept back and forth through the frequency spectrum.
Tremolo varies the volume and is a standard effect built-in to a Wurlitzer. Click the note symbol in the Phaser and Tremolo sections to sync the timing of the effect to the tempo of your song.
Playing with additional parameters
The vintage electric piano is the simplest keyboard of the bunch, but it still gives you modifications that would be hard to achieve with a real electric piano. Click the Details button in the control bar to access the advanced parameters.
Like the other vintage instruments, you can adjust the number of voices if you find yourself running out of computer processing power. You can adjust the decay and release of the tines as well as the volume of the bell and damper noise. A stereo width knob can rein in your sound or expand to the far reaches of the stereo spectrum. The Pitch section allows you to adjust the overall tuning, warmth, stretch tuning, and pitch bend range. Try doing that with a real Rhodes!
Fusing Four Synths with Retro Synth
Retro Synth is four synths in one. It’s a sixteen-voice synthesizer that can easily switch between four of the most popular types of synthesis. From deep bass to screaming leads, Retro Synth has you covered. The best part is how easy it is to dive in and get good sounds quickly. The second best part is that all these synths don’t collect dust in a wing of your rock star mansion.
170 Part III: Making Music with Virtual Instruments
Choosing your flavor of synthesis: Analog, sync, wavetable, and FM
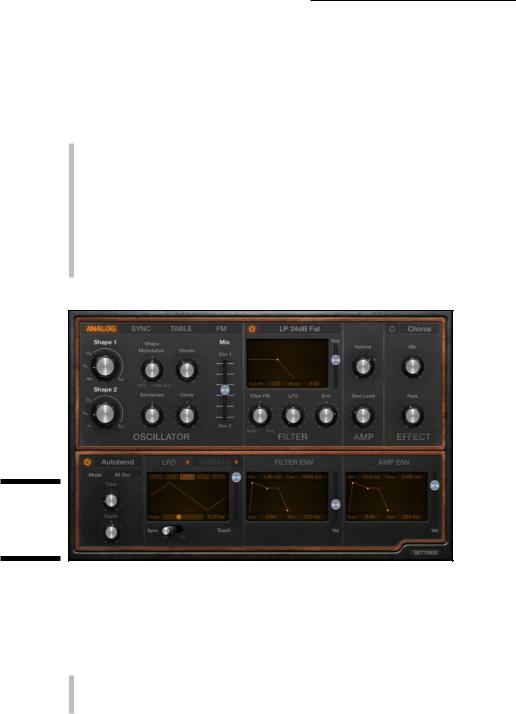
The upper-left section of the Retro Synth interface, shown in Figure 10-6, allows you to choose between the following synth engines:
\\Analog: Analog synthesis is found in classic synthesizers. It’s great for
leads, basses, and pads.
\\Sync: Sync is a more aggressive type of synthesis. It’s less suitable for
pads and just right for leads and basses.
\\Table: Wavetable synthesis is used for real instrument sounds in addi-
tion to synthesized sounds. It’s perfect for synth/acoustic hybrids.
\\FM: Frequency modulation (FM) synthesis creates classic digital sounds.
It’s excellent for bells, electric pianos, and bass sounds.
Figure 10-6:
The Retro Synth main window.
\\
Controlling your synth parameters
After choosing a synthesis type, you can further shape your sound in the Oscillator and Filter sections:
\\Oscillator: The Retro Synth oscillators generate the waveforms that
form your basic synth sound. The controls in the Oscillator section change depending on which type of synthesis you have selected.

Chapter 10: Playing Virtual Vintage Instruments 171
Synths are fun when you simply play with the knobs and sliders and see what happens. The Oscillator section is where you do your main tone shaping.
\\Filter: The Filter section shapes the sound coming from your oscillators.
Choose the type of filter in the pop-up title bar at the top of the section. You can choose from low-pass, high-pass, band-pass, band reject, or peak filters. Each filter allows certain frequencies to pass through and can be further modified with the other filter controls.
\\Amp: The Amp section sets the global synth volume. You can also mix in
a sine wave with your synth sound to make it bigger.
\\Glide/Autobend: Choose either Glide or Autobend in the pop-up title
bar at the top of the section. Glide controls how the pitch of a note bends into the pitch of the following note. Autobend controls how a note bends when you first play it.
\\Global: Click the Settings button on the bottom right of the Retro Synth
interface to get to the global settings. Here you can adjust pitch settings, adjust the stereo spread, and choose how many voices can be played at one time. You can also adjust how your MIDI controller interacts with the Retro Synth.
Modifying synth effects
On the top right of the Retro Synth interface is a simple Effects section where you can choose between a chorus and flanger:
\\Chorus: Chorus gives you a thick and rich sound by the use of multiple
delays. You can adjust the mix of the chorus as well as the chorus rate.
\\Flanger: Flanging combines the original signal with itself, creating washy
phase cancellations throughout the frequency spectrum. Like with the chorus, you can adjust the mix and rate.
Modulating the synth
Modulation alters your sound to make it interesting and exciting. You can use modulation to create vibrato, modify the filters, affect the volume, and lots of other less than realistic effects.
You can modulate your oscillator waveforms with the following parameters:
\\LFO: Your low frequency oscillator (LFO) is a waveform that will modu-
late your sound. Choose different waveforms and rates to create unique modulations. You can control the LFO from your MIDI controller’s

172 Part III: Making Music with Virtual Instruments
modulation wheel or with aftertouch (pressure applied to a key on a keyboard while the key is being held down) on the source pop-up menu on the bottom right of the LFO section or both.
\\Vibrato: Add vibrato to your synth sound by using the same controls as
the LFO.
\\Filter envelope: The filter envelope adjusts the attack, decay, sustain,
and release (ADSR) of your filter. Drag the envelope handles in the display to adjust your filter envelope.
\\Amp envelope: Similar to the filter envelope, the amp envelope adjusts
the ADSR of the overall Retro Synth volume. Faster attack times create instantaneous sounds while slower attack times make the sound appear gradually.
\\Controller: Click the Settings button on the bottom right of the Retro
Synth interface to adjust global parameters such as tuning and the number of voices. The right side of the Settings section includes parameters for your MIDI controller modulation wheel, aftertouch, and velocity.
\One of the best ways to learn how to program a synthesizer is to open a preset that you like and see how the sound is created. Compare two different sounds
to see which parameters are affecting the sound. And don’t be afraid to fiddle with the knobs. It might look vintage, but it won’t break!