

This material is copyright and is licensed for the sole use by Kliwon Klimis on 28th October 2008 425 cilce, , frood, grradt, 525254
Installing Zimbra
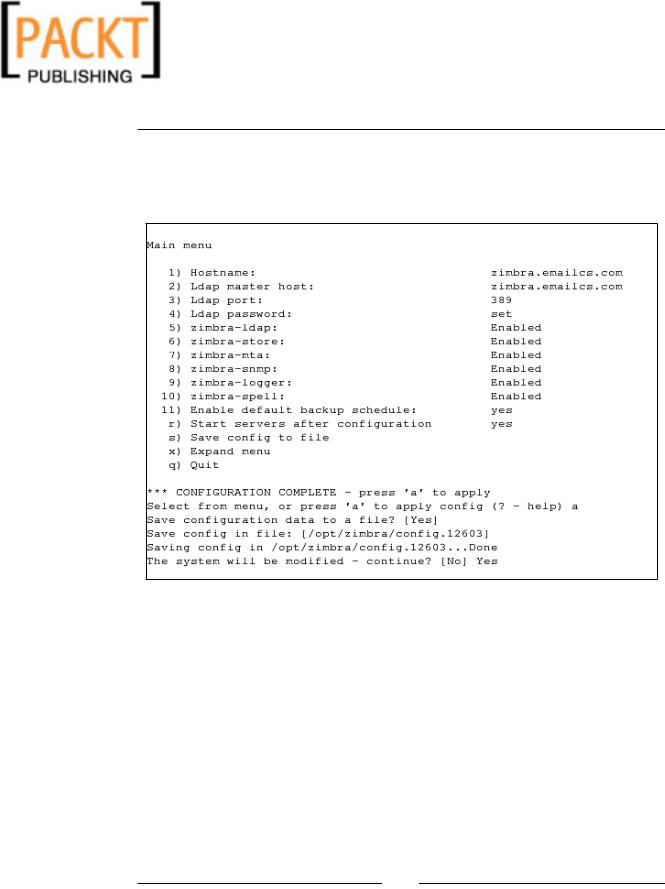
23.The installer will now proceed to finalize the Zimbra installation and when all is said and done, a prompt notifying the user that the configuration is complete will be displayed. Hit ENTER to exit; and the installation of Zimbra
Collaboration Suite on Red Hat Enterprise Linux 4 is complete.
Installing on SUSE ES 9
The install of SUSE Enterprise Server 9 should be similar to Red Hat in that you will want to partition the drives the same way as described in step 5, as follows:
•A /boot partition of 100MB.
•A swap partition of twice our physical memory (RAM).
•A / partition that is able to grow to fill the remainder of the diskspace.
A "default install" should be used. In the Network Devices section, a static IP address should be used along with entering Zimbra for the hostname and emailcs.com for the domain, creating a Fully Qualified Domain Name of Zimbra.emailcs.com.
[ 40 ]
This material is copyright and is licensed for the sole use by Kliwon Klimis on 28th October 2008 425 cilce, , frood, grradt, 525254
Chapter 2
Also, during the install, you will be prompted to configure the OpenLDAP server. At this time, the OpenLDAP server should be disabled, as to not conflict with the Zimbra-LDAP server. Once the operating system is installed, there will be a few more pre-installation steps prior to installing the Zimbra Collaboration Suite. Also please note that on SUSE ES 9, the Zimbra clustering feature is not supported.
Preparing SUSE ES 9 for Zimbra
1.The Default Install does not install GMP (GNU Multiple-Precision Library).
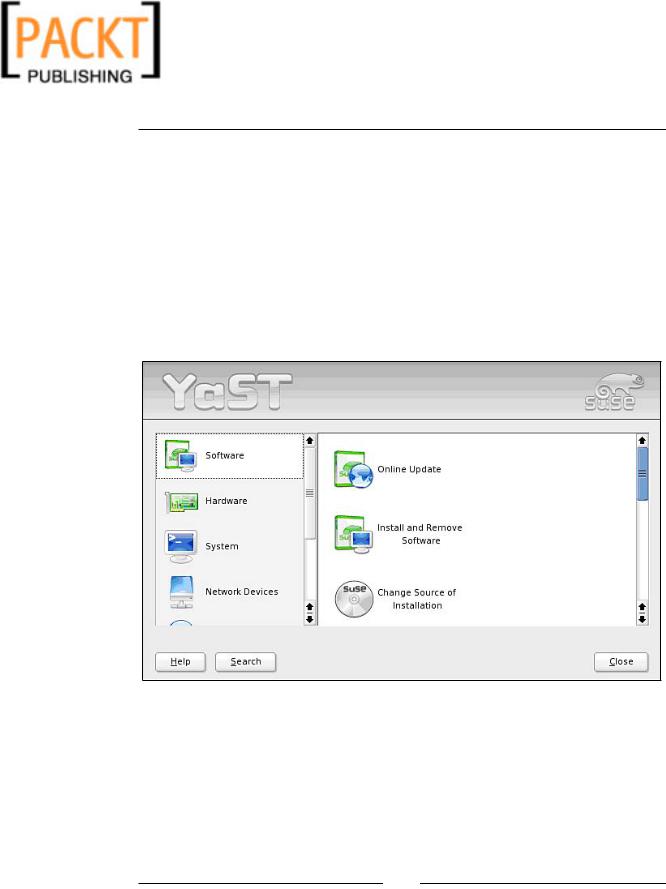
So the first thing we need to do is use the YaST (Yet Another Setup Tool) to install the GMP library. Open up the YaST tool and select Install and Remove Software.
[ 41 ]
This material is copyright and is licensed for the sole use by Kliwon Klimis on 28th October 2008 425 cilce, , frood, grradt, 525254
Installing Zimbra
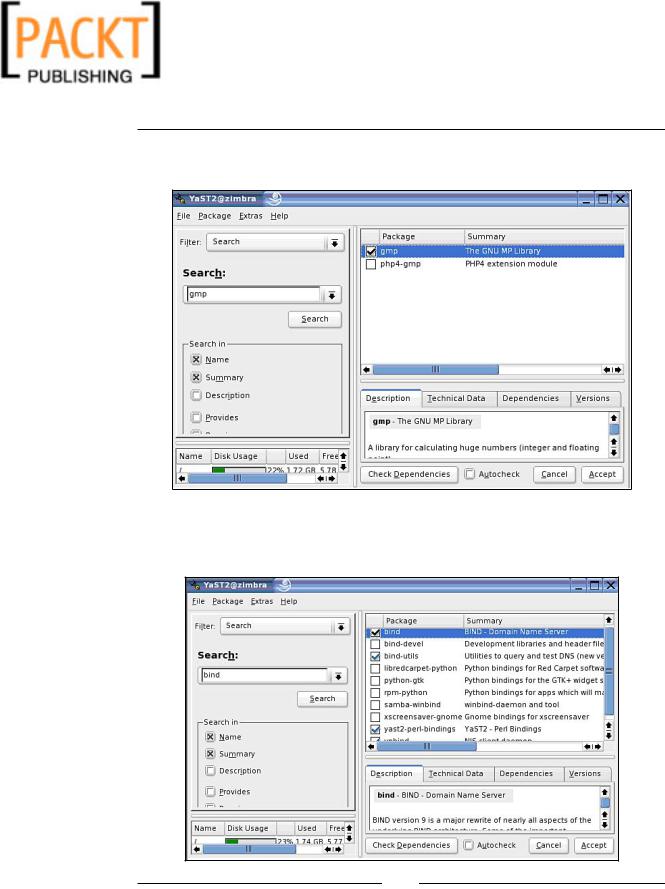
2.In the Search text box, enter in GMP and click on Search. Then proceed to select the GMP checkbox and click Accept.
3.With the YaST tool open, we will also need to install BIND to configure DNS on the server. So in the Search box, type bind and click Search. Just as we did with GMP, select the bind and bind-utils checkbox and click Accept.
[ 42 ]

This material is copyright and is licensed for the sole use by Kliwon Klimis on 28th October 2008 425 cilce, , frood, grradt, 525254
Chapter 2
4.YaST offers a GUI tool for configuring the DNS server, which you could use to configure the DNS information required for the install of Zimbra. However, if you prefer to configure DNS manually, you can edit the
/etc/named.conf and /var/lib/named/master/emailcs.com files as described in the section above. To use the DNS Server Tool, reopen YaST and select DNS Server from the Control Center.
5.The first screen will ask if we want to set any Forwarder Settings; we could just leave the default setting of Set Forwarders Manually and click Next.
[ 43 ]
This material is copyright and is licensed for the sole use by Kliwon Klimis on 28th October 2008 425 cilce, , frood, grradt, 525254
Installing Zimbra
6.The next screen will ask us to create a zone file. We will proceed to name the Zone emailcs.com and leave the Zone Type as Master. We can then click Add, which will add emailcs.com to Configured DNS Zones. To edit the DNS information of our newly created zone, we will click on Edit Zone.
[ 44 ]
This material is copyright and is licensed for the sole use by Kliwon Klimis on 28th October 2008 425 cilce, , frood, grradt, 525254
Chapter 2
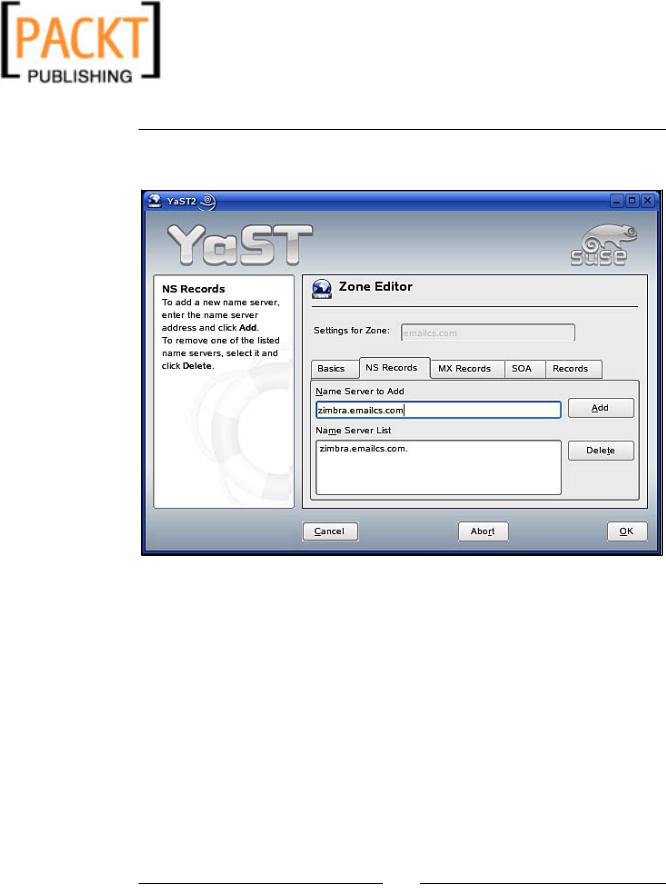
7.In the Zone Editor, there will be several tabs displayed. We will first start with the NS Records tab and add zimbra.emailcs.com as our Name Server.
[ 45 ]

This material is copyright and is licensed for the sole use by Kliwon Klimis on 28th October 2008 425 cilce, , frood, grradt, 525254
Installing Zimbra
8.The next tab will be the MX Records tab. Here we will add zimbra. emailcs.com as our MX record, with a Priority of 10 and then click Add.
Priority is used when you have several MX records and you want to organise the order the MX are used by the other mail servers on the
Internet. The lower the number is, the higher the priority is: if you have two MX, one with priority 5 and the other with priority 10, the other MTA on the Internet will send the mail to the "5" MX. If this one does not answer, they'll try the "10" one.
[ 46 ]
This material is copyright and is licensed for the sole use by Kliwon Klimis on 28th October 2008 425 cilce, , frood, grradt, 525254
Chapter 2
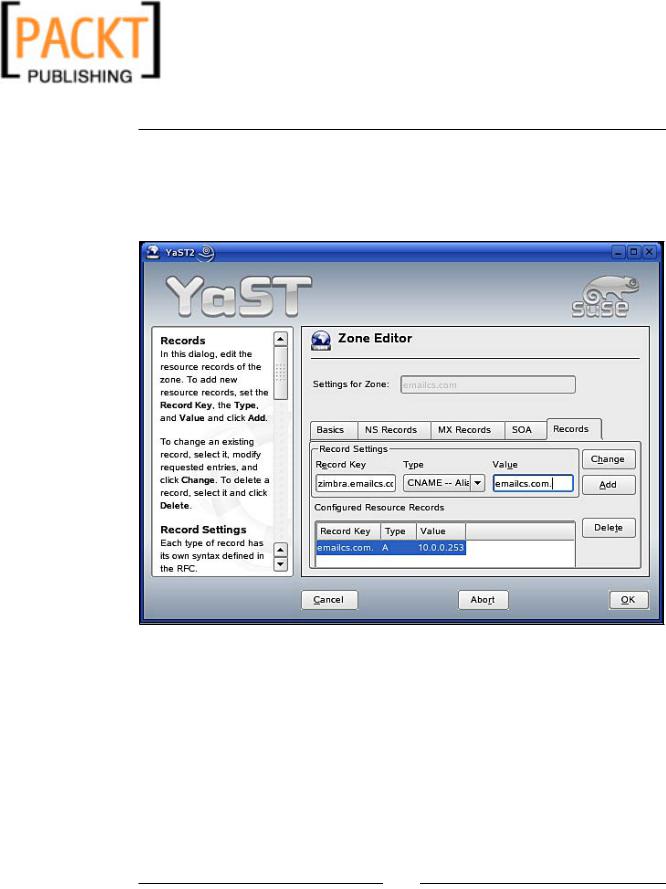
9.Finally, on the Records tab, we will need to enter two records. An A record for mapping our host name emailcs.com to the IP address of the server, and also creating a CNAME for zimbra.emailcs.com. When entering
the CNAME, be sure to enter a period (.) after zimbra.emailcs.com. and emailcs.com., just as we would if we edited the files manually.
[ 47 ]
This material is copyright and is licensed for the sole use by Kliwon Klimis on 28th October 2008 425 cilce, , frood, grradt, 525254
Installing Zimbra
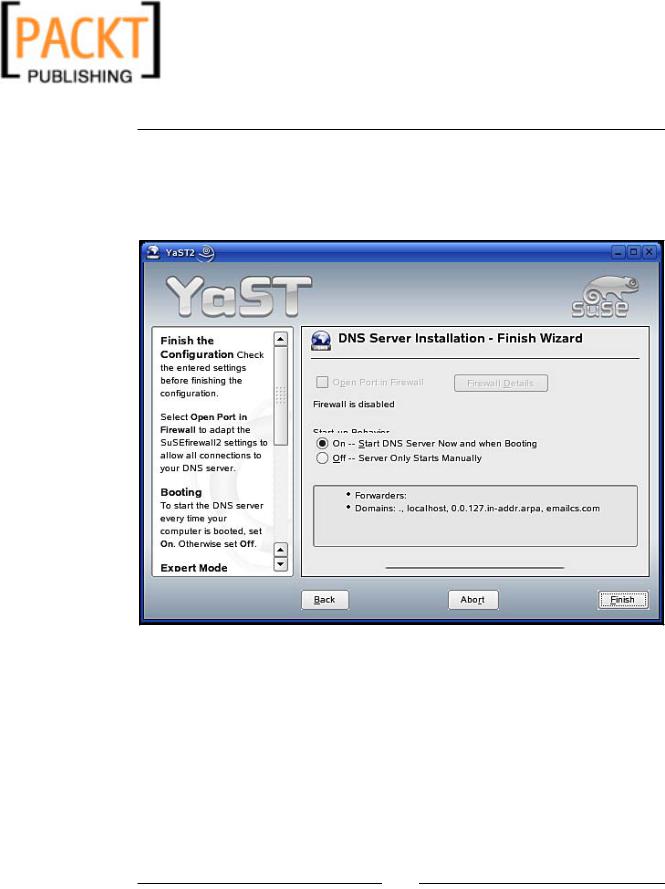
10.Lastly, we need to make sure that our DNS server will start up at reboot. To do this, we need to edit the DNS Start Behavior and make sure the radio button for On – Start DNS Server Now and When Booting is selected. Once all of this is completed, click Finish and we are ready to start installing Zimbra.
The installation of the Zimbra Collaboration Suite is identical to that of installing the
Suite on Red Hat Enterprise Linux 4. Therefore, please follow the steps described in the Installing Zimbra Collaboration Suite earlier in this chapter.
[ 48 ]