

This material is copyright and is licensed for the sole use by Kliwon Klimis on 28th October 2008 425 cilce, , frood, grradt, 525254
The Zimbra Web Client
Checking Email
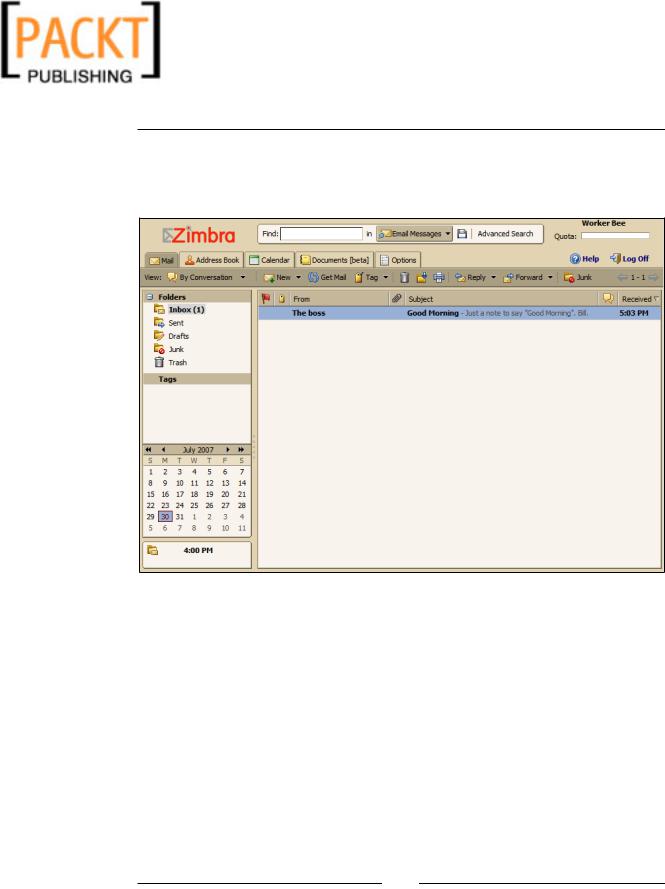
As you can see in the following screenshot, I have just logged into the Zimbra application as Worker Bee (username worker) and have received a new message.
[ 88 ]
This material is copyright and is licensed for the sole use by Kliwon Klimis on 28th October 2008 425 cilce, , frood, grradt, 525254
Chapter 4
When new email is received, the name of the folder is highlighted with bold text, with the number of new messages in parentheses. In our case, we have one new message and if we click on the Inbox, we see the new message in the Content Pane. The content pane, by default, lists seven columns including Flag, Tag, From,
Attachment, Subject, Count, and Received.
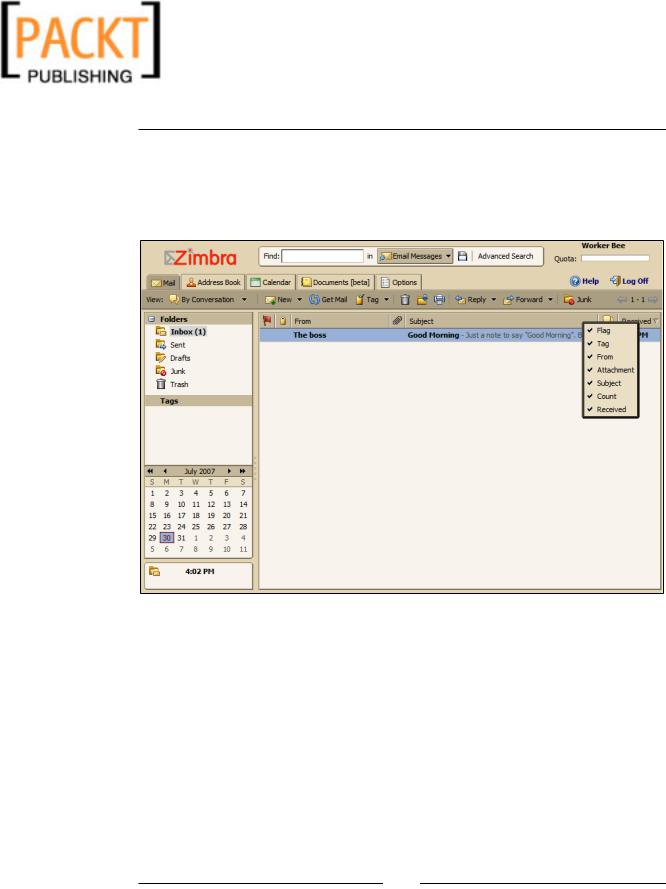
These columns are customizable, by right-clicking on any column heading and placing a check next to the columns you would like to be visible. Removing the check hides the corresponding column. Each column may also be used as a criteria for sorting the display, simply by clicking on the column. For example, if you would like to see all messages that have a Flag marked for them, click on the Flag column.
[ 89 ]
This material is copyright and is licensed for the sole use by Kliwon Klimis on 28th October 2008 425 cilce, , frood, grradt, 525254
The Zimbra Web Client
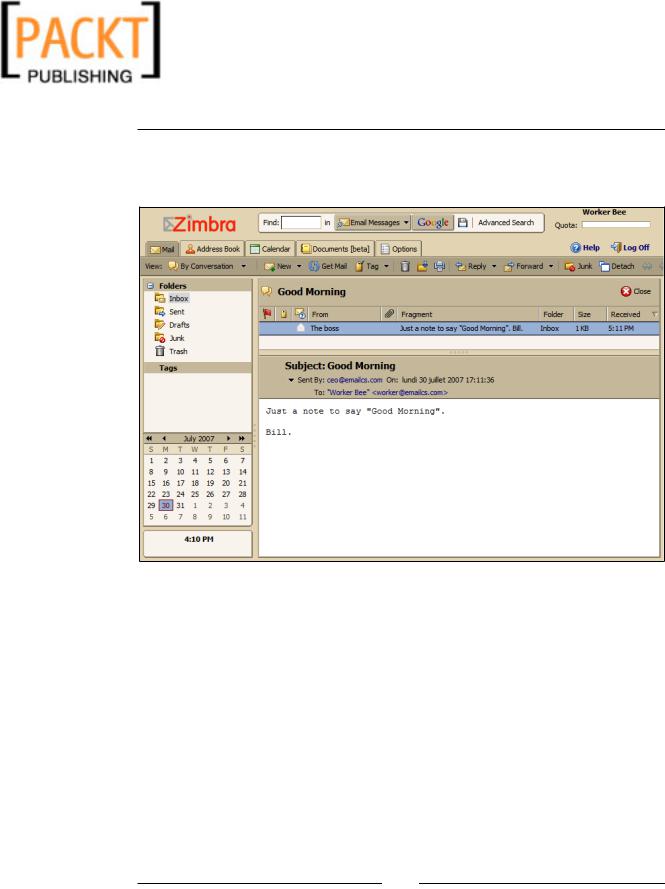
To open up a message, double-click the message in the Content Pane. Now the Content Pane changes to reveal the message in two parts. Also, the buttons on the Toolbar change to allow for additional email functionality.
The f rst part of the message is the Header. This includes the subject of the message, who it was sent by, who it was sent to, and the date/time of when it was sent. What is unique to Zimbra, is that when you hover the mouse cursor over a name that is in your contacts (in this case CEO), the contact information is revealed in a pop-up box. By highlighting the Date, a list of any appointments that you have that day is listed. By clicking on any of the displayed names, the Compose Email screen appears allowing you to send an email to that person.
[ 90 ]
This material is copyright and is licensed for the sole use by Kliwon Klimis on 28th October 2008 425 cilce, , frood, grradt, 525254
Chapter 4
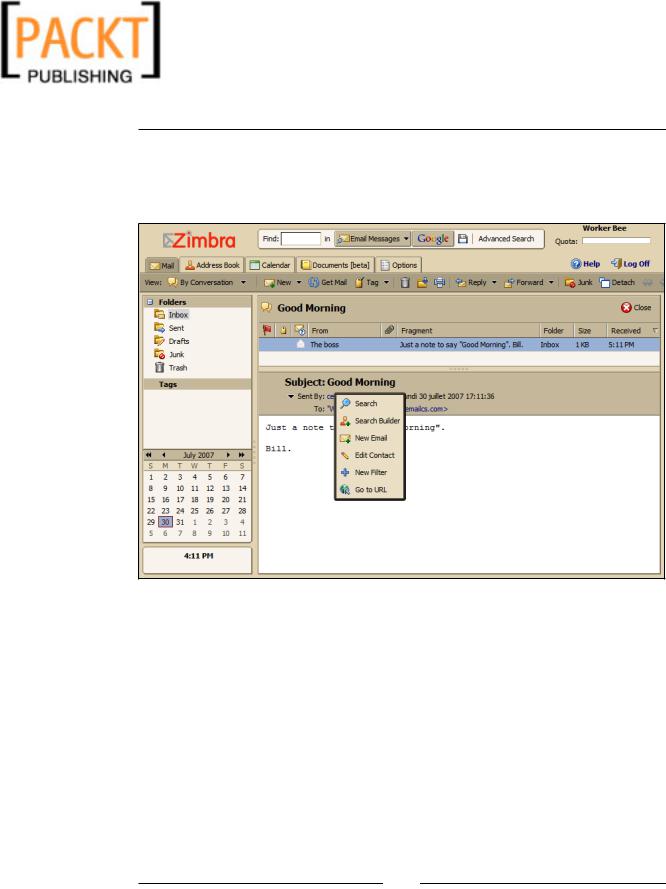
One other feature that the Zimbra Web client offers, is by right clicking on any name or email address, a context sensitive menu is displayed in a pop-up menu, offering a list of options including creating searches, adding contacts, creating rules, and so on as seen in the following screenshot.
Once an email is read, it is no longer highlighted. With the email open, you may reply, reply to all, or forward the message if desired. This functionality is standard in every email application. When you are done with the message, you may choose to file it in a folder other than the Inbox for organization purposes.
[ 91 ]
This material is copyright and is licensed for the sole use by Kliwon Klimis on 28th October 2008 425 cilce, , frood, grradt, 525254
The Zimbra Web Client
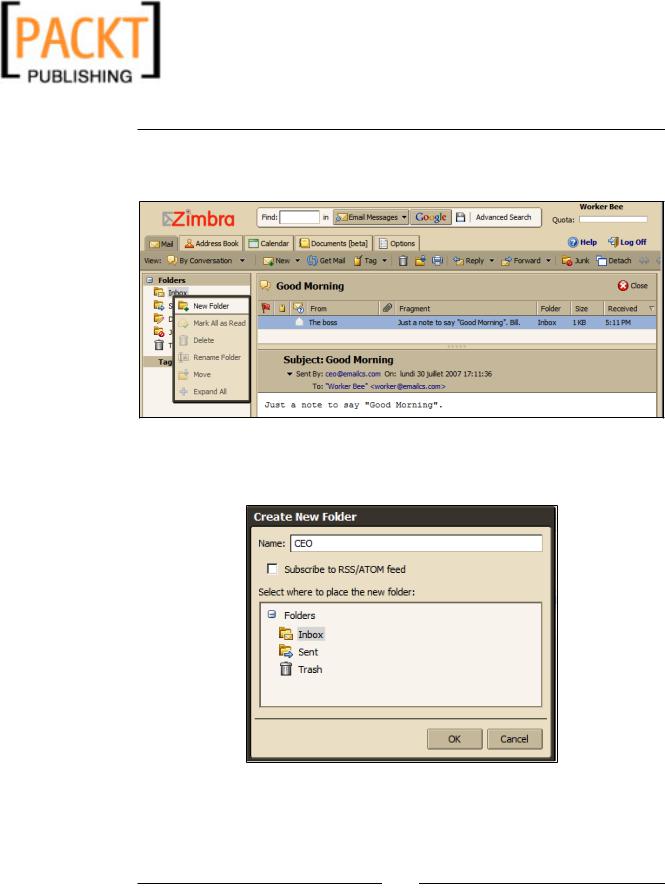
To create a new folder:
1. Right-click on the Inbox and select New Folder.
2.When the Create Folder Dialog box appears, type a name for the new folder and click OK. In this case, I will be creating a folder called CEO, to file all of my email messages from the CEO automatically.
2.To create a rule to automatically file emails from the CEO to this folder, I could right-click on the message in the Inbox and select New Filter.
[ 92 ]