- •Table of Contents
- •Preface
- •More than Just Email
- •Introducing Zimbra
- •What's in a Name?
- •Building Better Collaboration
- •Front-End
- •Back-End
- •The Benefits of Zimbra
- •Summary
- •Before the Installation
- •Hardware
- •Software
- •Editing the HOSTS File
- •Configuring DNS
- •Turning Off Sendmail
- •Installing on Red Hat Enterprise Linux 4
- •Installing the Red Hat Operating System
- •Installing Zimbra Collaboration Suite
- •Installing on SUSE ES 9
- •Preparing SUSE ES 9 for Zimbra
- •Installing on MAC OS X
- •Preparing MAC OS X Server for Zimbra
- •Installing the Zimbra Collaboration Suite
- •Post-Installation Steps
- •Configuring the Firewall
- •Uninstalling Zimbra
- •Summary
- •An Overview of the Administration Console
- •A. Content Pane
- •B. Search Bar
- •C. Monitoring
- •Server Management
- •Creating a New Domain
- •Configuring Global Settings
- •Class of Service
- •User Management
- •Creating User Accounts
- •Creating an Alias
- •Creating a Distribution List
- •Administering Zimbra from the Command Line
- •Managing Services with zmcontrol
- •Creating Accounts with zmprov
- •Summary
- •The Web Client System Requirements
- •A Bird's Eye View of the Web Client
- •Working with Email
- •Checking Email
- •Composing Email
- •Tags
- •Conversations
- •Managing Contacts
- •Sharing Address Books
- •Managing Schedules
- •Adding Appointments
- •Creating Multiple Calendars
- •Sharing Calendars
- •The Zimbra Documents
- •Creating Documents Pages
- •Sharing Documents
- •Saving Time with the Zimbra Assistant
- •Saving Even More Time with Keyboard Shortcuts
- •Sending an Email with Shortcuts
- •Summary
- •Built-In Security
- •Web Client Security
- •Mail Transfer Agent
- •Anti-Spam
- •Anti-Virus
- •Securing the Operating System
- •Host-Based Firewall
- •Services
- •Updates and Patching
- •Securing the Network
- •Firewalls
- •Virtual Private Networks
- •Summary
- •Exploring User Options
- •General Options
- •Mail Options
- •Mail Filters
- •Address Book
- •Calendar
- •Shortcuts
- •Configuring POP Accounts
- •Configuring Mail Identities
- •Building Searches
- •Building Our Search
- •Using a Saved Search
- •Summary
- •The PST Import Wizard
- •The Zimbra Connector for Outlook
- •A Look at Zimbra Integration
- •Contacts
- •Appointments
- •Sharing Outlook Folders
- •Summary
- •Preparing the Zimbra Server for Zimbra Mobile
- •Configuring Windows Mobile to Sync with Zimbra
- •Configuring Palm OS to Sync with Zimbra
- •Summary
- •An Overview of Zimlets
- •Mouse-Over Zimlet Example
- •The Date Zimlet
- •The Yahoo! Maps Zimlet
- •Managing Zimlets
- •Managing Zimlets through the Administrator Console
- •Assigning Zimlets to a COS
- •Assigning Zimlets to an Account
- •A Look at Configuring the RSS Zimlet
- •The RSS Zimlet in Action
- •Allowing RSS Feeds for Additional Sites
- •Managing Backups
- •Restoring Mailboxes
- •Using the Command Line for Backups
- •Summary
- •The Need for Monitoring
- •Availability
- •Scalability
- •Security
- •Working with Mail Queues
- •Monitoring Log Files
- •Summary
- •Index
This material is copyright and is licensed for the sole use by Kliwon Klimis on 28th October 2008 425 cilce, , frood, grradt, 525254
Chapter 9
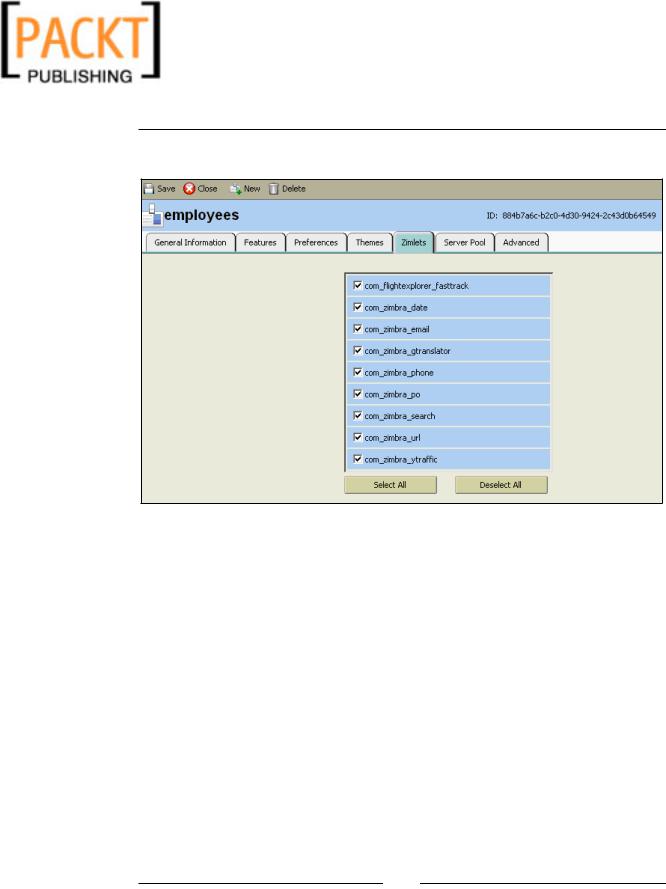
4. Select the Zimlets tab.
5.Within this tab, you may disable or enable Zimlets for all users within the
Class of Service by unchecking (disabling) or checking (enabling) each
Zimlet. Only Zimlets that have been enabled on the server level will be seen here.
6.Once completed click Save.
Just to reiterate, these Zimlets will be available, or unavailable, to all users within the COS unless they have explicitly been defined at the user account level, which we will go over in the next section. Users will have to log out and in again to see the changes.
Assigning Zimlets to an Account
Assigning Zimlets to an Account works exactly the same way as assigning them to
aCOS.
1.With the Administration Console open, double-click Accounts in the Navigation Pane.
2.In the Content Pane, select the Worker account and click Edit.
[ 177 ]
This material is copyright and is licensed for the sole use by Kliwon Klimis on 28th October 2008 425 cilce, , frood, grradt, 525254
The World of Zimlets
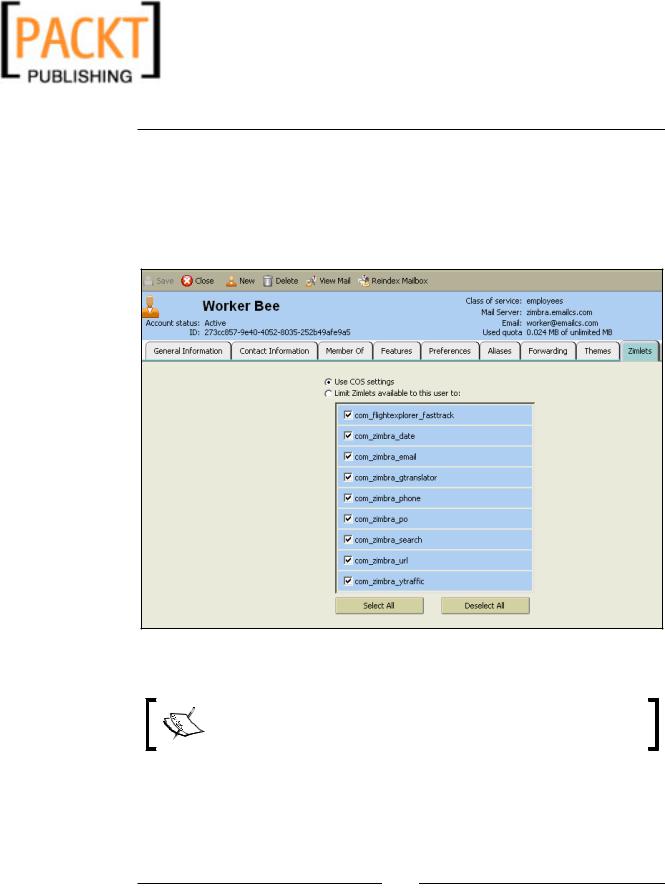
3.Select the Zimlets tab.
4.In the Results Pane, you will see a list of Zimlets that are available to the user. Those Zimlets will have a check mark in the box to the left of them.
5.To disable a Zimlet, uncheck the box. You should notice two radio buttons that allow you to either use the COS settings (this is default) or to Limit
Zimlets available to this user.
6. Once completed click Save.
Keep in mind that user settings will override COS settings. By defining Zimlets at the user level, it makes it much more difficult to administer them later.
Administering Zimlets through the Administration Console is very simple and straightforward. However, like in many services, the real power comes from administering the Zimlets from the command line. In the next section, we will look at how to configure the RSS Zimlet, which will provide us with a good overview of configuring Zimlets from the command line.
[ 178 ]