

This material is copyright and is licensed for the sole use by Kliwon Klimis on 28th October 2008 425 cilce, , frood, grradt, 525254
Chapter 7
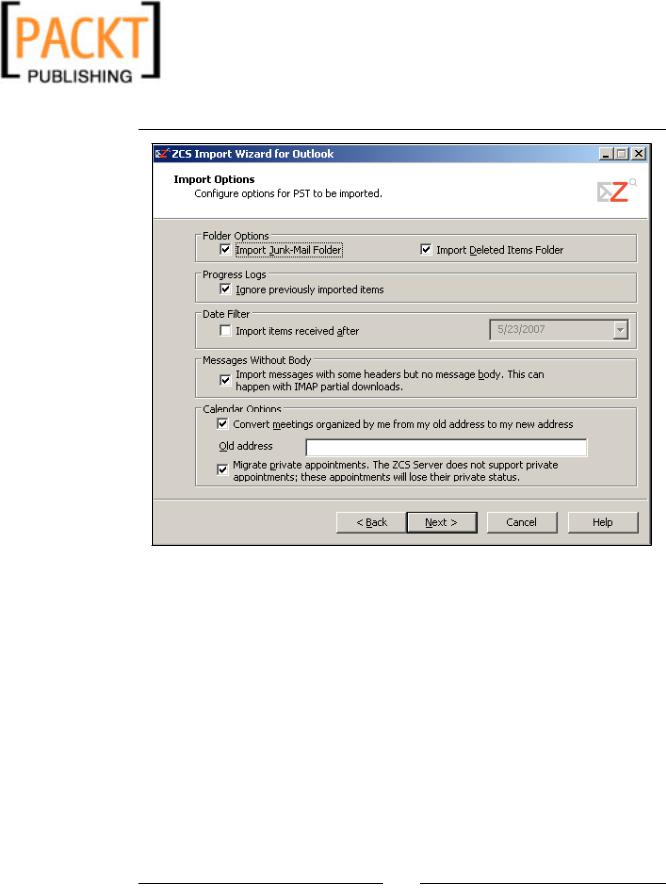
Once your choices are made, you can click on the Next button.
14.Click OK in the confirmation window.
15.Next window will show you the import evolution (number of items and percentage). You can stop the import at anytime and start again later. Once the import is finished, a window pops up with a summary of the import session.
16.You can click on the OK button of the summary window then Finish in the last window.
The Zimbra Connector for Outlook
The Zimbra Connector for Outlook (ZCO) is a downloadable .msi installable file that must be installed on the desktop in order for Outlook and Zimbra to communicate. To download the ZCO to the client:
[ 153 ]
This material is copyright and is licensed for the sole use by Kliwon Klimis on 28th October 2008 425 cilce, , frood, grradt, 525254
Zimbra and Outlook
1.Log in to the Administration Console at https://zimbra.emailcs.com:7071.
2.Click on the Downloads tab on the left of the navigation pane.
3.In the Content Pane, click on the Zimbra Connector for Outlook to download the .msi installable file.
4.Save the file to the local computer, or a network accessible shared folder.
5.Double click the .msi file to start the installation process.
6.The installation wizard will begin and go ahead and accept the License Agreement and accept all of the defaults.
7.Once complete click FINISH.
[ 154 ]
This material is copyright and is licensed for the sole use by Kliwon Klimis on 28th October 2008 425 cilce, , frood, grradt, 525254
Chapter 7
The ZCO creates a brand new profile within Outlook, called Zimbra. If you had previous profile(s) created on your computer, be sure to choose the “Zimbra” one.
The ZCO is now installed, and the first time we run Outlook on this client, the connector will prompt us for configuration information. Zimbra currently supports
Outlook 2003 only.
1.In the Server Name field, enter: zimbra.emailcs.com.
2.For port leave the default of 80.
3.Email address will be the email address for this user. In our case, we will use the Worker Bee with an email address of worker@emailcs.com.
4.For the password, enter the same password Worker would use to log in to the AJAX web client.
5.Once completed, click OK and Outlook will open Worker's email box.
The ZCO will now sync the Global Access List and will get all the emails from the server locally. It means that if you imported lots of item previously, you might need some time to get them back into Outlook from the server. Luckily, then the sync process happens in the background.
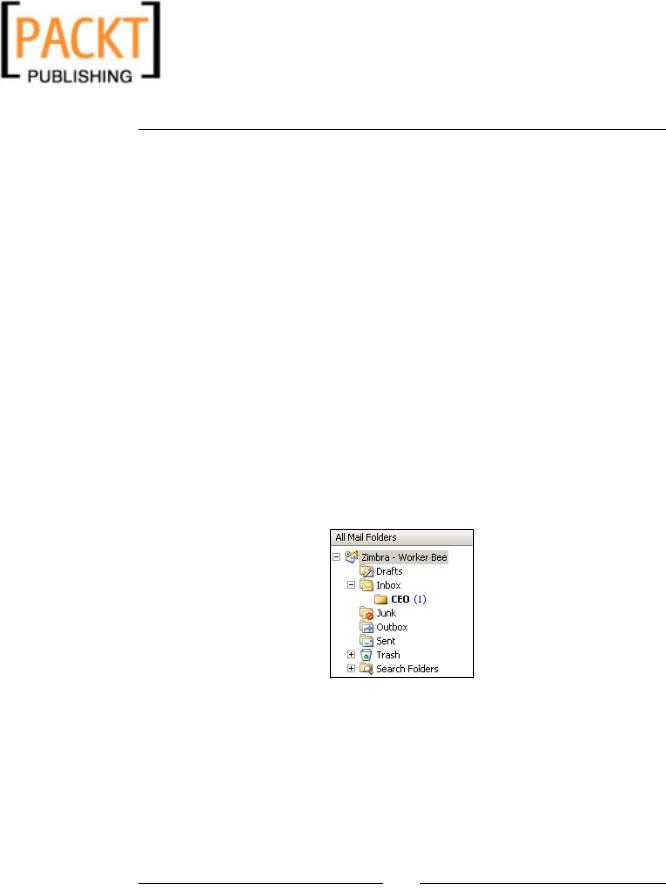
As you can see in the following screenshot, the folders we created in the Web Client are now configured in Outlook.
The first time Outlook is opened, it automatically performs a send/receive with the Zimbra server. After this initial synchronization, there is nothing a user needs to do from then on to initiate synchronization with the server. There is also nothing the user needs to set-up to let Outlook know whether or not the user is
Online—connected to the server, or Offline—disconnected from the server. Outlook automatically checks the status and acts accordingly. Therefore, a user need not be connected to the server to work with email that has already been received, check the address book, or work with the Calendar. All changes that the user makes in Offline mode, will synchronize with the server the next time the server is connected and Outlook is online.
[ 155 ]