- •Table of Contents
- •Preface
- •More than Just Email
- •Introducing Zimbra
- •What's in a Name?
- •Building Better Collaboration
- •Front-End
- •Back-End
- •The Benefits of Zimbra
- •Summary
- •Before the Installation
- •Hardware
- •Software
- •Editing the HOSTS File
- •Configuring DNS
- •Turning Off Sendmail
- •Installing on Red Hat Enterprise Linux 4
- •Installing the Red Hat Operating System
- •Installing Zimbra Collaboration Suite
- •Installing on SUSE ES 9
- •Preparing SUSE ES 9 for Zimbra
- •Installing on MAC OS X
- •Preparing MAC OS X Server for Zimbra
- •Installing the Zimbra Collaboration Suite
- •Post-Installation Steps
- •Configuring the Firewall
- •Uninstalling Zimbra
- •Summary
- •An Overview of the Administration Console
- •A. Content Pane
- •B. Search Bar
- •C. Monitoring
- •Server Management
- •Creating a New Domain
- •Configuring Global Settings
- •Class of Service
- •User Management
- •Creating User Accounts
- •Creating an Alias
- •Creating a Distribution List
- •Administering Zimbra from the Command Line
- •Managing Services with zmcontrol
- •Creating Accounts with zmprov
- •Summary
- •The Web Client System Requirements
- •A Bird's Eye View of the Web Client
- •Working with Email
- •Checking Email
- •Composing Email
- •Tags
- •Conversations
- •Managing Contacts
- •Sharing Address Books
- •Managing Schedules
- •Adding Appointments
- •Creating Multiple Calendars
- •Sharing Calendars
- •The Zimbra Documents
- •Creating Documents Pages
- •Sharing Documents
- •Saving Time with the Zimbra Assistant
- •Saving Even More Time with Keyboard Shortcuts
- •Sending an Email with Shortcuts
- •Summary
- •Built-In Security
- •Web Client Security
- •Mail Transfer Agent
- •Anti-Spam
- •Anti-Virus
- •Securing the Operating System
- •Host-Based Firewall
- •Services
- •Updates and Patching
- •Securing the Network
- •Firewalls
- •Virtual Private Networks
- •Summary
- •Exploring User Options
- •General Options
- •Mail Options
- •Mail Filters
- •Address Book
- •Calendar
- •Shortcuts
- •Configuring POP Accounts
- •Configuring Mail Identities
- •Building Searches
- •Building Our Search
- •Using a Saved Search
- •Summary
- •The PST Import Wizard
- •The Zimbra Connector for Outlook
- •A Look at Zimbra Integration
- •Contacts
- •Appointments
- •Sharing Outlook Folders
- •Summary
- •Preparing the Zimbra Server for Zimbra Mobile
- •Configuring Windows Mobile to Sync with Zimbra
- •Configuring Palm OS to Sync with Zimbra
- •Summary
- •An Overview of Zimlets
- •Mouse-Over Zimlet Example
- •The Date Zimlet
- •The Yahoo! Maps Zimlet
- •Managing Zimlets
- •Managing Zimlets through the Administrator Console
- •Assigning Zimlets to a COS
- •Assigning Zimlets to an Account
- •A Look at Configuring the RSS Zimlet
- •The RSS Zimlet in Action
- •Allowing RSS Feeds for Additional Sites
- •Managing Backups
- •Restoring Mailboxes
- •Using the Command Line for Backups
- •Summary
- •The Need for Monitoring
- •Availability
- •Scalability
- •Security
- •Working with Mail Queues
- •Monitoring Log Files
- •Summary
- •Index

This material is copyright and is licensed for the sole use by Kliwon Klimis on 28th October 2008 425 cilce, , frood, grradt, 525254
Customizing Zimbra
As we continue looking at mail options, we will configure our Worker Bee user to also act as our sales user, by accepting emails to sales@emailcs.com. We will use an alias for this, and then set up a mail identity within Worker's client to act as sales.
To create the alias, we will go to the administrator console at https://zimbra. emailcs.com:7071 and log in as the Zimbra user. Click on the Accounts tab and edit the Worker. Click on the Aliases tab and add "sales" in the text box. When completed click Save then Close.
At this point, log out of the Administration Console, and log into the regular Zimbra web client as Worker. Now we will configure the Mail Identity for sales.
1.Click on the Options tab.
2.Select Mail Identities.
3.In the Identities box, click Add.
4.For the Identity name: type in "Sales".
5.For the From: field we will use "Sales Department".
6.Check the Reply-to box and type in "Sales Department" for the name and sales@emailcs.com for the address.
7.Under Select this identity when: Check the box for Replying to a message sent to: and enter sales@emailcs.com.
8.Next click on the Signature tab.
9.We will now create a signature for the messages responded to as sales. In the Mail Signature box add the following: "Thank you for contacting the EmailCS Sales Department."
10.Once completed, click Save.
Our Worker Bee user now could act as sales and respond to messages accordingly.
Mail Identities behaviour is handled by the Class of Service. A user is not able to use any identity he wants (unless authorized by the CoS) : he can only, by default, use one of his aliases or POP3 accounts' email address to send mail from.
Building Searches
Zimbra has a very powerful and configurable search tool called "Search Builder" that could be accessed by clicking on Advanced Search. What is key about the Search Builder, is not only does it allow the user to compile some fairly complicated searches, but it also gives the user the option to save the search for use at a later time. The Search Builder also displays the search string so the user could learn how to format future searches later that will be similar, without the need of using the search builder tool.
[ 144 ]

This material is copyright and is licensed for the sole use by Kliwon Klimis on 28th October 2008 425 cilce, , frood, grradt, 525254
Chapter 6
In this section, we will create an advanced search, save the search for later use and then create a keyboard shortcut, to automatically run the search when desired.
Building Our Search
As the Worker Bee, we know our CEO tends to sends important files to us as attachments, and then assumes he could delete the file on his computer. Since of course now the Worker has a copy of it and he has no more need of it. Of course, there are times, he calls up the Worker Bee and demands for a copy of the attachment back, with the original email. So, we will create a search that will show us all emails that were received from the CEO, that have an attachment, and were received prior to this month. To create the search, we will need to do the following:
Please note that before creating the search, make sure Always Show
Search String is selected in the General tab of users options.
1.Click on Advanced Search at the top of the Zimbra Web Client.
2.You should see the Basic Search Box is already open, if not click on Basic, in the toolbar.
3.In the From field, type in "The Boss" and select the checkboxes for searching in Junk and Trash folders, just in case.
4.Next click on the Attachments icon in the search toolbar.
5.Select the Any Attachment radio button.
6.Click on the Date icon.
7.Make sure it is selected and then insure that today's date is selected.
8.On the top of the screen, directly to the left of the Advanced Search button, you will see a small floppy disk icon. Click on the icon to save our search and name it "Attachments".
Our search is now created and saved for future use. Also, we can also the search string for the search, if we would like to create a similar search, later without needing to go through the search builder. In the Search text box, you should now see:
(attachment:any from: (The Boss) is:anywhere before:3/1/2007)
[ 145 ]

This material is copyright and is licensed for the sole use by Kliwon Klimis on 28th October 2008 425 cilce, , frood, grradt, 525254
Customizing Zimbra
Using a Saved Search
Now that we have saved our search, there are a few ways we can access it again in the future. The first is through Advanced Search:
1.Click on Advanced Search.
2.Select the Saved Searches icon in the search toolbar.
3.Place a checkmark next to the search named "Attachments".
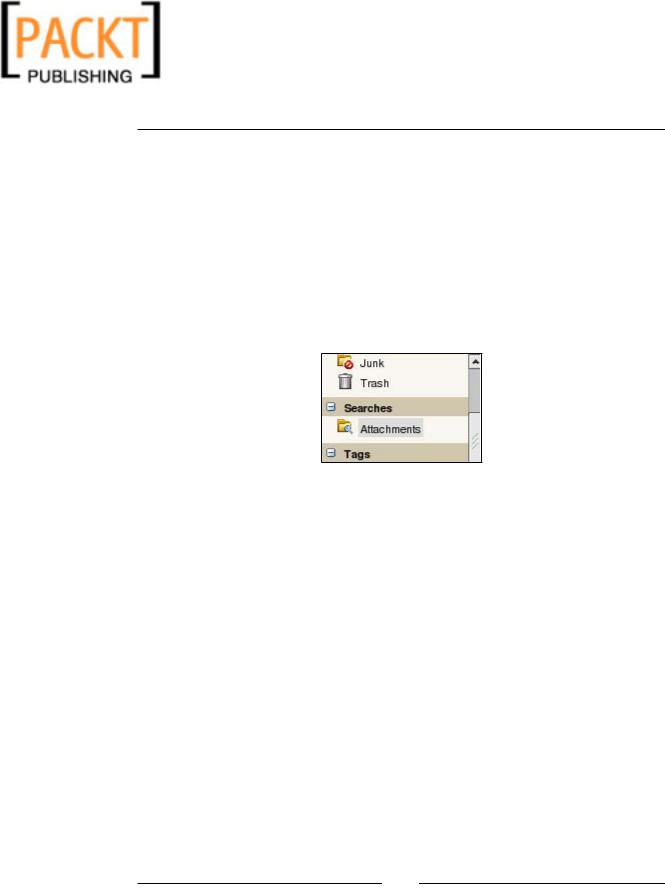
This will immediately initiate our search that we built previously. Another way you may notice is that there is now a Searches section in the Navigation Pane of the Web client that now lists the search.
Simply double-clicking on the search "Attachments" will initiate the search with all of our defined parameters. Lastly, we could create a keyboard shortcut.
To create the keyboard shortcut for the search:
1.Click on the Options tab and select Shortcuts.
2.Select the Saved Search Shortcuts tab.
3.Click on Add Shortcut.
4.Click on Browse to select our saved search.
5.Choose "Attachments" from the Choose Search dialog box and click OK.
6.For the shortcut textbox enter the number 1.
7.Click Save.
At any time now within the Zimbra Client, if you type in the shortcut s then 1, our saved search "Attachments" will be initiated.
[ 146 ]
