

CHAPTER 5: Autorotation and Autosizing |
123 |
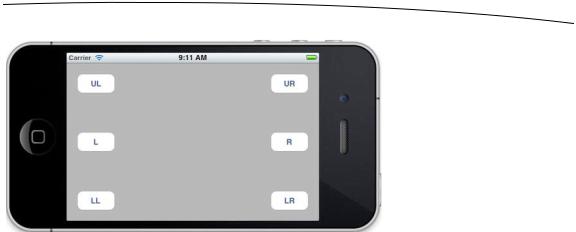
Figure 5–10. The buttons in their new positions after rotating
In this example, we kept our buttons the same size, so now all of our buttons are visible and usable, but there is a lot of unused space on the screen. Perhaps it would be better if we allowed the width or height of our buttons to change so that there will be less empty space on the interface? Feel free to experiment with the autosize attributes of these six buttons, and perhaps even add some other buttons. Play around until you feel comfortable with the way autosize works.
In the course of your experimentation, you’re bound to notice that sometimes no combination of autosize attributes will give you exactly what you want. In some cases, you’ll need to rearrange your interface more drastically than can be handled with this technique. For those situations, a little more code is in order. Let’s take a look at that next.
Restructuring a View When Rotated
Back in your nib file, single-click each of the buttons, and use the size inspector to change the Width and Height fields to 125, which will set the width and height of the buttons to 125 points. If you like, you can select all six buttons and use the size inspector to change them all at once. When you are finished, rearrange your buttons using the blue guidelines so that your view looks like Figure 5–11.
www.it-ebooks.info
124 |
CHAPTER 5: Autorotation and Autosizing |
Figure 5–11. View after resizing all the buttons
Can you guess what’s going to happen now when we rotate the screen? Well, assuming that you kept the buttons’ autosize attributes to the settings shown in Figure 5–9, you probably won’t be pleased. The buttons will overlap and look like Figure 5–12, because there simply isn’t enough height on the screen in landscape mode to accommodate three buttons that are 125 points tall.
Figure 5–12. Not exactly what we want. Too much overlap. We need another solution.
www.it-ebooks.info

CHAPTER 5: Autorotation and Autosizing |
125 |
We could accommodate this scenario using the autosize attributes by allowing the height of the buttons to change, but that’s wouldn’t make the best use of our screen real estate, because it would leave a large gap in the middle of the screen. If there was room for six square buttons in portrait mode, there should still be room for six square buttons in landscape mode—we just need to shuffle them around a bit. One way we can handle this is to specify new positions for each of the buttons when the view is rotated.
Creating and Connecting Outlets
Edit BIDViewController.xib and bring up the assistant editor (as you did in the previous chapter). Make sure you can see BIDViewController.h in addition to the GUI layout area, and then control-drag from each of the six buttons to the header file on the right to create six outlets called buttonUL, buttonUR, buttonL, buttonR, buttonLL, and buttonLR. Be sure each of the new outlets is specified as weak.
Once you’ve connected all six buttons to new outlets, save the nib. Your header file should look like this:
# import <UIKit/UIKit.h>
@interface BIDViewController : UIViewController @property (weak, nonatomic) IBOutlet UIButton *buttonUL; @property (weak, nonatomic) IBOutlet UIButton *buttonUR; @property (weak, nonatomic) IBOutlet UIButton *buttonL; @property (weak, nonatomic) IBOutlet UIButton *buttonR; @property (weak, nonatomic) IBOutlet UIButton *buttonLL; @property (weak, nonatomic) IBOutlet UIButton *buttonLR;
@end
Moving the Buttons on Rotation
To move these buttons to make the best use of space, we need to override the method willAnimateRotationToInterfaceOrientation:duration: in BIDViewController.m. This method is called automatically after a rotation has happened but before the final rotation animations have occurred.
Add the following method at the bottom of BIDViewController.m, just above the @end:
- (void)willAnimateRotationToInterfaceOrientation:(UIInterfaceOrientation) interfaceOrientation duration:(NSTimeInterval)duration {
if (UIInterfaceOrientationIsPortrait(interfaceOrientation)) { buttonUL.frame = CGRectMake(20, 20, 125, 125); buttonUR.frame = CGRectMake(175, 20, 125, 125); buttonL.frame = CGRectMake(20, 168, 125, 125); buttonR.frame = CGRectMake(175, 168, 125, 125); buttonLL.frame = CGRectMake(20, 315, 125, 125); buttonLR.frame = CGRectMake(175, 315, 125, 125);
} else {
buttonUL.frame = CGRectMake(20, 20, 125, 125);
www.it-ebooks.info