

248 |
CHAPTER 8: Introduction to Table Views |
Builder, but as you’ve seen, it has a lot going for it. Besides having the obvious appeal of letting you visually design your GUI, this approach promotes the proper use of nib files, which helps you stick to the MVC architecture pattern. Also, you can make your application code simpler, more modular, and just plain easier to write. As our good buddy Mark Dalrymple says, “No code is the best code!”
Grouped and Indexed Sections
Our next project will explore another fundamental aspect of tables. We’re still going to use a single table view—no hierarchies yet—but we’ll divide data into sections. Create a new Xcode project using the Single View Application template again, this time calling it
Sections.
Building the View
Open the Sections folders, and click BIDViewController.xib to edit the file. Drop a table view onto the View window, as we did before. Then press 6, and connect the dataSource and delegate connections to the File’s Owner icon.
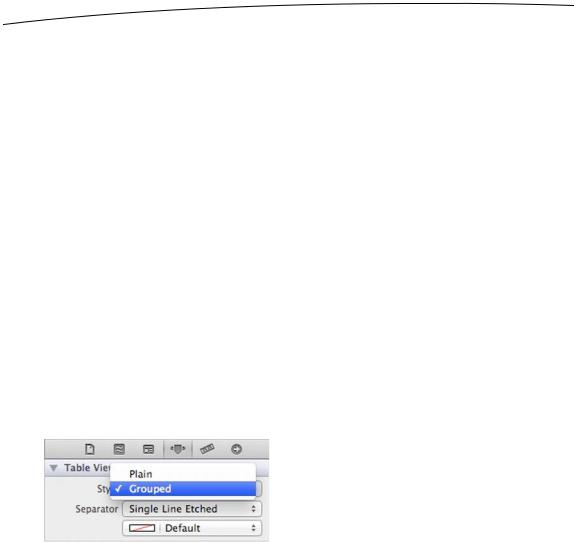
Next, make sure the table view is selected, and press 4 to bring up the attributes inspector. Change the table view’s Style from Plain to Grouped (see Figure 8–20). You should see the change reflected in the sample table shown in the table view. Save your nib, and move along. (We discussed the difference between indexed and grouped styles at the beginning of the chapter.)
Figure 8–20. The attributes inspector for the table view, showing the Style popup with Grouped selected
Importing the Data
This project needs a fair amount of data to do its thing. To save you a few hours worth of typing, we’ve provided another property list for your tabling pleasure. Grab the file named sortednames.plist from the 08 Sections/Sections subfolder in this book’s project archive and add it to your project’s Sections folder.
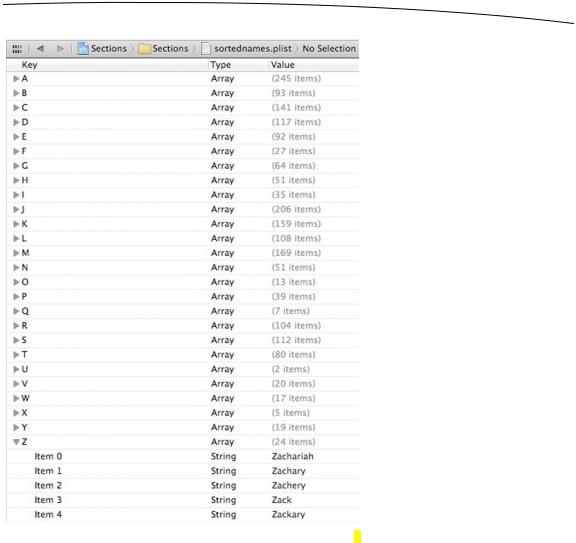
Once sortednames.plist is added to your project, single-click it just to get a sense of what it looks like (see Figure 8–21). It’s a property list that contains a dictionary, with one entry for each letter of the alphabet. Underneath each letter is a list of names that start with that letter.
www.it-ebooks.info
CHAPTER 8: Introduction to Table Views |
249 |
Figure 8–21. The sortednames.plist property list file. We opened the letter Z to give you a sense of one of the dictionaries.
We’ll use the data from this property list to feed the table view, creating a section for each letter.
Implementing the Controller
Single-click the BIDViewController.h file, and add both an NSDictionary and an NSArray instance variable and corresponding property declarations. The dictionary will hold all of our data. The array will hold the sections sorted in alphabetical order. We also need to make the class conform to the UITableViewDataSource and UITableViewDelegate protocols.
www.it-ebooks.info

250CHAPTER 8: Introduction to Table Views
#import <UIKit/UIKit.h>
@interface BIDViewController : UIViewController
<UITableViewDataSource, UITableViewDelegate>
@property (strong, nonatomic) NSDictionary *names; @property (strong, nonatomic) NSArray *keys;
@end
Now, switch over to BIDViewController.m, and add the following code to the beginning of that file:
#import "BIDViewController.h"
@implementation BIDViewController
@synthesize names; @synthesize keys;
.
.
.
- (void)viewDidLoad { [super viewDidLoad];
// Do any additional setup after loading the view, typically from a nib.
NSString *path = [[NSBundle mainBundle] pathForResource:@"sortednames" ofType:@"plist"];
NSDictionary *dict = [[NSDictionary alloc] initWithContentsOfFile:path];
self.names = dict;
NSArray *array = [[names allKeys] sortedArrayUsingSelector: @selector(compare:)];
self.keys = array;
}
.
.
.
Insert the following lines of code in the existing viewDidUnload method:
- (void)viewDidUnload { [super viewDidUnload];
//Release any retained subviews of the main view.
//e.g. self.myOutlet = nil;
self.names = nil; self.keys = nil;
}
Now, add the following code at the end of the file, just above the @end declaration:
.
.
.
#pragma mark -
#pragma mark Table View Data Source Methods
- (NSInteger)numberOfSectionsInTableView:(UITableView *)tableView { return [keys count];
}
www.it-ebooks.info

CHAPTER 8: Introduction to Table Views |
251 |
- (NSInteger)tableView:(UITableView *)tableView numberOfRowsInSection:(NSInteger)section {
NSString *key = [keys objectAtIndex:section]; NSArray *nameSection = [names objectForKey:key]; return [nameSection count];
}
- (UITableViewCell *)tableView:(UITableView *)tableView cellForRowAtIndexPath:(NSIndexPath *)indexPath { NSUInteger section = [indexPath section]; NSUInteger row = [indexPath row];
NSString *key = [keys objectAtIndex:section];
NSArray *nameSection = [names objectForKey:key];
static NSString *SectionsTableIdentifier = @"SectionsTableIdentifier"; UITableViewCell *cell = [tableView dequeueReusableCellWithIdentifier:
SectionsTableIdentifier]; if (cell == nil) {
cell = [[UITableViewCell alloc] initWithStyle:UITableViewCellStyleDefault reuseIdentifier:SectionsTableIdentifier];
}
cell.textLabel.text = [nameSection objectAtIndex:row]; return cell;
}
- (NSString *)tableView:(UITableView *)tableView titleForHeaderInSection:(NSInteger)section { NSString *key = [keys objectAtIndex:section]; return key;
}
@end
Most of this isn’t too different from what you’ve seen before. In the viewDidLoad method, we created an NSDictionary instance from the property list we added to our project and assigned it to names. After that, we grabbed all the keys from that dictionary and sorted them to give us an ordered NSArray with all the key values in the dictionary in alphabetical order. Remember that the NSDictionary uses the letters of the alphabet as its keys, so this array will have 26 letters, in order from A to Z, and we’ll use that array to help us keep track of the sections.
Scroll down to the data source methods. The first one we added to our class specifies the number of sections. We didn’t implement this method in the earlier example, because we were happy with the default setting of 1. This time, we’re telling the table view that we have one section for each key in our dictionary.
- (NSInteger)numberOfSectionsInTableView:(UITableView *)tableView { return [keys count];
}
www.it-ebooks.info

252 |
CHAPTER 8: Introduction to Table Views |
The next method calculates the number of rows in a specific section. In the previous example, we had only one section, so we just returned the number of rows in our array. This time, we need to break it down by section. We can do this by retrieving the array that corresponds to the section in question and returning the count from that array.
- (NSInteger)tableView:(UITableView *)tableView numberOfRowsInSection:(NSInteger)section {
NSString *key = [keys objectAtIndex:section]; NSArray *nameSection = [names objectForKey:key]; return [nameSection count];
}
In our tableView:cellForRowAtIndexPath: method, we need to extract both the section and row from the index path, and use those to determine which value to use. The section will tell us which array to pull out of the names dictionary, and then we can use the row to figure out which value from that array to use. Everything else in that method is basically the same as the version in the Simple Table application we built earlier in the chapter.
The method tableView:titleForHeaderInSection allows you to specify an optional header value for each section, and we simply return the letter for this group.
- (NSString *)tableView:(UITableView *)tableView titleForHeaderInSection:(NSInteger)section { NSString *key = [keys objectAtIndex:section]; return key;
}
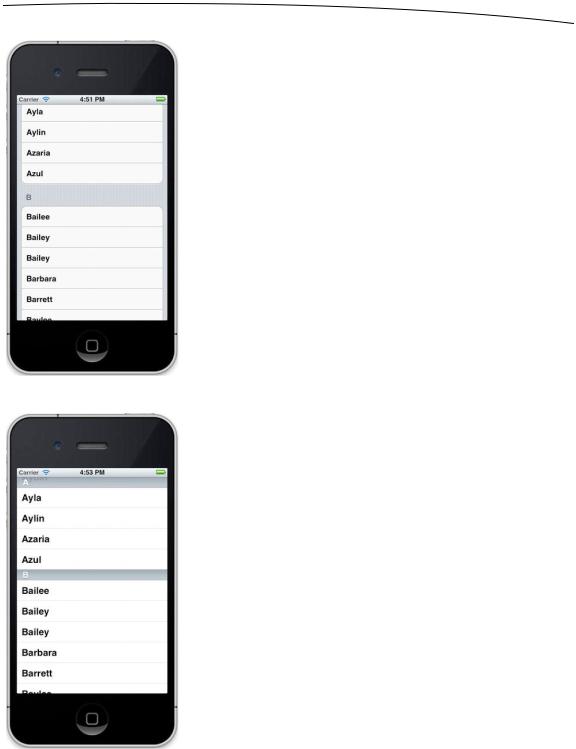
Compile and run the project, and revel in its grooviness. Remember that we changed the table’s Style to Grouped, so we ended up with a grouped table with 26 sections, which should look like Figure 8–22.
As a contrast, let’s change our table view back to the plain style and see what a plain table view with multiple sections looks like. Select BIDViewController.xib to edit the file in Interface Builder again. Select the table view, and use the attributes inspector to switch the view to Plain. Save the project, and then build and run it—same data, different grooviness (see Figure 8–23).
www.it-ebooks.info
CHAPTER 8: Introduction to Table Views |
253 |
Figure 8–22. A grouped table with multiple sections
Figure 8–23. A plain table with sections and no index
www.it-ebooks.info