


CHAPTER 6: Multiview Applications |
161 |
Next, we need to specify the transition to use. At the time of this writing, four iOS view transitions are available:
UIViewAnimationTransitionFlipFromLeft
UIViewAnimationTransitionFlipFromRight
UIViewAnimationTransitionCurlUp
UIViewAnimationTransitionCurlDown
We chose to use two different effects, depending on which view was being swapped in. Using a left flip for one transition and a right flip for the other makes the view seem to flip back and forth.
The cache option speeds up drawing by taking a snapshot of the view when the animation begins and using that image, rather than redrawing the view at each step of the animation. You should always cache the animation unless the appearance of the view may need to change during the animation.
[UIView setAnimationTransition:UIViewAnimationTransitionFlipFromRight forView:self.view cache:YES];
Then we remove the currently shown view from our controller’s view, and instead add the other view.
When we’re finished specifying the changes to be animated, we call commitAnimations on UIView. Everything between the start of the animation block and the call to commitAnimations will be animated together.
Thanks to Cocoa Touch’s use of Core Animation under the hood, we’re able to do fairly sophisticated animation with only a handful of code.
Switching Off
Whoo-boy! Creating our own multiview controller was a lot of work, wasn’t it? You should have a very good grasp on how multiview applications are put together now that you’ve built one from scratch.
Although Xcode contains project templates for the most common types of multiview applications, you need to understand the overall structure of these types of applications so you can build them yourself from the ground up. The delivered templates are incredible time-savers, but at times, they simply won’t meet your needs.
In the next few chapters, we’re going to continue building multiview applications to reinforce the concepts from this chapter and to give you a feel for how more complex applications are put together. In Chapter 7, we’ll construct a tab bar application. Let’s get going!
www.it-ebooks.info
Chapter 7
Tab Bars and Pickers
In the previous chapter, you built your first multiview application. In this chapter, you’re going to build a full tab bar application with five different tabs and five different content views. Building this application will reinforce a lot of what you learned in Chapter 6.
Now, you’re too smart to spend a whole chapter doing stuff you already sort of know how to do, so we’re going to use those five content views to demonstrate a type of iOS control that we have not yet covered. The control is called a picker view, or just a picker.
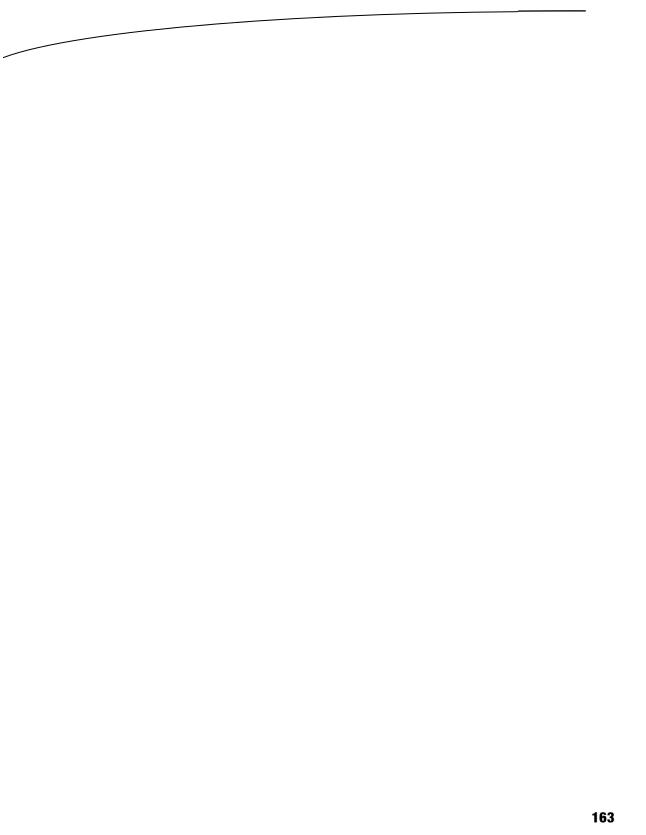
You may not be familiar with the name, but you’ve almost certainly used a picker if you’ve owned an iPhone or iPod touch for more than, say, 10 minutes. Pickers are the controls with dials that spin. You use them to input dates in the Calendar application or to set a timer in the Clock application (see Figure 7–1). On the iPad, the picker view isn’t quite as common, since the larger display lets you present other ways of choosing among multiple items, but even there, it’s used in the Calendar application.
D.Mark et al., Beginning iOS 5 Development
©Dave Mark, Jack Nutting, Jeff LaMarche 2011
www.it-ebooks.info
164 |
CHAPTER 7: Tab Bars and Pickers |
Figure 7–1. A picker in the Clock application
Pickers are a bit more complex than the iOS controls you’ve seen so far, and as such, they deserve a little more attention. Pickers can be configured to display one dial or many. By default, pickers display lists of text, but they can also be made to display images.
The Pickers Application
This chapter’s application, Pickers, will feature a tab bar. As you build Pickers, you’ll change the default tab bar so it has five tabs, add an icon to each of the tab bar items, and then create a series of content views and connect each view to a tab.
The application’s content views will feature five different pickers:
www.it-ebooks.info
CHAPTER 7: Tab Bars and Pickers |
165 |
Date picker: The first content view we’ll build will have a date picker, which is the easiest type of picker to implement (see Figure 7–2). The view will also have a button that, when tapped, will display an alert that shows the date that was picked.
Figure 7–2. The first tab will show a date picker.
www.it-ebooks.info
166CHAPTER 7: Tab Bars and Pickers
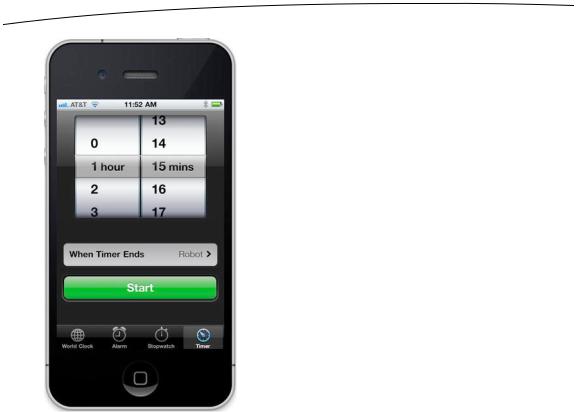
Single-component picker: The second tab will feature a picker with a single list of values (see Figure 7–3). This picker is a little more work to implement than a date picker. You’ll learn how to specify the values to be displayed in the picker by using a delegate and a data source.
Figure 7–3. A picker displaying a single list of values
www.it-ebooks.info
CHAPTER 7: Tab Bars and Pickers |
167 |
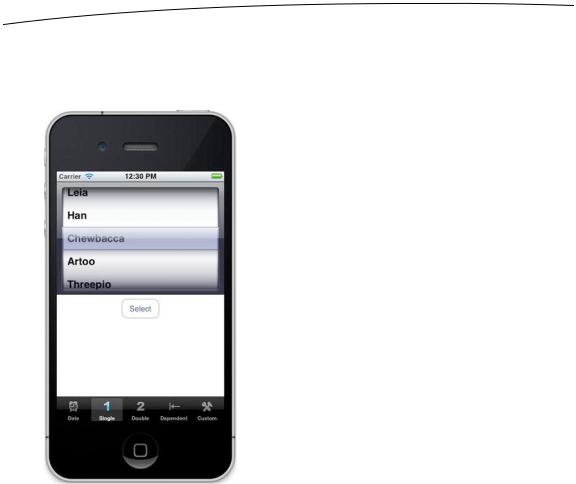
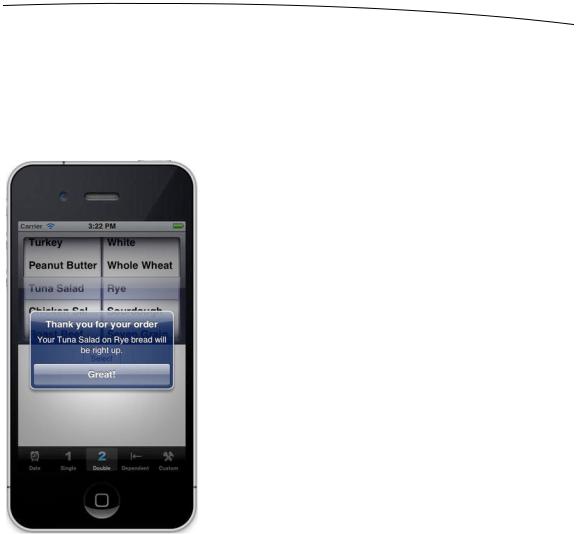
Multicomponent picker: In the third tab, we’re going to create a picker with two separate wheels. The technical term for each of these wheels is a picker component, so here we are creating a picker with two components. You’ll see how to use the data source and delegate to provide two independent lists of data to the picker (see Figure 7–4). Each of this picker’s components can be changed without impacting the other one.
Figure 7–4. A two-component picker, showing an alert that reflects our selection
www.it-ebooks.info
168CHAPTER 7: Tab Bars and Pickers
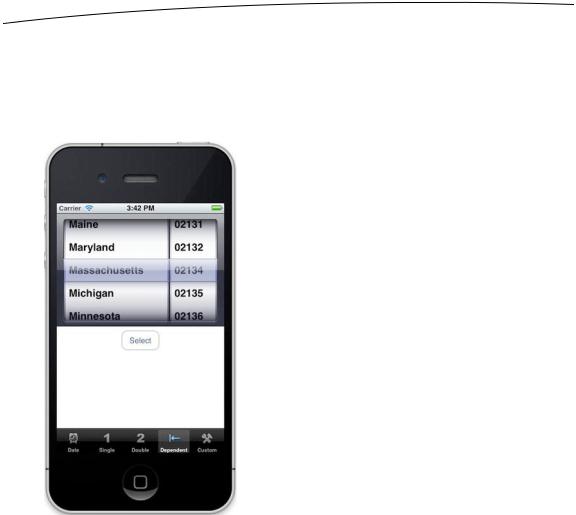
Picker with dependent components: In the fourth content view, we’ll build another picker with two components. But this time, the values displayed in the component on the right will change based on the value selected in the component on the left. In our example, we’re going to display a list of states in the left component and a list of that state’s ZIP codes in the right component (see Figure 7–5).
Figure 7–5. In this picker, one component is dependent on the other. As you select a state in the left component, the right component changes to a list of ZIP codes in that state.
www.it-ebooks.info