

CHAPTER 8: Introduction to Table Views |
259 |
Here’s what we just did:
The outlet table will point to our table view.
The outlet search will point to the search bar.
The dictionary allNames will hold the full dataset.
The dictionary names will hold the dataset that matches the current search criteria.
keys will hold the index values and section names.
If you’re clear on everything, let’s forge ahead and modify our view.
Modifying the View
Every table view allows for the possibility of placing a view at the top end of the table view, above any content. That header view will scroll with the rest of the content. A perfect example of this is the UISearchBar. If you drag a Search Bar from the library and place it just above the table view, Interface Builder will size the search bar so it fits at the top of the table view and scrolls with the table view.
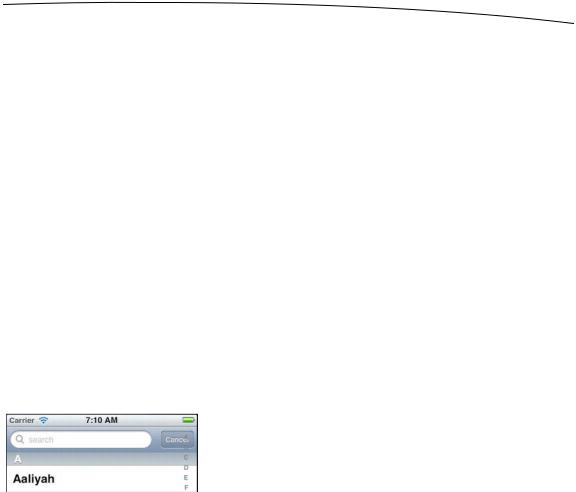
Unfortunately, the UISearchBar does not play well with the right-hand indexing feature. If you take a look at Figure 8–26, you’ll see why. Notice that the index overlaps the search bar, covering a bit of the Cancel button.
Figure 8–26. In the current version of our application, the search bar’s Cancel button is overlapped by the index.
Fortunately, there is a solution, and we can implement it without changing a line of our existing code, entirely by configuring the view hierarchy in Interface Builder. The idea is to put the search bar inside a plain old UIView. That way, the table view will make sure the UIView fills up the space, but the UIView's contents will still be presented just the way we set them up.
Select BIDViewController.xib to edit the file in Xcode’s Interface Builder, and select the table view in the editing area. Use the object library to find a View, and drag it to the top of the table view.
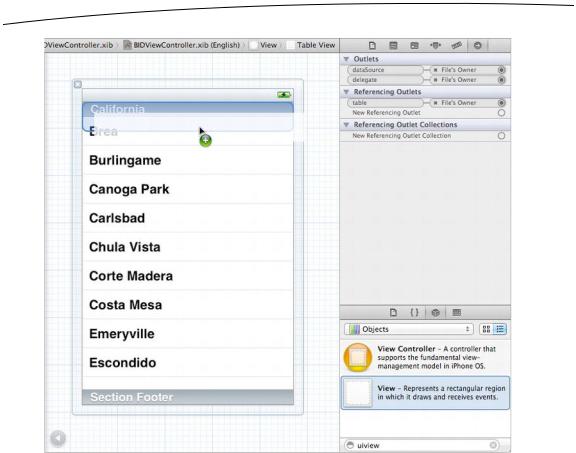
You’re trying to drop the view into the table view’s header section, a special part of the table view that lies before the first section. The way to do this is to place the view at the top of the table view. Before you release the mouse button, you should see a rounded, blue rectangle at the top of the table view (see Figure 8–27). That’s your indication that if you drop the view now, it will go into the table header. Release the mouse button to drop the view once you see that blue rectangle.
www.it-ebooks.info
260 |
CHAPTER 8: Introduction to Table Views |
Figure 8–27. Dropping a view onto the table view. Notice the rounded rectangle that appears at the top of the table view, indicating that the view will be added to the table’s header.
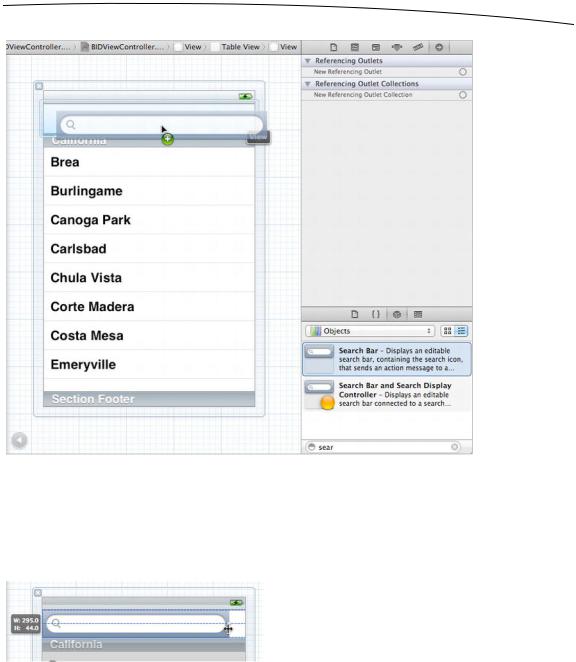
Now, grab a Search Bar from the library, and drop it straight onto the view you just added. You'll see the familiar blue rectangle, and find that the search bar fits perfectly within the view (see Figure 8–28).
www.it-ebooks.info
CHAPTER 8: Introduction to Table Views |
261 |
Figure 8–28. Dropping a search bar onto the view we previously placed in the table view header
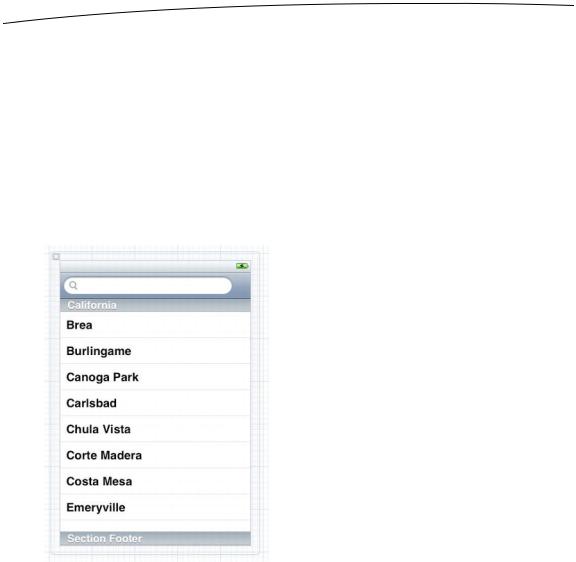
Next, let’s resize the search bar to make room for the index. First, select the search bar, and then grab the resizing handle on the right edge of the search bar and drag it to the left by 25 pixels. That should give us enough clearance for the table view's index column. You'll see a little, floating size panel while you're dragging. The search bar starts out at 320 pixels wide, so resize it down to 295 pixels wide (see Figure 8–29).
Figure 8–29. We grabbed the right edge of the search bar and dragged it to the left 25 pixels. Notice the tool tip on the left that helps you tell when you’ve resized the search bar to 295 pixels wide.
So far so good. Our next step is to do something about that unsightly white gap to the right of the search bar. Fortunately, there's another class whose background looks just like UISearchBar that we can use to fill in that space.
www.it-ebooks.info
262 |
CHAPTER 8: Introduction to Table Views |
The navigation bar (UINavigationBar) is normally used to contain navigation elements (and you'll learn more about that in Chapter 9), but at its heart it is, after all, a subclass of UIView. This means it can be placed on screen and resized just like anything else.
Locate a Navigation Bar in the library, and drag it into the view at the top of the table view. You'll see that it also fills the entire UIView, obscuring the search bar. Double-click the Title text and delete it, leaving just the gradient background. Now go back to the dock and select the navigation bar (deleting the text may have left the Navigation Item selected, which is not what you want). With the navigation bar selected, grab the resize handle from its left edge and drag it to the right until the navigation bar is just 25 pixels wide (the same size we carved out of the search bar). You'll see that the gap is now covered, and the same smooth gradient appears all the way across the screen (see Figure 8–30). The illusion is complete!
Figure 8–30. We inserted a navigation bar in the table view header’s view. We deleted its title and resized it to be 25 pixels wide. This looks good, and our search bar will not collide with our index.
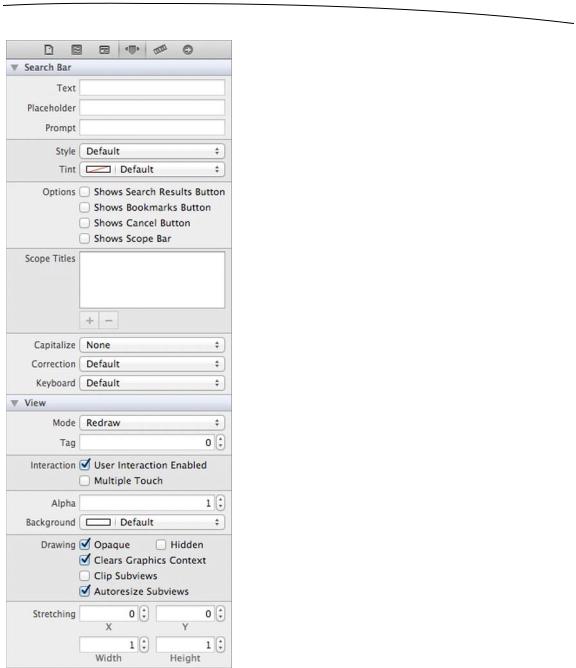
Next, control-drag from the File’s Owner icon to the table view, and select the table outlet. Repeat this procedure with the search bar, and select the search outlet. Singleclick the search bar, and go to the attributes inspector by pressing 4. It should look like Figure 8–31.
www.it-ebooks.info
CHAPTER 8: Introduction to Table Views |
263 |
Figure 8–31. The attributes inspector for the search bar
Type search in the Placeholder field. The word search will appear, very lightly, in the search field.
A bit farther down, in the Options section, you’ll find a series of checkboxes for adding a search results button or a bookmarks button at the far-right end of the search bar.
www.it-ebooks.info