

132 CHAPTER 5: Autorotation and Autosizing
}
}
else {
for (UIButton *oneBar in bars) { oneBar.hidden = YES;
}
}
}
Build and run the app again, and try it out. Tap one of the buttons, and then rotate to the other orientation. If you tapped the Foo button, you shouldn’t see a Foo button on either the landscape or the portrait orientation. This is because we looped through the elements in the outlet collection and hid them all.
NOTE: If you accidentally click both buttons, the only way to bring them back is to quit the
simulator and rerun the project. Don’t use this approach in your own applications.
Rotating Out of Here
In this chapter, you tried out three completely different approaches to supporting autorotation in your applications. You learned about autosize attributes and how to restructure your views, in code, when the iOS device rotates. You saw how to swap between two completely different views when the device rotates.
You also got your first taste of using multiple views in an application by swapping between two views from the same nib. In the next chapter, we’re going to start looking at true multiview applications.
Every application we’ve written so far has used a single view controller, and all except the last one in this chapter used a single content view. A lot of complex iOS applications, such as Mail and Contacts, are made possible only by the use of multiple views and view controllers, and we’re going to look at exactly how that works in Chapter 6.
www.it-ebooks.info
Chapter 6
Multiview Applications
Up until this point, we’ve written applications with a single view controller. While there certainly is a lot you can do with a single view, the real power of the iOS platform emerges when you can switch out views based on user input. Multiview applications come in several different flavors, but the underlying mechanism is the same, regardless of how the app may appear on the screen.
In this chapter, we’re going to focus on the structure of multiview applications and the basics of swapping content views by building our own multiview application from scratch. We will write our own custom controller class that switches between two different content views, which will give you a strong foundation for taking advantage of the various multiview controllers that Apple provides.
But before we start building our application, let’s see how multiple-view applications can be useful.
Common Types of Multiview Apps
Strictly speaking, we have worked with multiple views in our previous applications, since buttons, labels, and other controls are all subclasses of UIView, and they can all go into the view hierarchy. But when Apple uses the term view in documentation, it is generally referring to a UIView or one of its subclasses that has a corresponding view controller. These types of views are also sometimes referred to as content views, because they are the primary container for the content of your application.
The simplest example of a multiview application is a utility application. A utility application focuses primarily on a single view but offers a second view that can be used to configure the application or to provide more detail than the primary view. The Stocks application that ships with iPhone is a good example (see Figure 6–1). If you click the little i icon in the lower-right corner, the view flips over to let you configure the list of stocks tracked by the application.
D.Mark et al., Beginning iOS 5 Development
©Dave Mark, Jack Nutting, Jeff LaMarche 2011
www.it-ebooks.info
134 |
CHAPTER 6: Multiview Applications |
Figure 6–1. The Stocks application that ships with iPhone has two views: one to display the data and another to configure the stock list.
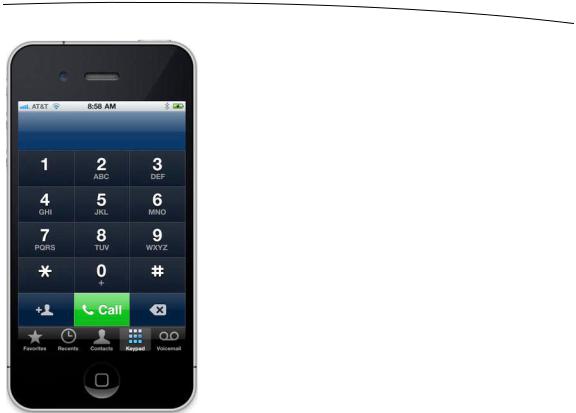
There are also several tab bar applications that ship with the iPhone, such as the Phone application (see Figure 6–2) and the Clock application. A tab bar application is a multiview application that displays a row of buttons, called the tab bar, at the bottom of the screen. Tapping one of the buttons causes a new view controller to become active and a new view to be shown. In the Phone application, for example, tapping Contacts shows a different view than the one shown when you tap Keypad.
www.it-ebooks.info
CHAPTER 6: Multiview Applications |
135 |
Figure 6–2. The Phone application is an example of a multiview application using a tab bar
Another common kind of multiview iPhone application is the navigation-based application, which features a navigation controller that uses a navigation bar to control a hierarchical series of views. The Settings application is a good example. In Settings, the first view you get is a series of rows, each row corresponding to a cluster of settings or a specific app. Touching one of those rows takes you to a new view where you can customize one particular set of settings. Some views present a list that allows you to dive even deeper. The navigation controller keeps track of how deep you go and gives you a control to let you make your way back to the previous view.
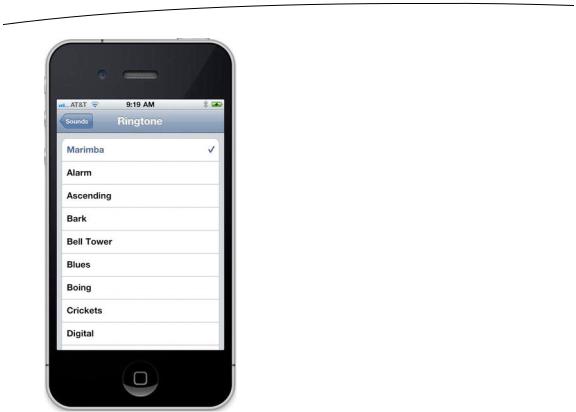
For example, if you select the Sounds preference, you’ll be presented a view with a list of sound-related options. At the top of that view is a navigation bar with a left arrow that takes you back to the previous view if you tap it. Within the sound options is a row labeled Ringtone. Tap Ringtone, and you’re taken to a new view featuring a list of ringtones and a navigation bar that takes you back to the main Sounds preference view (see Figure 6–3). A navigation-based application is useful when you want to present a hierarchy of views.
www.it-ebooks.info
136 |
CHAPTER 6: Multiview Applications |
Figure 6–3. The iPhone Settings application is an example of a multiview application using a navigation bar.
On the iPad, most navigation-based applications, such as Mail, are implemented using a split view, where the navigation elements appear on the left side of the screen, and the item you select to view or edit appears on the right. You’ll learn more about split views and other iPad-specific GUI elements in Chapter 10.
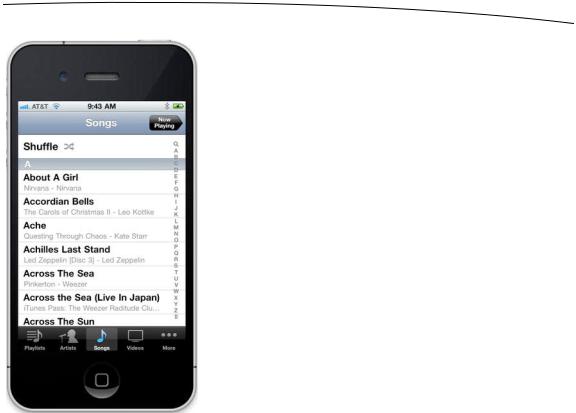
Because views are themselves hierarchical in nature, it’s even possible to combine different mechanisms for swapping views within a single application. For example, the iPhone’s iPod application uses a tab bar to switch between different methods of organizing your music, and a navigation controller and its associated navigation bar to allow you to browse your music based on that selection. In Figure 6–4, the tab bar is at the bottom of the screen, and the navigation bar is at the top of the screen.
www.it-ebooks.info
CHAPTER 6: Multiview Applications |
137 |
Figure 6–4. The iPod application uses both a navigation bar and a tab bar.
Some applications make use of a toolbar, which is often confused with a tab bar. A tab bar is used for selecting one and only one option from among two or more. A toolbar can hold buttons and certain other controls, but those items are not mutually exclusive. A perfect example of a toolbar is at the bottom of the main Safari view (see Figure 6–5). If you compare the toolbar at the bottom of the Safari view with the tab bar at the bottom of the Phone or iPod application, you’ll find the two pretty easy to tell apart. The tab bar is divided into clearly defined segments, while typically, the toolbar is not divided this way.
www.it-ebooks.info