

122 Part I Learning the Max Interface
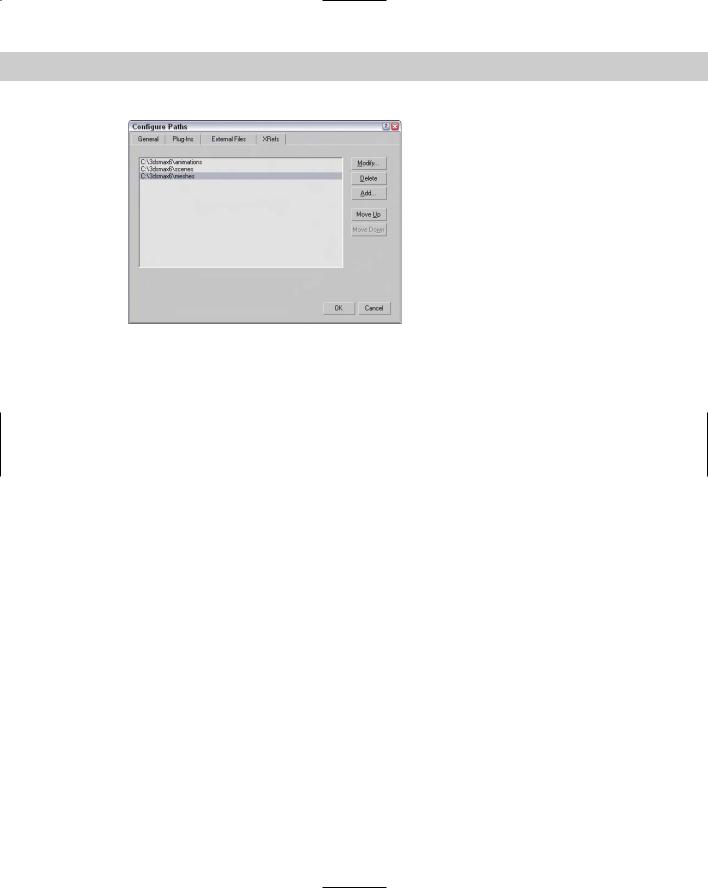
Figure 3-29: The XRefs panel in the Configure Paths dialog box lets you specify paths to be searched when an XRef cannot be located.
Max keeps track of the path of any XRefs used in a scene, but if it cannot find them, it looks at the paths designated in the XRefs panel of the Configure Paths dialog box. For projects that use lots of XRefs, populating this list with potential paths is a good idea. Paths are scanned in the order they are listed, so place the most likely paths at the top of the list.
To add a new path to the panel, click the Add button. You can also modify or delete paths in this panel with the Modify and Delete buttons.
Using the File Utilities
With all these various files floating around, Max has included several utilities that make it easier to work with them. The Utilities panel of the Command Panel includes several useful utilities for working with files. You can access these utilities by opening the Utilities panel and clicking the More button to see a list of available utilities.
Using the Asset Browser utility
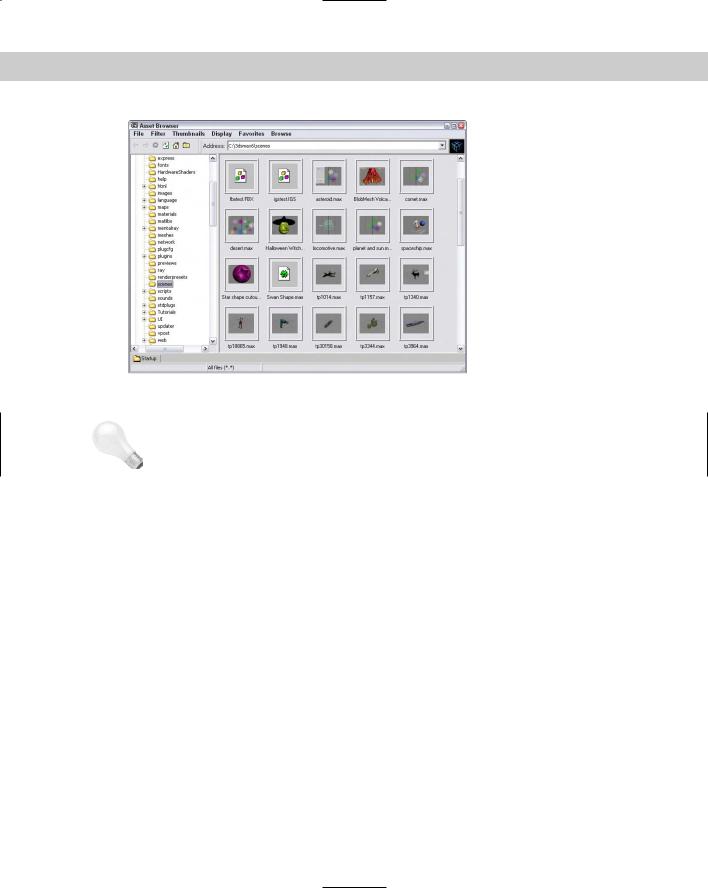
The Asset Browser utility is the first default button in the Utility panel. Clicking this button opens the Asset Browser window. The Asset Browser resembles Windows Explorer, except that it displays thumbnail images of all the supported formats contained within the current directory. Using this window, shown in Figure 3-30, you can browse through directory files and see thumbnails of images and scenes.
The supported file types include AVI, BMP, CIN, CEL, GIF, IFL, IPP, JPEG, PNG, PSD, MOV, RGB, RLA, RPF, VST, TIF, and YUV. These types are the same ones that the File View File command can open. All files with these extensions are viewable within the Asset Browser. You can select to view only a certain type of file using the Filter menu.
Chapter 3 Working with Files and XRefs 123
|
Figure 3-30: The Asset Browser window displays thumbnails of the |
|
files in the current directory. |
Tip |
Open and display the Asset Manager within a viewport by right-clicking the viewport title and |
|
choosing Views Extended Asset Manager from the pop-up menu. |
|
You can also drag and drop files from the Asset Browser window to Max. Drag a scene file and |
|
drop it on Max’s title bar to open the scene file within Max. You can drop image files onto the |
|
map buttons in the Material Editor window or drop an image file onto a viewport to make a |
|
dialog box appear, which lets you apply the image as an Environment Map or as a Viewport |
|
Background, respectively. |
|
The Asset Browser window is modeless, so you can work with the Max interface while the |
|
Asset Browser window is open. Double-clicking an image opens it full size in the Rendered |
|
Frame Window. |
|
The Asset Browser can also act as a Web browser to look at content online. When the Asset |
|
Browser first opens, a dialog box reminds you that online content may be copyrighted and |
|
cannot be used without consent from the owner. |
|
The Display menu includes three panes that you can select. The Thumbnail pane shows the |
|
files as thumbnails. You can change the size of these thumbnails using the Thumbnails menu. |
|
The Explorer pane displays the files as icons the same as you would see in Windows Explorer. |
|
The Web pane displays the Web page for the site listed in the Address field. |
|
To view Web sites, you need to be connected to the Internet. The Asset Browser can remem- |
|
ber your favorite Web sites using the Favorites menu. The Asset Browser window also |
|
includes the standard Web browser navigation buttons, such as Back, Forward, Home, |
|
Refresh, and Stop. You can also find these commands in the Browse menu. |
124 Part I Learning the Max Interface
Max keeps thumbnails of all the images you access in its cache. The cache is a directory that holds thumbnails of all the recently accessed images. Each thumbnail image points to the actual directory where the image is located. Choose File Preferences to open the Preference dialog box, in which you can specify where you want the cache directory to be located. Its default location is the abcache directory located where Max is installed. To view the cached files, choose Filter All in Cache.
Choose File Print to print the selected image.
Finding files with the Max File Finder utility
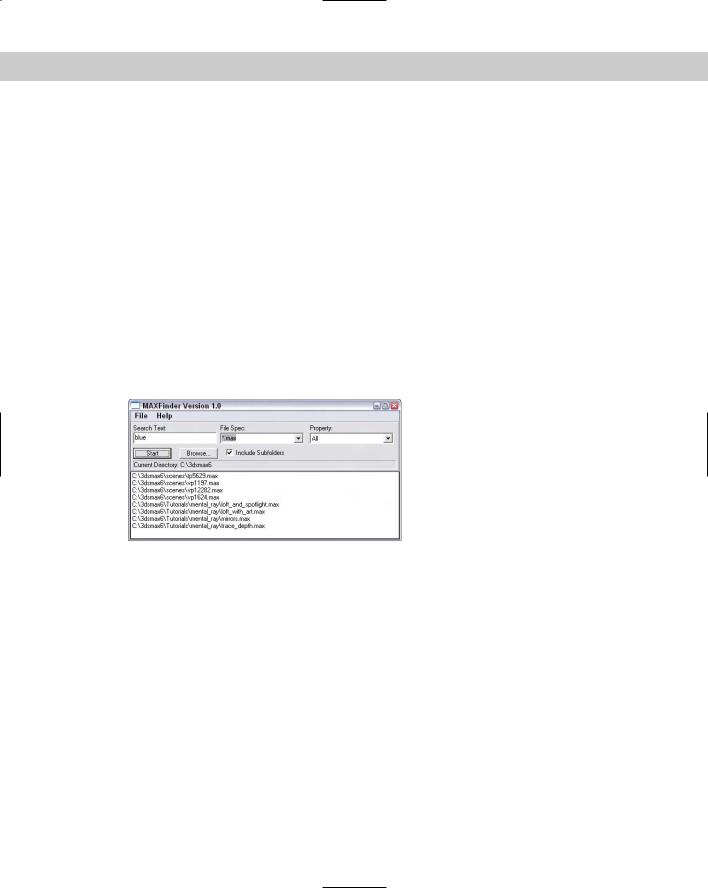
Another useful utility for locating files is the Max File Finder utility, which you get to by using the More button in the Utilities panel. When you select this utility, a rollout with a Start button appears in the Utility panel. Clicking this button opens the MAXFinder dialog box. Using MAXFinder, you can search for scene files by any of the information listed in the File Properties dialog box.
You can use the Browse button to specify the root directory to search. You can select to have the search also examine any subfolders. Figure 3-31 shows the MAXFinder dialog box locating all the scene files that include the word blue.
Figure 3-31: You can use the MAXFinder utility to search for scene files by property.
Collecting files with the Resource Collector utility
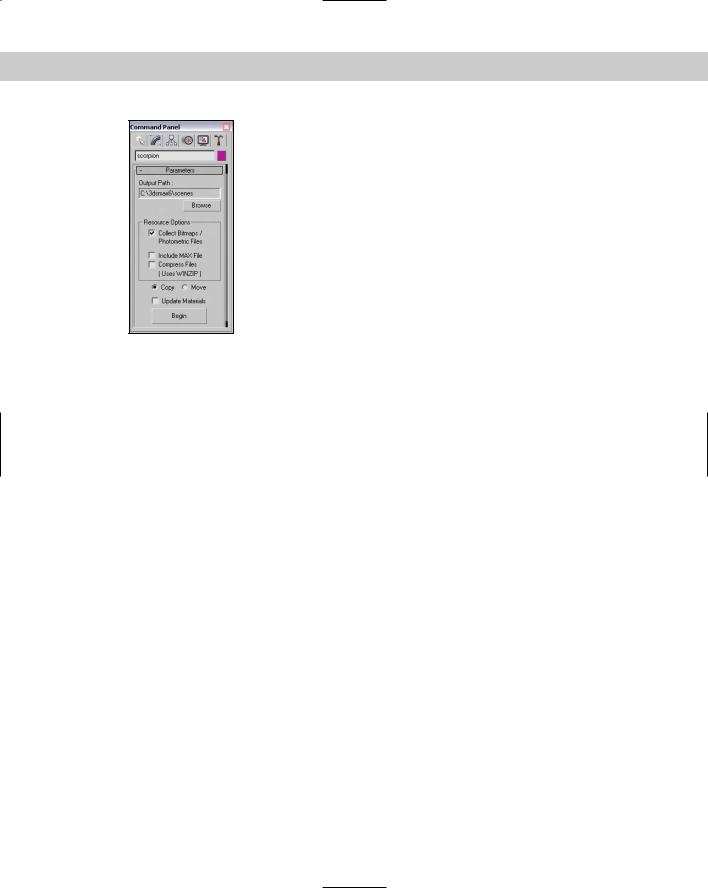
When a scene is created, image and object files can be pulled from several different locations. The Resource Collector utility helps you consolidate all these files into one location. The settings for this utility appear in the Parameters rollout in the Utility panel, as shown in Figure 3-32. The Output Path is the location where the files are collected. You can change this location using the Browse button.
The utility includes options to Collect Bitmaps, to include the Max scene file, and to Compress the files into a compressed WinZip file. The Copy option makes copies of the files, and the Move option moves the actual file into the directory specified in the Output Path field. The Update Materials option updates all material paths in the Material Editor. When you’re comfortable with the settings, click the Begin button to start the collecting.
Chapter 3 Working with Files and XRefs 125
Figure 3-32: The Resource Collector utility can compile all referenced files into a single location.
Using i-drop
To make accessing needed files from the Web even easier, Autodesk has created a technology known as i-drop that lets you drag files from i-drop-supported Web pages and drop them directly in Max. With i-drop, you can drag and drop light fixture models from a light manufacturer’s Web site into your scene without importing and positioning a file. This format makes it possible to add geometry, photometric data, and materials.
Accessing File Information
As you work with files, several dialog boxes in Max supply you with extra information about your scene. Using this information to your advantage can help you keep track of files and record valuable statistics about a scene.
Displaying scene Information
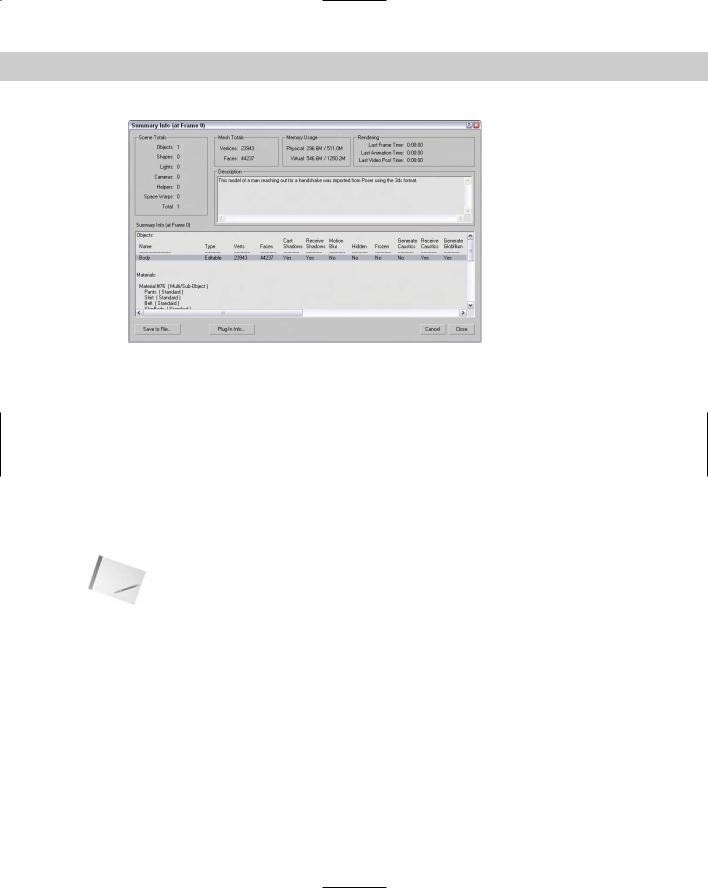
If you like to keep statistics on your files (to see whether you’ve broken the company record for the model with the greatest number of faces), you’ll find the Summary Info dialog box useful. Use the File Summary Info menu command to open a dialog box that displays all the relevant details about the current scene, such as the number of objects, lights, and cameras; the total number of vertices and faces; and various model settings, as well as a Description field where you can describe the scene. Figure 3-33 shows the Summary Info dialog box.
The Plug-In Info button on the Summary Info dialog box displays a list of all the plug-ins currently installed on your system. Even without any external plug-ins installed, the list is fairly long because many of the core features in Max are implemented as plug-ins. The Summary Info dialog box also includes a Save to File button for saving the scene summary information as a text file.
126 Part I Learning the Max Interface
Figure 3-33: The Summary Info dialog box shows all the basic information about the current scene.
|
Viewing file properties |
|
As the number of files that you have on your system increases, you’ll be wishing you had a |
|
card catalog to keep track of them all. Max has an interface that you can use to attach key- |
|
words and other descriptive information about the scene to the file. The File File Properties |
|
menu command opens the File Properties dialog box. This dialog box, shown in Figure 3-34, |
|
includes three panels: Summary, Contents, and Custom. The Summary panel holds informa- |
|
tion such as the Title, Subject, and Author of the Max file and can be useful for managing a |
|
collaborative project. The Contents panel holds information about the scene such as the total |
|
number of objects and much more. Much of this information is also found in the Summary |
|
Info dialog box. The Custom panel, also shown in Figure 3-34, includes a way to enter a cus- |
|
tom list of properties such as client information, language, and so on. |
Note |
You can also view the Properties dialog box information while working in Windows Explorer |
|
by right-clicking the file and selecting Properties. Three unique tabs are visible: General, |
|
Custom, and Summary. The Summary tab holds the file identification information, including |
|
the Title, Subject, Author, Category, Keywords, and Comments. |
Viewing files
Sometimes looking at the thumbnail of an image isn’t enough to help you decide whether you have the right image. For these cases, you can quickly load the image in question into a viewer to look at it closely. The File View Image File menu command opens the View File dialog box shown in Figure 3-35. This dialog box lets you load and view graphic and animation files using the Rendered Frame Window or the default Media Player for your system.

Chapter 3 Working with Files and XRefs 127
Figure 3-34: The File Properties dialog box contains workflow information such as the scene author, comments, and revision dates.
Figure 3-35: The View File dialog box can open an assortment of image and animation formats.
Cross- The Rendered Frame Window is discussed in more detail in Chapter 41, “Rendering Basics.”
Reference