


204 Part II Working with Objects
Cross- |
Advanced Lighting is covered in Chapter 28, “Advanced Lighting and Light Tracing,” and the |
Reference |
mental ray renderer is covered in Chapter 44, “Raytracing and mental ray.” |
|
Using the User-Defined panel
The User-Defined panel contains a simple text window. In this window, you can type any sort of information. This information is saved with the scene and can be referred to as notes about an object.
Hiding and Freezing Objects
|
Hidden and frozen objects cannot be selected, and as such they cannot be moved from their |
|
existing positions. This becomes convenient when you move objects around in the scene. If |
|
you have an object in a correct position, you can freeze it to prevent it from being moved |
|
accidentally or you can hide it from the viewports completely. A key difference between these |
|
modes is that frozen objects are still rendered, but hidden objects are not. |
|
You can hide and freeze objects in several ways. You can hide or freeze objects in a scene by |
|
selecting the Hide or Freeze options in the Object Properties dialog box. You can also hide |
|
and freeze objects using the Display Floater dialog box, which you access by choosing |
|
Tools Display Floater. |
Tip |
Several keyboard shortcuts can be used to hide specific objects. These shortcuts are toggles, |
|
so one press makes the objects disappear and another press makes them reappear. Object |
|
types that can be hidden with these shortcuts include cameras (Shift+C), geometry |
|
(Shift+G), grids (G), helpers (Shift+H), lights (Shift+L), particle systems (Shift+P), shapes |
|
(Shift+S), and Space Warps (Shift+W). |
|
The Hide option makes the selected object in the scene invisible, and the Freeze option turns |
|
the selected object dark gray (if the Show Frozen in Gray option in the Object Properties dia- |
|
log box is enabled) and doesn’t enable it to be transformed or selected. You cannot select |
|
hidden objects by clicking in the viewport. |
Note |
When you use the Zoom Extents button to resize the viewports around the current objects, |
|
hidden objects aren’t included. |
Using the Display Floater dialog box
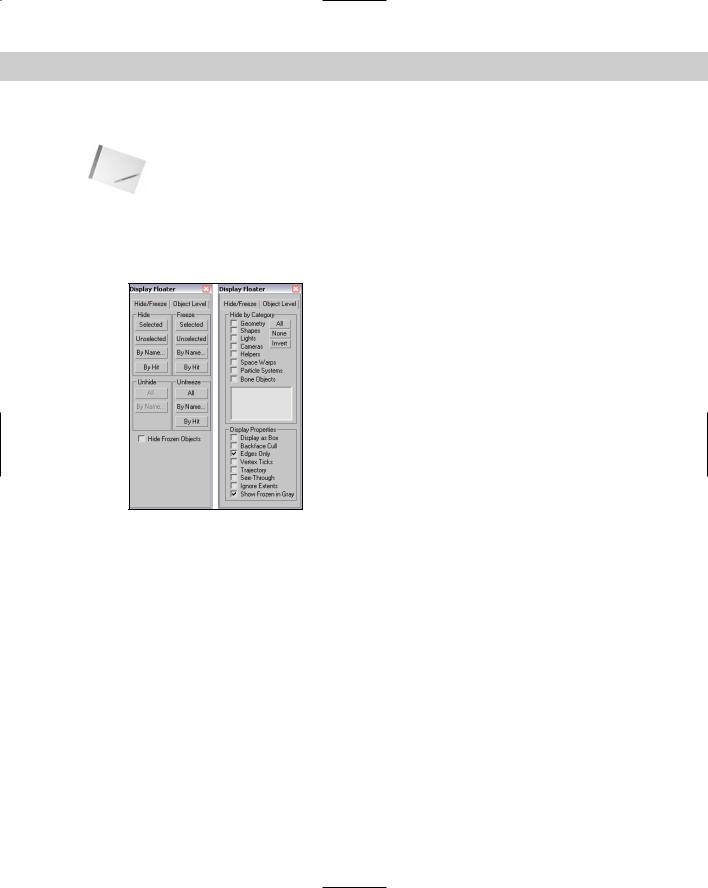
The Display Floater dialog box includes two tabs: Hide/Freeze and Object Level. The Hide/ Freeze tab splits the dialog box into two columns, one for Hide and one for Freeze. Both columns have similar buttons that let you hide or freeze Selected or Unselected objects, By Name or By Hit. The By Name button opens the Select Objects dialog box (which is labeled Hide or Freeze Objects). The By Hit option lets you click in one of the viewports to select
an object to hide or freeze. Each column also has additional buttons to unhide or unfreeze All
Chapter 6 Selecting Objects and Setting Object Properties |
205 |
objects, By Name, or in the case of Freeze, By Hit. You can also select an option to Hide Frozen Objects.
Note Other places to find the same buttons found in the Display Floater are the Hide and Freeze rollouts of the Display panel of the Command Panel and in the right-click quadmenu.
The Object Level panel of the Display Floater lets you hide objects by category such as All Lights or Cameras. You can also view and change many of the Display Properties that are listed in the Object Properties dialog box.
Figure 6-11 shows the Hide/Freeze and Object Level panels of the Display Floater dialog box.
Figure 6-11: The Display Floater dialog box includes two panels: Hide/Freeze and Object Level.
Using the Display panel
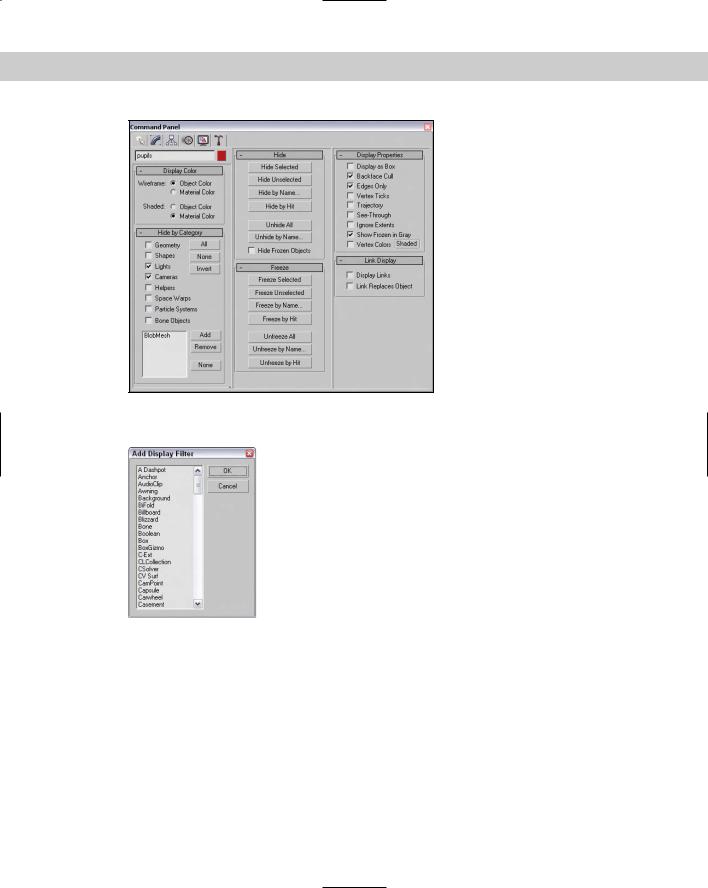
If you were to take many of the features of the Display Floater and the Object Properties dialog box and mix them together with some new features, the result would be the Display panel. You access this panel by clicking the fifth icon from the left in the Command Panel (the icon that looks like monitor screen).
The first rollout in the Display panel, shown in Figure 6-12, is the Display Color rollout. This rollout includes options for setting whether Wireframe and Shaded objects in the viewports are displayed using the Object Color or the Material Color.
The panel also includes a Hide by Category rollout. Using this rollout, you can add new categories that will appear in the Object Level panel of the Display Floater. To add a new category, click the Add button of the Hide by Category rollout. The Add Display Filter list appears, as shown in Figure 6-13. From this list, you can choose specific object categories to add to the Hide by Category list.
206 Part II Working with Objects
Figure 6-12: The Display panel includes many of the same features of the Display Floater and Object Properties dialog box.
Figure 6-13: From this dialog box, you can add new categories to the Hide by Category list.
The Display panel also includes Hide and Freeze rollouts that include the same buttons and features as the Hide/Freeze panel of the Display Floater. You also find a Display Properties rollout that is the same as the list found in the Display Floater’s Object Level panel and the Object Properties dialog box.
The Link Display rollout at the bottom of the Display panel includes options for displaying links in the viewports. Links are displayed as lines that extend from the child to its parent object. Using the Link Replaces Object option, you can hide the objects in the viewport and see only the links.
Chapter 6 Selecting Objects and Setting Object Properties |
207 |
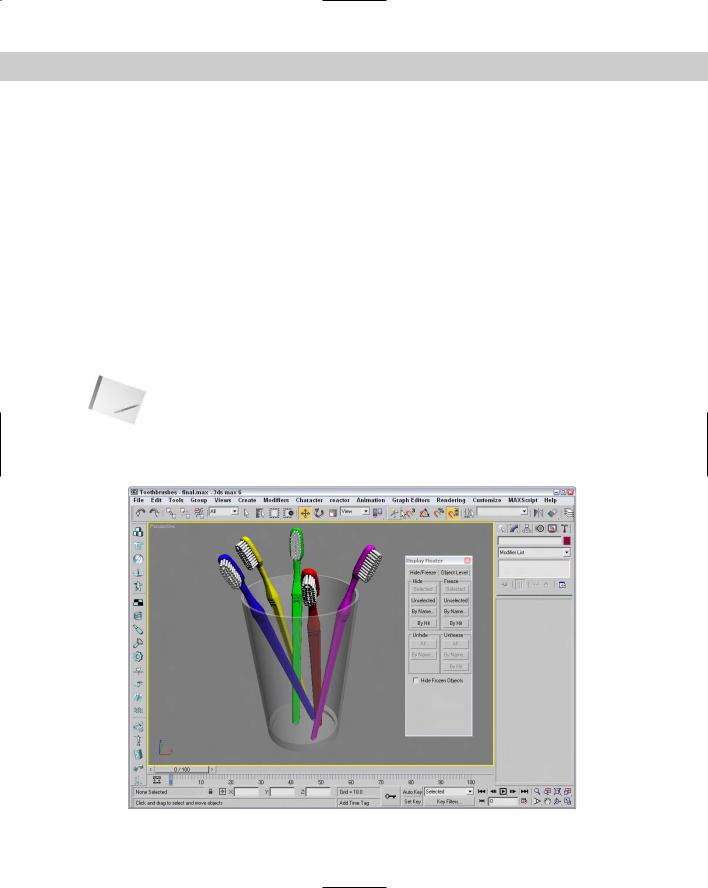
Tutorial: Hidden toothbrushes
In this example, I’ve hidden several toothbrushes in the scene and your task is to find them. To find the hidden objects, follow these steps:
1.Open the Toothbrushes.max scene file.
This file appears to only contain a single toothbrush, but there are more. See if you can find them. The toothbrush model was created by Viewpoint Datalabs. You can find it in the Chap 06 directory on the CD-ROM.
2.Locate the hidden object in the scene by opening the Display Floater (choose Tools Display Floater).
3.In the Display Floater, select the Hide/Freeze tab. In the Unhide section, click the Name button.
The Unhide Objects dialog box appears, which lists all the hidden objects in the scene.
4.Select the green toothbrush object from the list, and click the Unhide button.
The Unhide Objects dialog box closes, and the hidden objects become visible again.
Note Notice that the Display Floater is still open. That’s because it’s modeless. You don’t need to close it in order to keep working.
5. To see all the remaining objects, click the Unhide All button in the Display Floater.
Figure 6-14 shows the finished scene with all toothbrushes visible.
Figure 6-14: Toothbrushes for the whole family; just remember which color is yours.