

- •Preface
- •About This Book
- •Acknowledgments
- •Contents at a Glance
- •Contents
- •Relaxing at the Beach
- •Dressing the Scene
- •Animating Motion
- •Rendering the Final Animation
- •Summary
- •The Interface Elements
- •Using the Menus
- •Using the Toolbars
- •Using the Viewports
- •Using the Command Panel
- •Using the Lower Interface Bar Controls
- •Interacting with the Interface
- •Getting Help
- •Summary
- •Understanding 3D Space
- •Using the Viewport Navigation Controls
- •Configuring the Viewports
- •Working with Viewport Backgrounds
- •Summary
- •Working with Max Scene Files
- •Setting File Preferences
- •Importing and Exporting
- •Referencing External Objects
- •Using the File Utilities
- •Accessing File Information
- •Summary
- •Customizing Modify and Utility Panel Buttons
- •Working with Custom Interfaces
- •Configuring Paths
- •Selecting System Units
- •Setting Preferences
- •Summary
- •Creating Primitive Objects
- •Exploring the Primitive Object Types
- •Summary
- •Selecting Objects
- •Setting Object Properties
- •Hiding and Freezing Objects
- •Using Layers
- •Summary
- •Cloning Objects
- •Understanding Cloning Options
- •Mirroring Objects
- •Cloning over Time
- •Spacing Cloned Objects
- •Creating Arrays of Objects
- •Summary
- •Working with Groups
- •Building Assemblies
- •Building Links between Objects
- •Displaying Links and Hierarchies
- •Working with Linked Objects
- •Summary
- •Using the Schematic View Window
- •Working with Hierarchies
- •Setting Schematic View Preferences
- •Using List Views
- •Summary
- •Working with the Transformation Tools
- •Using Pivot Points
- •Using the Align Commands
- •Using Grids
- •Using Snap Options
- •Summary
- •Exploring the Modifier Stack
- •Exploring Modifier Types
- •Summary
- •Exploring the Modeling Types
- •Working with Subobjects
- •Modeling Helpers
- •Summary
- •Drawing in 2D
- •Editing Splines
- •Using Spline Modifiers
- •Summary
- •Creating Editable Mesh and Poly Objects
- •Editing Mesh Objects
- •Editing Poly Objects
- •Using Mesh Editing Modifiers
- •Summary
- •Introducing Patch Grids
- •Editing Patches
- •Using Modifiers on Patch Objects
- •Summary
- •Creating NURBS Curves and Surfaces
- •Editing NURBS
- •Working with NURBS
- •Summary
- •Morphing Objects
- •Creating Conform Objects
- •Creating a ShapeMerge Object
- •Creating a Terrain Object
- •Using the Mesher Object
- •Working with BlobMesh Objects
- •Creating a Scatter Object
- •Creating Connect Objects
- •Modeling with Boolean Objects
- •Creating a Loft Object
- •Summary
- •Understanding the Various Particle Systems
- •Creating a Particle System
- •Using the Spray and Snow Particle Systems
- •Using the Super Spray Particle System
- •Using the Blizzard Particle System
- •Using the PArray Particle System
- •Using the PCloud Particle System
- •Using Particle System Maps
- •Controlling Particles with Particle Flow
- •Summary
- •Understanding Material Properties
- •Working with the Material Editor
- •Using the Material/Map Browser
- •Using the Material/Map Navigator
- •Summary
- •Using the Standard Material
- •Using Shading Types
- •Accessing Other Parameters
- •Using External Tools
- •Summary
- •Using Compound Materials
- •Using Raytrace Materials
- •Using the Matte/Shadow Material
- •Using the DirectX 9 Shader
- •Applying Multiple Materials
- •Material Modifiers
- •Summary
- •Understanding Maps
- •Understanding Material Map Types
- •Using the Maps Rollout
- •Using the Map Path Utility
- •Using Map Instances
- •Summary
- •Mapping Modifiers
- •Using the Unwrap UVW modifier
- •Summary
- •Working with Cameras
- •Setting Camera Parameters
- •Summary
- •Using the Camera Tracker Utility
- •Summary
- •Using Multi-Pass Cameras
- •Creating Multi-Pass Camera Effects
- •Summary
- •Understanding the Basics of Lighting
- •Getting to Know the Light Types
- •Creating and Positioning Light Objects
- •Viewing a Scene from a Light
- •Altering Light Parameters
- •Working with Photometric Lights
- •Using the Sunlight and Daylight Systems
- •Using Volume Lights
- •Summary
- •Selecting Advanced Lighting
- •Using Local Advanced Lighting Settings
- •Tutorial: Excluding objects from light tracing
- •Summary
- •Understanding Radiosity
- •Using Local and Global Advanced Lighting Settings
- •Working with Advanced Lighting Materials
- •Using Lighting Analysis
- •Summary
- •Using the Time Controls
- •Working with Keys
- •Using the Track Bar
- •Viewing and Editing Key Values
- •Using the Motion Panel
- •Using Ghosting
- •Animating Objects
- •Working with Previews
- •Wiring Parameters
- •Animation Modifiers
- •Summary
- •Understanding Controller Types
- •Assigning Controllers
- •Setting Default Controllers
- •Examining the Various Controllers
- •Summary
- •Working with Expressions in Spinners
- •Understanding the Expression Controller Interface
- •Understanding Expression Elements
- •Using Expression Controllers
- •Summary
- •Learning the Track View Interface
- •Working with Keys
- •Editing Time
- •Editing Curves
- •Filtering Tracks
- •Working with Controllers
- •Synchronizing to a Sound Track
- •Summary
- •Understanding Your Character
- •Building Bodies
- •Summary
- •Building a Bones System
- •Using the Bone Tools
- •Using the Skin Modifier
- •Summary
- •Creating Characters
- •Working with Characters
- •Using Character Animation Techniques
- •Summary
- •Forward versus Inverse Kinematics
- •Creating an Inverse Kinematics System
- •Using the Various Inverse Kinematics Methods
- •Summary
- •Creating and Binding Space Warps
- •Understanding Space Warp Types
- •Combining Particle Systems with Space Warps
- •Summary
- •Understanding Dynamics
- •Using Dynamic Objects
- •Defining Dynamic Material Properties
- •Using Dynamic Space Warps
- •Using the Dynamics Utility
- •Using the Flex Modifier
- •Summary
- •Using reactor
- •Using reactor Collections
- •Creating reactor Objects
- •Calculating and Previewing a Simulation
- •Constraining Objects
- •reactor Troubleshooting
- •Summary
- •Understanding the Max Renderers
- •Previewing with ActiveShade
- •Render Parameters
- •Rendering Preferences
- •Creating VUE Files
- •Using the Rendered Frame Window
- •Using the RAM Player
- •Reviewing the Render Types
- •Using Command-Line Rendering
- •Creating Panoramic Images
- •Getting Printer Help
- •Creating an Environment
- •Summary
- •Creating Atmospheric Effects
- •Using the Fire Effect
- •Using the Fog Effect
- •Summary
- •Using Render Elements
- •Adding Render Effects
- •Creating Lens Effects
- •Using Other Render Effects
- •Summary
- •Using Raytrace Materials
- •Using a Raytrace Map
- •Enabling mental ray
- •Summary
- •Understanding Network Rendering
- •Network Requirements
- •Setting up a Network Rendering System
- •Starting the Network Rendering System
- •Configuring the Network Manager and Servers
- •Logging Errors
- •Using the Monitor
- •Setting up Batch Rendering
- •Summary
- •Compositing with Photoshop
- •Video Editing with Premiere
- •Video Compositing with After Effects
- •Introducing Combustion
- •Using Other Compositing Solutions
- •Summary
- •Completing Post-Production with the Video Post Interface
- •Working with Sequences
- •Adding and Editing Events
- •Working with Ranges
- •Working with Lens Effects Filters
- •Summary
- •What Is MAXScript?
- •MAXScript Tools
- •Setting MAXScript Preferences
- •Types of Scripts
- •Writing Your Own MAXScripts
- •Learning the Visual MAXScript Editor Interface
- •Laying Out a Rollout
- •Summary
- •Working with Plug-Ins
- •Locating Plug-Ins
- •Summary
- •Low-Res Modeling
- •Using Channels
- •Using Vertex Colors
- •Rendering to a Texture
- •Summary
- •Max and Architecture
- •Using AEC Objects
- •Using Architectural materials
- •Summary
- •Tutorial: Creating Icy Geometry with BlobMesh
- •Tutorial: Using Caustic Photons to Create a Disco Ball
- •Summary
- •mental ray Rendering System
- •Particle Flow
- •reactor 2.0
- •Schematic View
- •BlobMesh
- •Spline and Patch Features
- •Import and Export
- •Shell Modifier
- •Vertex Paint and Channel Info
- •Architectural Primitives and Materials
- •Minor Improvements
- •Choosing an Operating System
- •Hardware Requirements
- •Installing 3ds max 6
- •Authorizing the Software
- •Setting the Display Driver
- •Updating Max
- •Moving Max to Another Computer
- •Using Keyboard Shortcuts
- •Using the Hotkey Map
- •Main Interface Shortcuts
- •Dialog Box Shortcuts
- •Miscellaneous Shortcuts
- •System Requirements
- •Using the CDs with Windows
- •What’s on the CDs
- •Troubleshooting
- •Index

578 Part IV Materials and Maps
Figure 20-14: A dolphin over the water with applied materials
Using External Tools
Several external tools can be valuable when you create material textures. These tools can include an image editing program like Photoshop, a digital camera or camcorder, and a scanner. With these tools, you can create or capture images that can be applied as maps to a material using the map channels.
Once the image is created or captured, you can apply it to a material by clicking a map shortcut button or by selecting a map in the Maps rollout. This opens the Material/Map Browser, where you can select the Bitmap map type and load the image file from the file dialog box that appears.
Creating material textures using Photoshop
When you begin creating texture images, Photoshop will become your best friend. Using Photoshop’s filters enables you to quickly create a huge variety of textures that will add life and realism to your textures.
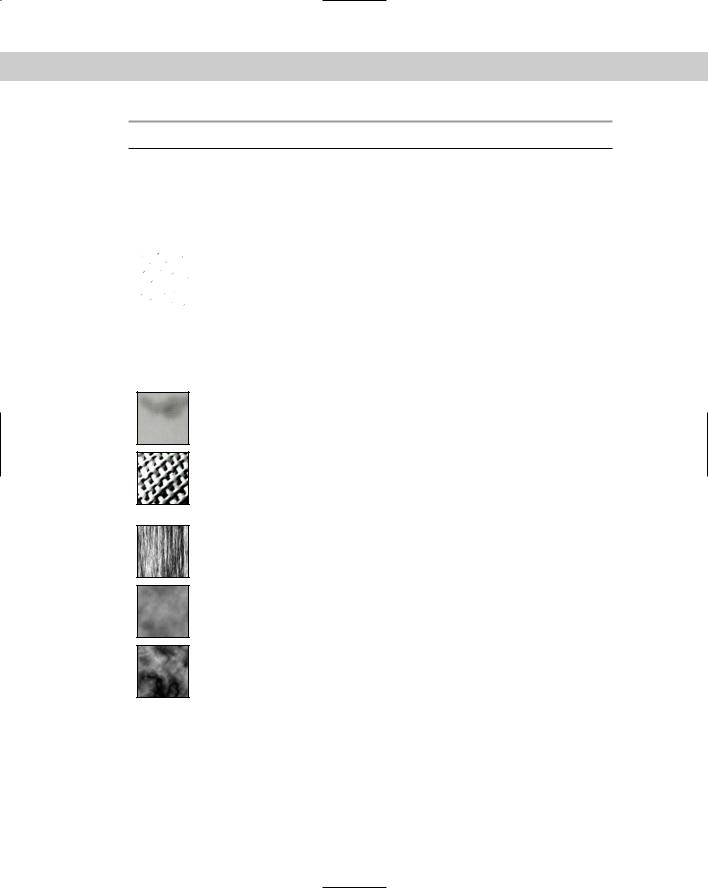
Table 20-1 is a recipe book of several common textures that you can create in Photoshop. The table provides only a quick sampling of some simple textures. Many other features and effects are possible with Photoshop.
Chapter 20 Creating Simple Materials 579
Table 20-1: Photoshop Texture Recipes
|
Texture |
Technique |
Create in Photoshop |
Apply in Max as |
|
|
|
|
|
|
|
Faded color |
Decrease image |
Diffuse map |
|
|
|||
|
|
|
saturation value |
|
|
|
|
(Image Adjustments |
|
|
|
|
Hue/Saturation) by |
|
|
|
|
20-30%. |
|
|
|
|
|
|
|
|
Surface scratches |
Apply Chalk & Charcoal |
Bump map |
|
|
|||
|
|
|
filter (Filter Sketch |
|
|
|
|
Chalk & Charcoal) with |
|
|
|
|
a Stroke Pressure of 2, |
|
|
|
|
to a blank white image, |
|
|
|
|
|
|
|
|
|
then apply the Film Grain |
|
|
|
|
(Filter Artistic |
|
|
|
|
Film Grain) filter with |
|
|
|
|
maximum Grain and |
|
|
|
|
Intensity. |
|
Adding stains |
Use the Dodge and Burn |
to fabric |
tools to add stains to a |
|
fabric bitmap. |
Surface relief |
Apply Dark Strokes filter |
texture |
(Filter Brush Strokes |
|
Dark Strokes) to a texture |
|
bitmap, save image as a |
|
separate bump image. |
Diffuse map
Diffuse map (original texture), Bump map (Dark Strokes version)
Planar hair |
Apply the Fibers filter |
Diffuse, Bump, and |
|
(Filter Render Fibers). |
Specular maps |
Clouds or fog |
Apply the Clouds filter |
Diffuse map |
background |
(Filter Render Clouds). |
|
Nebula or |
Apply the Difference |
Diffuse map |
plasma cloud |
Clouds filter (Filter |
|
|
Render Difference |
|
|
Clouds). Then, switch |
|
|
black and white color |
|
|
positions and apply the |
|
|
Difference Clouds |
|
|
filter again. |
|
Continued
580 Part IV Materials and Maps
Table 20-1 (continued)
|
Texture |
Technique |
Create in Photoshop |
Apply in Max as |
|
|
|
|
|
|
|
Rock wall |
Apply the Clouds filter |
Diffuse and Bump maps |
|
|
|||
|
|
|
(Filter Render Clouds). |
|
|
|
|
Then, apply the Bas |
|
|
|
|
Relief (Filter Sketch |
|
|
|
|
Bas Relief) filter. |
|
|
|
|
|
|
|
|
Burlap sack |
Apply the Add Noise filter |
Diffuse and Bump maps |
|
|
|||
|
|
|
(Filter Noise Add |
|
|
|
|
Noise) followed by the |
|
|
|
|
Texturizer filter (Filter |
|
|
|
|
Texture Texturizer) with |
|
|
|
|
the Burlap setting. |
|
|
|
Tile floor |
Apply the Add Noise filter |
Diffuse map |
|
|
|||
|
|
|
(Filter Noise Add |
|
|
|
|
Noise) followed by the |
|
|
|
|
Stained Glass filter |
|
|
|
|
(Filter Texture |
|
|
|
|
|
|
|
|
|
Stained Glass). |
|
|
|
Brushed metal |
Apply the Add Noise filter |
Diffuse and Bump maps |
|
|
|||
|
|
|
(Filter Noise Add |
|
|
|
|
Noise) followed by the |
|
|
|
|
Angled Strokes filter |
|
|
|
|
(Filter Brush Strokes |
|
|
|
|
|
|
|
|
|
Angled Strokes). |
|
|
|
Frosted glass |
Apply the Clouds filter |
Diffuse map |
|
|
|||
|
|
|
(Filter Render Clouds), |
|
|
|
|
then apply the Glass |
|
|
|
|
(Filter Distort Glass) |
|
|
|
|
filter and select the |
|
|
|
|
Frosted option. |
|
|
|
Pumice stone |
Apply the Add Noise filter |
Diffuse and Bump maps |
|
|
|||
|
|
|
(Filter Noise Add |
|
|
|
|
Noise) followed by the |
|
|
|
|
Chalk & Charcoal filter |
|
|
|
|
(Filter Sketch |
|
|
|
|
|
|
|
|
|
Chalk & Charcoal). |
|
|
|
Planet islands |
Apply the Difference |
Diffuse and Shininess maps |
|
|
|||
|
|
|
Clouds filter (Filter |
|
|
|
|
Render Difference |
|
|
|
|
Clouds), then apply the |
|
|
|
|
Note Paper (Filter |
|
|
|
|
|
|
|
|
|
Sketch Note Paper) filter. |
|

Chapter 20 Creating Simple Materials 581
|
Texture |
Technique |
Create in Photoshop |
Apply in Max as |
|
|
|
|
|
|
|
Netting |
Apply the Mosaic Tiles |
Diffuse and Opacity maps |
|
|
|||
|
|
|
filter (Filter Texture |
|
|
|
|
Mosaic Tiles) followed by |
|
|
|
|
the Stamp (Filter |
|
|
|
|
Sketch Stamp) filter. |
|
|
|
|
|
|
|
|
Leopard skin |
Apply the Grain filter |
Diffuse and Opacity maps |
|
|
|||
|
|
|
(Filter Texture Grain) |
|
|
|
|
with the Clumped option |
|
|
|
|
followed by the Poster |
|
|
|
|
Edges (Filter Artistic |
|
|
|
|
Poster Edges) filter applied |
|
|
|
|
twice. |
|
|
|
|
|
|
Capturing digital images
Digital cameras and camcorders are inexpensive enough that they really are a necessary item when creating material textures. Although Photoshop can be used to create many unique and interesting textures, a digital image of a riverbed stones will be much more realistic than anything that can be created with Photoshop. The world is full of interesting textures that can be used as textures.
Avoiding specular highlights
Nothing can ruin a good texture taken with a digital camera faster than the camera’s flash. Taking a picture of a highly reflective surface like the surface of a table can reflect back to the camera, thereby ruining the texture.
There are several ways to counter this. One is to block the flash and make sure there is enough ambient light to capture the texture. Taking pictures outside can help with this because they don’t need the flash. Another technique is to take the image at an angle, but this might skew the texture. A third technique is to take the image and then to crop away the highlights that are unwanted.
Adjusting brightness
Digital images that are taken with a digital camera are typically pre-lit, meaning that they already have a already have light source lighting them. When these pre-lit images are added to a Max scene that includes lights, the image gets a double dose of light that will typically wash out the images.
You can remedy this problem by adjusting the brightness of the image prior to loading it into Max. For images taken in normal indoor light, you’ll want to decrease the brightness value by 10–20%. For outdoor scenes in full sunlight, you may want to decrease the brightness even more.
You can find the Brightness/Contrast control in Photoshop in the Image Adjustments Brightness/Contrast menu.

582 Part IV Materials and Maps
Scanning images
In addition to taking digital images with a digital camera, you can scan images from other sources. For example, the maple leaf that was modeled using patches in Chapter 15 was scanned from a real leaf found in my yard.
Caution |
Most magazine and book images are copyrighted and cannot be scanned and used without |
|
permission. |
Tutorial: Creating a fishing net
Some modeling tasks can be solved more easily with a material than with geometry changes. A fishing net is a good example. Using geometry to create the holes in the net would be tricky, but a simple Opacity map makes this complex modeling task easy.
To create a fishing net, follow these steps:
1.Before working in Max, create the needed texture in Photoshop. In Photoshop, select File New, enter the dimensions of 512 pixels×512 pixels in the New dialog box, and click Ok to create a new image file.
2.Select the Filter Texture Mosaic Tiles menu command to apply the Mosaic Tiles filter. Set the Tile Size to 30 and the Grout Width to 3 and click the OK button. Then select the Filter Sketch Stamp menu command to apply the Stamp filter with a Light/Dark Balance value of 49 and a Smooth value of 50.
3.Use the File Save As menu command and save the file as Netting.tif. A copy of this file is available in the Chapter 20 directory on the CD-ROM.
4.Open the Fish net.max file from the Chapter 20 directory on the CD-ROM. This file includes a fishing net model created by stretching half a sphere with the Shell modifier applied.
5.Select the Rendering Material Editor menu command (or press the M key) to open the Material Editor and select the first sample slot. Name the material net.
6.Click the map shortcut to the right of the Opacity value in the Blinn Basic Parameters rollout and double-click the Bitmap map type. This opens a file dialog box where you can select the netting texture. Then drag the material from its sample slot to the net object in the viewports.
7.If you were to render the viewport, the net would look rather funny because the black lines are transparent instead of the white spaces. To fix this, open the Output rollout and enable the Invert option. This inverts the texture image.
Note |
Although you can enable the Show Map in Viewport button in the Material Editor, the trans- |
|
parency is not displayed until you render the scene. |
Figure 20-15 shows the rendered net.