

Chapter 1 Finding Your Way — Exploring the Max Interface |
37 |
The Help menu
The Help menu is a valuable resource that provides access to reference materials and tutorials. The New Features Guide, User Reference, and MAXScript Reference are comprehensive help systems that work like a Web browser. The Tutorial command loads the tutorials, which offer a chance to gain valuable experience.
The Hotkey Map displays an interactive interface for learning all the keyboard shortcuts. Additional Help presents help systems for any external plug-ins that are loaded. The 3ds max on the Web options (Online Support, Updates, Resources, and Partners) automatically opens a Web browser and loads the Discreet Support Web pages or looks for updates.
The Authorize 3ds max command lets you enter an authorization number to authorize the software. The About 3ds max command opens the About dialog box. This dialog box displays the serial number and current display driver.
Cross- |
Most of the Help menu commands are covered at the end of this chapter in the section titled |
Reference |
“Getting Help.” |
|
Using the Toolbars
Now that you’ve learned the menu two-step, it is time for the toolbar one-step. The main toolbar appears by default directly under the menus at the top of the Max window; the reactor toolbar appears docked to the left edge of the interface. Using toolbars is one of the most convenient ways to execute commands because most commands require only a single click.
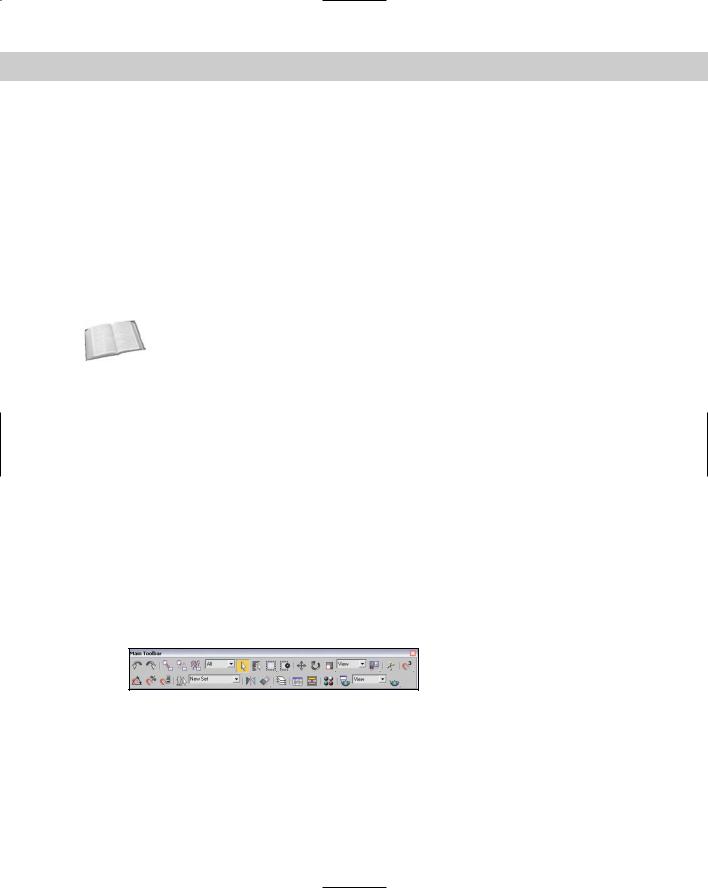
You can make any docked toolbar a floating toolbar by clicking and dragging the two vertical lines on the left (or top) end of the toolbar away from the interface edge. After you separate it from the window, you can resize the floating toolbar by dragging on its edges or corners. You can then drag and dock it to any of the window edges or double-click on the toolbar title to automatically dock the toolbar to its latest location. Figure 1-2 shows the main toolbar as a floating panel.
If you right-click on any toolbar away from the buttons, you can access a pop-up menu that includes options to Dock, Float, Customize, show, or hide any of the toolbars or the Command Panel. You can also show or hide all floating toolbars or the main toolbar with the Customize Show UI menu command. The main toolbar can be hidden with the Alt+6 keyboard shortcut.
Figure 1-2: The main toolbar includes buttons and drop-down lists for controlling many of the most popular Max functions.
All icon buttons (including those found in toolbars, the Command Panel, and other dialog boxes and windows) include tooltips, which are identifying text labels. If you hold the mouse
38 |
Part I Learning the Max Interface |
cursor over an icon button, the tooltip label appears. This feature is useful for identifying buttons. If you can’t remember what a specific button does, hold the cursor over the top of it and the tooltip gives you its name.
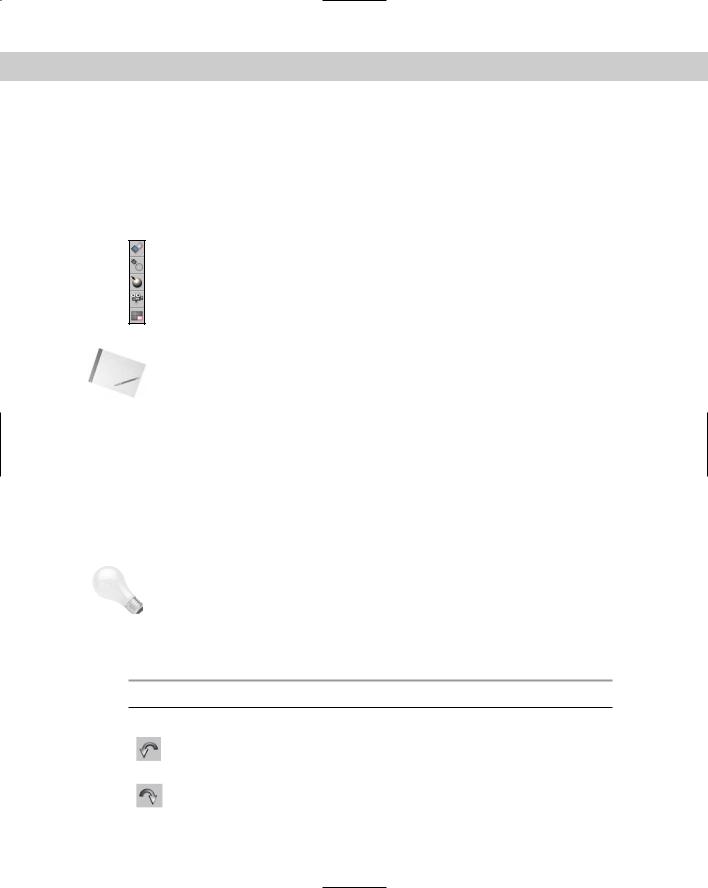
All toolbar buttons with a small triangle in the lower-right corner are flyouts. A flyout is a single toolbar button that expands to reveal additional buttons. Click and hold on the flyout to reveal the additional icons, and drag to select one. Figure 1-3 shows the flyout for the Align button on the main toolbar.
Figure 1-3: Flyout menus bundle several toolbar buttons together.
Note If you’re looking for the Tab Panel, you won’t find it. The Tab Panel, although it was a good idea, never really caught on and has been removed from this version of Max. Its former keyboard shortcut, Y, hasn’t been reused, so if you often use a command that needs a shortcut, the letter Y is available.
Starting with the main toolbar
On smaller resolution screens, the main toolbar is too long to be entirely visible. To see the entire main toolbar, you need to set your monitor resolution to be at least 1280 pixel wide. To scroll the toolbar to see the end, position the cursor on the toolbar away from the buttons, such as underneath one of the drop-down lists (the cursor changes to a hand), then click and drag the toolbar in either direction. Using the hand cursor to scroll also works in the Command Panel, Material Editor, and any other place where the panel exceeds the given space.
Tip |
The easiest way to scroll the main toolbar is to drag with the middle mouse button. |
Table 1-4 lists the controls found in the main toolbar. Buttons with flyouts are separated with commas.
Table 1-4: Main Toolbar Buttons
Toolbar Button |
Name |
Description |
|
|
|
|
Undo (Ctrl+Z) |
Removes the last performed command. You |
|
|
can set the levels of Undo in the Preferences |
|
|
dialog box. |
|
Redo (Ctrl+Y) |
Brings back the last command that was |
|
|
undone. |
Chapter 1 Finding Your Way — Exploring the Max Interface |
39 |
Toolbar Button |
Name |
Description |
|
|
|
|
Select and Link |
Establishes links between objects. |
|
Unlink Selection |
Breaks links between objects. |
|
Bind to Space |
Assigns objects to be modified by a |
|
Warp |
space warp. |
|
Selection Filter |
Limits the type of objects that can be |
|
drop-down list |
selected. |
|
Select Object (Q) |
Chooses an object. |
|
Select by Name (H) |
Opens a dialog box for selecting objects |
|
|
by name. |
|
Rectangular |
Determines the shape used for selecting |
|
Selection Region, |
objects. |
|
Circular Selection |
|
|
Region, Fence |
|
|
Selection Region, |
|
|
Lasso Selection |
|
|
Region (Ctrl+F |
|
|
to cycle) |
|
|
Window/ |
Specifies whether an object must be crossed |
|
Crossing Toggle |
or windowed to be selected. |
|
Select and |
Selects an object and allows positional |
|
Move (W) |
translations. |
|
Select and |
Selects an object and allows rotational |
|
Rotate (E) |
transforms. |
|
Select and Uniform |
Selects an object and allows scaling |
|
Scale, Select and |
transforms using different methods. |
|
Non-Uniform Scale, |
|
|
Select and Squash |
|
|
(R to cycle) |
|
|
Reference |
Specifies the coordinate system used for |
|
Coordinate System |
transforms. |
|
drop-down list |
|
|
Use Pivot Point |
Specifies the center about which rotations |
|
Center, Use |
are completed. |
|
Selection Center, |
|
|
Use Transform |
|
|
Coordinate Center |
|
|
Select and |
Selects an object and allows parameter |
|
Manipulate |
manipulation via a manipulator. |
Continued
40 |
Part I Learning the Max Interface |
Table 1-4 (continued)
Toolbar Button |
Name |
Description |
|
|
|
|
Snap Toggle 2D, |
Specifies the snap mode. 2D snaps only to |
|
Snap Toggle 2.5D, |
the active construction grid, 2.5D snaps to |
|
Snap Toggle 3D (S) |
the construction grid or to geometry |
|
|
projected from the grid, and 3D snaps to |
|
|
anywhere in 3D space. |
|
Angle Snap |
Causes rotations to snap to specified angles. |
|
Toggle (A) |
|
|
Percent Snap |
Causes scaling to snap to specified |
|
(Shift+Ctrl+P) |
percentages. |
|
Spinner Snap Toggle |
Determines the amount a spinner value |
|
|
changes with each click. |
|
Named Selection Sets |
Opens a dialog box for creating and |
|
|
managing selection sets. |
|
Named Selection |
Lists and allows you to select a set of named |
|
Sets drop-down list |
objects. |
|
Mirror Selected |
Creates a mirrored copy of the selected |
|
Objects |
object. |
|
Align (Alt+A), |
Opens the alignment dialog box for |
|
Normal Align (Alt+N), |
positioning objects, allows objects to be |
|
Place Highlight |
aligned by their normals, determines the |
|
(Ctrl+H), Align to |
location of highlights, or aligns object to a |
|
Camera, Align to View |
camera or view. |
|
Layer Manager |
Opens the Layer Manager interface where |
|
|
you can work with layers. |
|
Open Curve Editor |
Opens the Function Curves Editor. |
|
Open Schematic View |
Opens the Schematic View window. |
|
Material Editor (M) |
Opens the Material Editor window. |
|
Render Scene (F10) |
Opens the Render Scene dialog box for |
|
|
setting rendering options. |
|
Render Type |
Selects the area or objects to render. |
|
drop-down list |
|
|
Quick Render |
Produces a quick test rendering of the current |
|
(Production), Quick |
viewport without opening the Render Scene |
|
Render (ActiveShade) |
dialog box. |
|
|
|
Chapter 1 Finding Your Way — Exploring the Max Interface |
41 |
New |
The only change in the main toolbar was to move the Keyboard Shortcut Override Toggle |
Feature |
button to the Extras floating toolbar and to add the Layer Manager button. The Selection |
|
|
|
Filter drop-down list and the Select and Manipulate buttons changed position and the Quick |
|
Render (Draft) button was dropped. Everything else is unchanged. Thanks, Discreet. |
Viewing the default floating toolbars
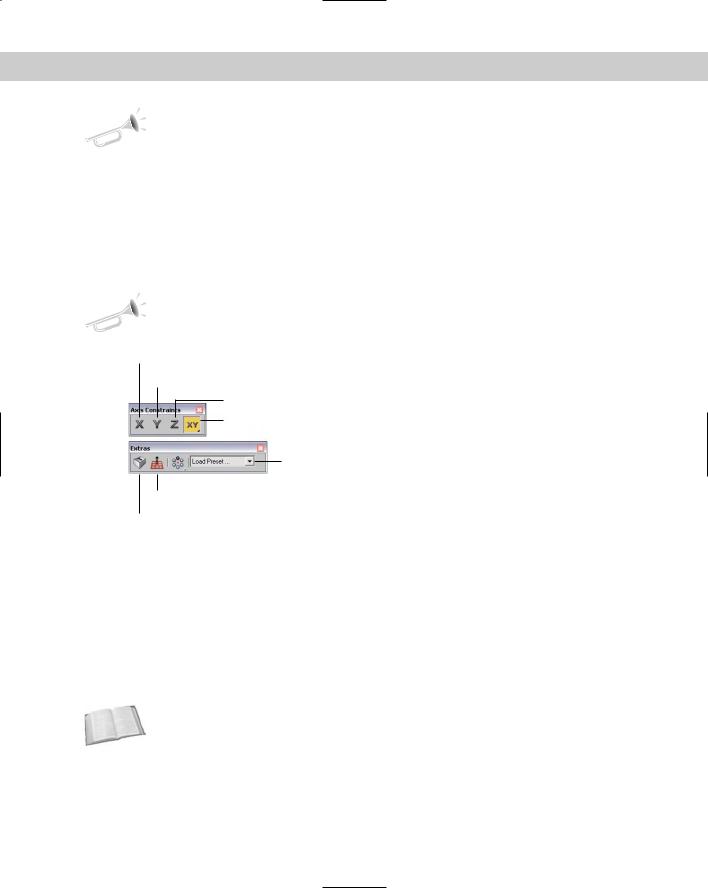
If you select the Customize Show UI Show Floating Toolbars menu command, three more toolbars appear. These are floating toolbars. You can also make them appear by selecting them from the toolbar right-click pop-up menu. The floating toolbars are Axis Constraints, Layers, and Extras and Reactor, but the Reactor toolbar is docked to the left side of the interface by default. Figure 1-4 shows the Axis Constraints and Extras toolbars.
New |
The Extras and reactor toolbars are new to 3ds max 6. |
Feature |
|
Restrict to X
Restrict to Y
Restrict to Z
Restrict to XY, YZ, XZ Plane
Render Presets drop-down list
 Array, Snapshot, Spacing Tool
AutoGrid
Keyboard Shortcut Override Toggle
Figure 1-4: The Axis Constraints and Extras toolbars are available as floating toolbars.
The Axis Constraints toolbar includes buttons for restricting transformations to the X (F5), Y (F6), or Z (F7) axes or to restrict transformations to a single plane: XY, YZ, or ZX (F8 to cycle). The Extras toolbar includes the Keyboard Shortcut Override Toggle, AutoGrid, and a flyout button for the Array, Snapshot, and Spacing Tool (Shift+I) dialog boxes. It also includes the Rendering Presets drop-down list.
The Layers toolbar includes several buttons for creating, enabling, locking, and selecting layers. You can also set the properties for each layer. The reactor toolbar includes buttons for accessing all the reactor functions.
Cross- |
Layers are discussed in Chapter 6, “Selecting Objects and Setting Object Properties,” and |
Reference |
reactor is covered in Chapter 40, “Animating with reactor.” |
|