

- •Preface
- •About This Book
- •Acknowledgments
- •Contents at a Glance
- •Contents
- •Relaxing at the Beach
- •Dressing the Scene
- •Animating Motion
- •Rendering the Final Animation
- •Summary
- •The Interface Elements
- •Using the Menus
- •Using the Toolbars
- •Using the Viewports
- •Using the Command Panel
- •Using the Lower Interface Bar Controls
- •Interacting with the Interface
- •Getting Help
- •Summary
- •Understanding 3D Space
- •Using the Viewport Navigation Controls
- •Configuring the Viewports
- •Working with Viewport Backgrounds
- •Summary
- •Working with Max Scene Files
- •Setting File Preferences
- •Importing and Exporting
- •Referencing External Objects
- •Using the File Utilities
- •Accessing File Information
- •Summary
- •Customizing Modify and Utility Panel Buttons
- •Working with Custom Interfaces
- •Configuring Paths
- •Selecting System Units
- •Setting Preferences
- •Summary
- •Creating Primitive Objects
- •Exploring the Primitive Object Types
- •Summary
- •Selecting Objects
- •Setting Object Properties
- •Hiding and Freezing Objects
- •Using Layers
- •Summary
- •Cloning Objects
- •Understanding Cloning Options
- •Mirroring Objects
- •Cloning over Time
- •Spacing Cloned Objects
- •Creating Arrays of Objects
- •Summary
- •Working with Groups
- •Building Assemblies
- •Building Links between Objects
- •Displaying Links and Hierarchies
- •Working with Linked Objects
- •Summary
- •Using the Schematic View Window
- •Working with Hierarchies
- •Setting Schematic View Preferences
- •Using List Views
- •Summary
- •Working with the Transformation Tools
- •Using Pivot Points
- •Using the Align Commands
- •Using Grids
- •Using Snap Options
- •Summary
- •Exploring the Modifier Stack
- •Exploring Modifier Types
- •Summary
- •Exploring the Modeling Types
- •Working with Subobjects
- •Modeling Helpers
- •Summary
- •Drawing in 2D
- •Editing Splines
- •Using Spline Modifiers
- •Summary
- •Creating Editable Mesh and Poly Objects
- •Editing Mesh Objects
- •Editing Poly Objects
- •Using Mesh Editing Modifiers
- •Summary
- •Introducing Patch Grids
- •Editing Patches
- •Using Modifiers on Patch Objects
- •Summary
- •Creating NURBS Curves and Surfaces
- •Editing NURBS
- •Working with NURBS
- •Summary
- •Morphing Objects
- •Creating Conform Objects
- •Creating a ShapeMerge Object
- •Creating a Terrain Object
- •Using the Mesher Object
- •Working with BlobMesh Objects
- •Creating a Scatter Object
- •Creating Connect Objects
- •Modeling with Boolean Objects
- •Creating a Loft Object
- •Summary
- •Understanding the Various Particle Systems
- •Creating a Particle System
- •Using the Spray and Snow Particle Systems
- •Using the Super Spray Particle System
- •Using the Blizzard Particle System
- •Using the PArray Particle System
- •Using the PCloud Particle System
- •Using Particle System Maps
- •Controlling Particles with Particle Flow
- •Summary
- •Understanding Material Properties
- •Working with the Material Editor
- •Using the Material/Map Browser
- •Using the Material/Map Navigator
- •Summary
- •Using the Standard Material
- •Using Shading Types
- •Accessing Other Parameters
- •Using External Tools
- •Summary
- •Using Compound Materials
- •Using Raytrace Materials
- •Using the Matte/Shadow Material
- •Using the DirectX 9 Shader
- •Applying Multiple Materials
- •Material Modifiers
- •Summary
- •Understanding Maps
- •Understanding Material Map Types
- •Using the Maps Rollout
- •Using the Map Path Utility
- •Using Map Instances
- •Summary
- •Mapping Modifiers
- •Using the Unwrap UVW modifier
- •Summary
- •Working with Cameras
- •Setting Camera Parameters
- •Summary
- •Using the Camera Tracker Utility
- •Summary
- •Using Multi-Pass Cameras
- •Creating Multi-Pass Camera Effects
- •Summary
- •Understanding the Basics of Lighting
- •Getting to Know the Light Types
- •Creating and Positioning Light Objects
- •Viewing a Scene from a Light
- •Altering Light Parameters
- •Working with Photometric Lights
- •Using the Sunlight and Daylight Systems
- •Using Volume Lights
- •Summary
- •Selecting Advanced Lighting
- •Using Local Advanced Lighting Settings
- •Tutorial: Excluding objects from light tracing
- •Summary
- •Understanding Radiosity
- •Using Local and Global Advanced Lighting Settings
- •Working with Advanced Lighting Materials
- •Using Lighting Analysis
- •Summary
- •Using the Time Controls
- •Working with Keys
- •Using the Track Bar
- •Viewing and Editing Key Values
- •Using the Motion Panel
- •Using Ghosting
- •Animating Objects
- •Working with Previews
- •Wiring Parameters
- •Animation Modifiers
- •Summary
- •Understanding Controller Types
- •Assigning Controllers
- •Setting Default Controllers
- •Examining the Various Controllers
- •Summary
- •Working with Expressions in Spinners
- •Understanding the Expression Controller Interface
- •Understanding Expression Elements
- •Using Expression Controllers
- •Summary
- •Learning the Track View Interface
- •Working with Keys
- •Editing Time
- •Editing Curves
- •Filtering Tracks
- •Working with Controllers
- •Synchronizing to a Sound Track
- •Summary
- •Understanding Your Character
- •Building Bodies
- •Summary
- •Building a Bones System
- •Using the Bone Tools
- •Using the Skin Modifier
- •Summary
- •Creating Characters
- •Working with Characters
- •Using Character Animation Techniques
- •Summary
- •Forward versus Inverse Kinematics
- •Creating an Inverse Kinematics System
- •Using the Various Inverse Kinematics Methods
- •Summary
- •Creating and Binding Space Warps
- •Understanding Space Warp Types
- •Combining Particle Systems with Space Warps
- •Summary
- •Understanding Dynamics
- •Using Dynamic Objects
- •Defining Dynamic Material Properties
- •Using Dynamic Space Warps
- •Using the Dynamics Utility
- •Using the Flex Modifier
- •Summary
- •Using reactor
- •Using reactor Collections
- •Creating reactor Objects
- •Calculating and Previewing a Simulation
- •Constraining Objects
- •reactor Troubleshooting
- •Summary
- •Understanding the Max Renderers
- •Previewing with ActiveShade
- •Render Parameters
- •Rendering Preferences
- •Creating VUE Files
- •Using the Rendered Frame Window
- •Using the RAM Player
- •Reviewing the Render Types
- •Using Command-Line Rendering
- •Creating Panoramic Images
- •Getting Printer Help
- •Creating an Environment
- •Summary
- •Creating Atmospheric Effects
- •Using the Fire Effect
- •Using the Fog Effect
- •Summary
- •Using Render Elements
- •Adding Render Effects
- •Creating Lens Effects
- •Using Other Render Effects
- •Summary
- •Using Raytrace Materials
- •Using a Raytrace Map
- •Enabling mental ray
- •Summary
- •Understanding Network Rendering
- •Network Requirements
- •Setting up a Network Rendering System
- •Starting the Network Rendering System
- •Configuring the Network Manager and Servers
- •Logging Errors
- •Using the Monitor
- •Setting up Batch Rendering
- •Summary
- •Compositing with Photoshop
- •Video Editing with Premiere
- •Video Compositing with After Effects
- •Introducing Combustion
- •Using Other Compositing Solutions
- •Summary
- •Completing Post-Production with the Video Post Interface
- •Working with Sequences
- •Adding and Editing Events
- •Working with Ranges
- •Working with Lens Effects Filters
- •Summary
- •What Is MAXScript?
- •MAXScript Tools
- •Setting MAXScript Preferences
- •Types of Scripts
- •Writing Your Own MAXScripts
- •Learning the Visual MAXScript Editor Interface
- •Laying Out a Rollout
- •Summary
- •Working with Plug-Ins
- •Locating Plug-Ins
- •Summary
- •Low-Res Modeling
- •Using Channels
- •Using Vertex Colors
- •Rendering to a Texture
- •Summary
- •Max and Architecture
- •Using AEC Objects
- •Using Architectural materials
- •Summary
- •Tutorial: Creating Icy Geometry with BlobMesh
- •Tutorial: Using Caustic Photons to Create a Disco Ball
- •Summary
- •mental ray Rendering System
- •Particle Flow
- •reactor 2.0
- •Schematic View
- •BlobMesh
- •Spline and Patch Features
- •Import and Export
- •Shell Modifier
- •Vertex Paint and Channel Info
- •Architectural Primitives and Materials
- •Minor Improvements
- •Choosing an Operating System
- •Hardware Requirements
- •Installing 3ds max 6
- •Authorizing the Software
- •Setting the Display Driver
- •Updating Max
- •Moving Max to Another Computer
- •Using Keyboard Shortcuts
- •Using the Hotkey Map
- •Main Interface Shortcuts
- •Dialog Box Shortcuts
- •Miscellaneous Shortcuts
- •System Requirements
- •Using the CDs with Windows
- •What’s on the CDs
- •Troubleshooting
- •Index

Chapter 19 Exploring the Material Editor 549
Reflection Dimming controls how much of the original reflection is lost as the surroundings are reflected within the scene.
Shininess and specular highlights
Shiny objects, such as polished metal or clean windows, include highlights where the lights reflect off their surfaces. These highlights are called specular highlights and are determined by the Specular settings. These settings include Specular Level, Glossiness, and Soften values.
The Specular Level is a setting for the intensity of the highlight. The Glossiness determines the size of the highlight — higher values result in a smaller highlight. The Soften value thins the highlight by lowering its intensity and increasing its size.
A rough material has the opposite properties of a shiny material and almost no highlights. The Roughness property sets how quickly the Diffuse color blends with the Ambient color. Cloth and fabric materials have a high Roughness value; plastic and metal Roughness values are small.
Other properties
Max uses several miscellaneous properties to help define standard materials, including properties such as Diffuse Level and Metalness.
The Diffuse Level property controls the brightness of the Diffuse color. Decreasing this value darkens the material without affecting the specular highlights. The Metalness property controls the metallic look of the material. Some properties are available only for certain material types.
Note |
Before proceeding, you need to understand the difference between a material and a map. A |
|
material is an effect that permeates the 3D object, but most maps are 2D images (although |
|
procedural 3D maps also exist) that can be wrapped on top of the object. Materials can con- |
|
tain maps, and maps can be made up of several materials. In the Material Editor, materials |
|
appear shaded in the sample slots, and maps appear as 2D images. You usually can tell |
|
whether you’re working with a material or a map by looking at the default name. Maps show |
|
up in the name drop-down list as Map and a number (Map #1), and materials are named a |
|
number and Default (7- Default). |
Working with the Material Editor
The Material Editor is the interface with which you define, create, and apply materials. You can access the Material Editor by choosing Rendering Material Editor, clicking the Material Editor button on the main toolbar (it has four small rendered spheres on the icon), or using the M keyboard shortcut.
Using the Material Editor controls
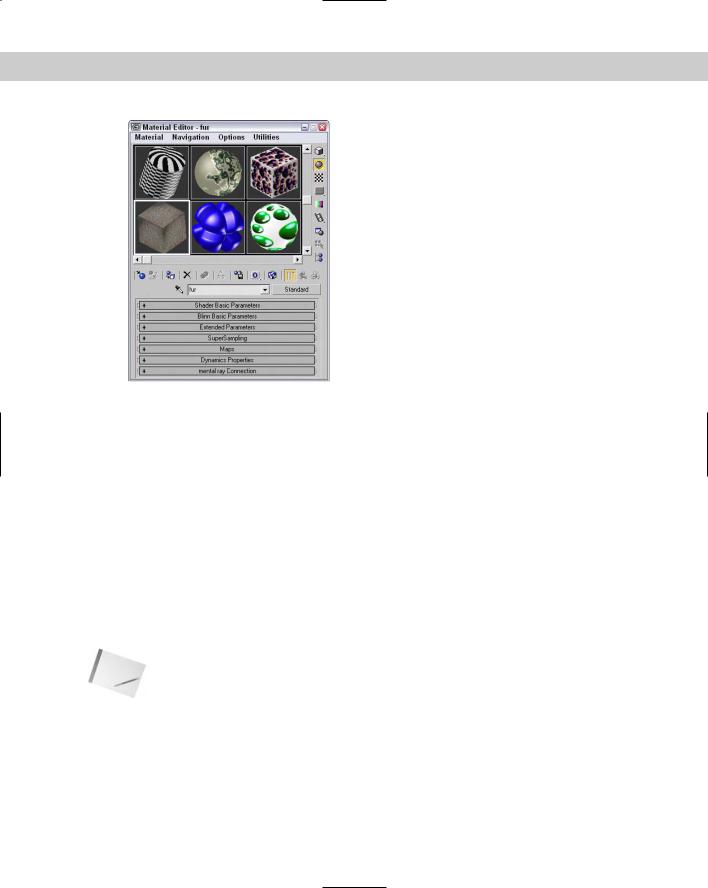
At the top of the default Material Editor window is a menu of options including Material, Navigation, Options, and Utilities. The menu commands found in these menus offer the same functionality as the toolbar buttons, but the menus are often easier to find than the buttons with which you are unfamiliar.
Below the menus are six sample slots that display a preview of some available materials. Surrounding these slots are button icons for controlling the appearance of these sample slots and interacting with materials. Figure 19-1 shows the Material Editor.
550 Part IV Materials and Maps
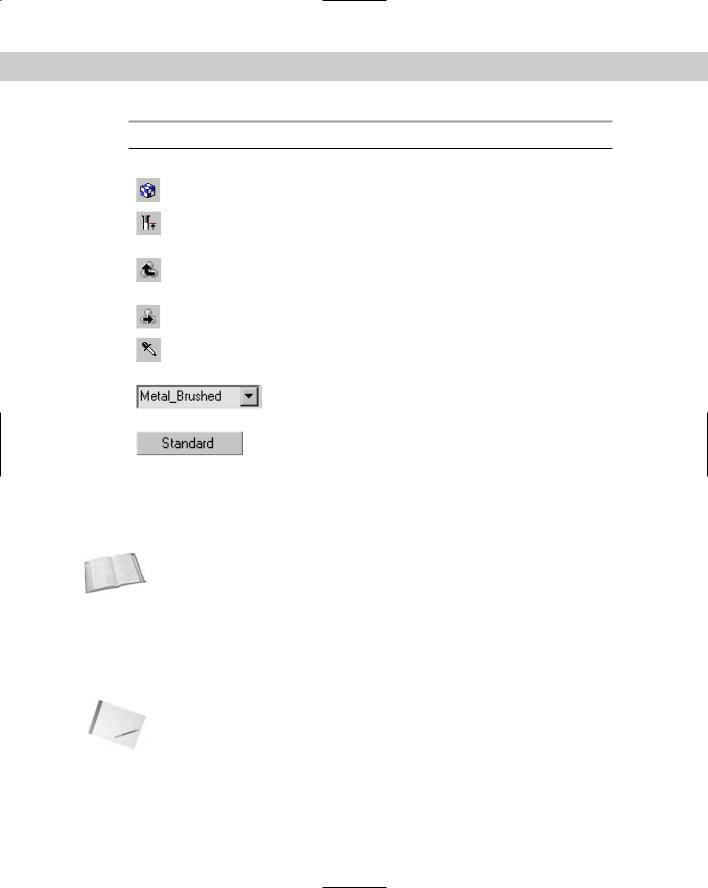
The button icons to the right and below the sample slots control how the materials appear in the editor. These buttons are defined in Tables 19-1 and 19-2.
Sample slots |
Vertical buttons |
Material name |
Horizontal buttons |
Figure 19-1: Use the Material Editor window to |
|
create, store, and work with materials. |
|
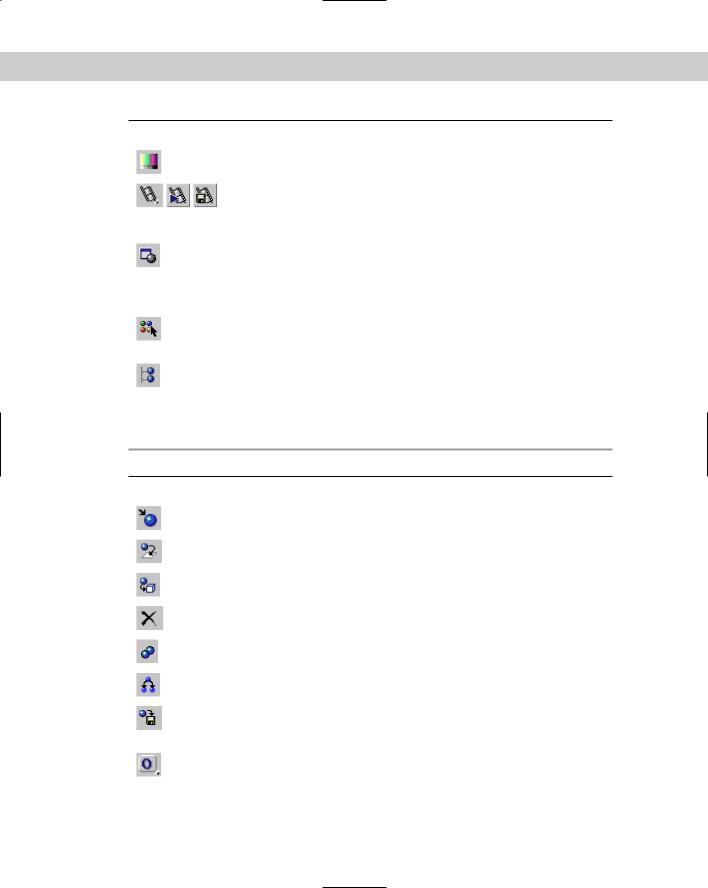
Table 19-1: Material Editor Buttons — Vertical
Toolbar Button |
Name |
Description |
|
|
|
|
Sample Type (Sphere, |
Controls the type of object displayed in the |
|
Cylinder, Box, Custom) |
sample slot. The default object is a sphere. Other |
|
|
options available as flyouts include a cylinder |
|
|
and a cube. You can also select a custom object |
|
|
to use as the preview object. |
|
Backlight (L) |
Turns backlighting in the selected sample slot on |
|
|
or off. |
|
Background (B) |
Displays a checkered background image (or a |
|
|
custom background) behind the material, helpful |
|
|
when displaying a transparent material. |
|
Sample UV Tiling |
Sets UV tiling for the map in the sample slot. |
|
(1×1, 2×2, 3×3, 4×4) |
The default is 1×1. Additional options available |
|
|
as flyouts are 2×2, 3×3, and 4×4. This setting only |
|
|
affects maps. |
Chapter 19 Exploring the Material Editor 551
Toolbar Button |
Name |
Description |
|
|
|
|
Video Color Check |
Checks the current material for colors that are |
|
|
unsupported by the NTSC and PAL formats. |
|
Make Preview (P), |
Used to generate, view, and save material |
|
Play Preview, |
preview renderings. These animated material |
|
Save Preview |
previews enable you to see the effect of an |
|
|
animated material before rendering. |
|
Options (O) |
Opens the Material Editor Options dialog box. |
|
|
This dialog box includes settings for enabling |
|
|
material animation, loading a custom |
|
|
background, defining the light intensity and |
|
|
color, and number of sample slots. |
|
Select by Material |
Selects all objects using the current material. This |
|
|
button opens the Select Objects dialog box with |
|
|
those objects selected. |
|
Material/ |
Opens the Material/Map Navigator dialog box. |
|
Map Navigator |
This dialog box displays a tree of all the levels for |
|
|
the current material. |
|
|
|
Table 19-2: Material Editor Buttons — Horizontal
Toolbar Button |
Name |
Description |
|
|
|
|
Get Material (G) |
Opens the Material/Map Browser for selecting |
|
|
materials. |
|
Put Material in Scene |
Updates the materials applied to objects in the |
|
|
viewport after materials have been edited. |
|
Assign Material to |
Paints the selected object with the selected |
|
Selection |
material. |
|
Reset Map/Mtl to |
Removes any modified properties and resets the |
|
Default Settings |
material properties to their defaults. |
|
Make Material Copy |
Creates a copy of the current material in the |
|
|
selected sample slot. |
|
Make Unique |
Makes instanced materials into a new |
|
|
standalone material. |
|
Put to Library |
Opens a simple dialog box that lets you rename |
|
|
the material and saves it into the current open |
|
|
library. |
|
Material Effects |
Sets a unique channel ID for applying |
|
Channel |
post-processing effects. This button includes |
|
|
channels 1–15 as flyouts. A material with |
|
|
channel 0 means no effect will be applied. |
Continued
552 Part IV Materials and Maps
Table 19-2 (continued)
Toolbar Button |
Name |
Description |
|
|
|
|
Show Map in Viewport |
Displays 2D material maps on objects in the |
|
|
viewports. |
|
Show End Result |
Displays the material in the sample slot with all |
|
|
levels applied. If this button is disabled, you will |
|
|
see only the level that is currently selected. |
|
Go to Parent |
Moves up one level for the current material. This |
|
|
applies only to compound objects with several |
|
|
levels. |
|
Go Forward to Sibling |
Selects the next maps or material at the same |
|
|
level. |
|
Pick Material From |
Enables you to select a material from an object |
|
Object |
in the scene and load the material into the |
|
|
selected sample slot. |
|
Material |
Lists the elements in the current material. You |
|
drop-down list |
can change the material or map name by typing |
|
|
a new name in this field. |
|
Type button |
Displays the current material or map type that is |
|
|
being used. Clicking this button opens the |
|
|
Material/Map Browser where you can select a |
|
|
new material or map type. |
|
|
|
Below the material name and type button is where the rollouts for the current material are opened. These rollouts change depending on the material type.
Cross- |
The Material Effects Channel IDs are used with the Rendering Effects dialog box to apply spe- |
Reference |
cific effects, such as glow and blur, to a material. To learn more about these effects, see |
|
|
|
Chapter 43, “Using Rendering Elements and Render Effects.” |
Using the sample slots
The Material Editor includes 24 sample slots that display materials and map examples. Each of these sample slots contains one material or map. Only one sample slot can be selected at a time — the selected slot is outlined with a white border. Click one of the material slots to select it.
Note |
Sample slots cannot be empty — they always contain a material of some kind. |

Chapter 19 Exploring the Material Editor 553
Sample slots are temporary placeholders for materials and maps. An actual scene can have hundreds of materials. By loading a material into a sample slot, you can change its parameters, apply it to other materials, or save it to a library for use in other scenes. When a file is saved, all materials in the Material Editor are saved with the file.
Twenty-four slots are available, but the default layout displays only six. You can access the other 18 slots using the scroll bars. You can also change the number of displayed slots. To change the number of slots, choose Options Cycle Sample Slots (or press the X key), or right-click any of the material slots and select 2×3, 3×5, or 4×6 from the pop-up menu. These options are also available in the Options dialog box (keyboard shortcut, O). Figure 19-2 shows the Material Editor with 24 sample slots displayed.
Figure 19-2: You can set the number of sample slots in the Material Editor to display 6, 15, or 24 slots.
Note |
The 24 default sample slots that are available when the Material Editor is opened are loaded |
|
from the medit.mat file in the \matlibs subdirectory. To load your own default materials, save |
|
them into this file. |
Magnifying a sample slot
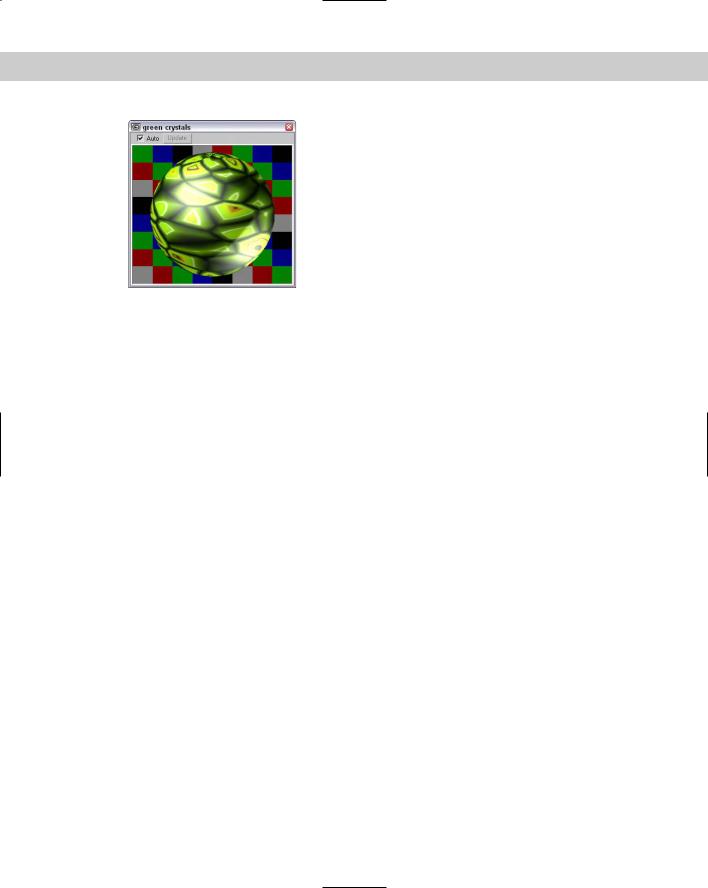
The Material Launch Magnify Window menu command (also found in the right-click pop-up menu) opens the material in a magnified window. You can also open this window by doubleclicking the sample slot. You can resize the window to view the material at any size, and you can set it to automatically update when changes are made. If the Auto option is disabled, you can update the material by clicking the Update button. Figure 19-3 shows the magnified window. This window is great for seeing the intricate details of a material.
554 Part IV Materials and Maps
Figure 19-3: Open materials in a magnified window by double-clicking them.
Using different sample objects
You can change the Sample Type object displayed in the sample slots to be a sphere, cylinder, or box using the Sample Type button at the top right of the Material Editor window.
The Options button (the seventh button from the top in the vertical column of buttons at the right) opens the Material Editor Options dialog box (also opened with the keyboard shortcut, O), where you can designate a custom sample object. The sample object must be contained in a .max or .chr file. To create a sample object, create and save a Max scene with a single object that fits inside a 100-unit cube.
The scene can also include custom lights and cameras. The object must have Mapping Coordinates enabled. You can enable them by selecting the Generate Mapping Coordinates option for objects like primitives or by applying the UVW Map modifier. To make the object available, click the File Name button and select the option to Load Camera and/or Lights. After the object loads, its name appears on the button in the Options dialog box. You can then select the custom object from the Object Type flyout button. Figure 19-4 shows the Material Editor with several different object types loaded, including a custom object.
Dragging materials
When you right-click the active sample slot, a pop-up menu appears. From this menu, you can select several commands. The Drag/Copy command is a toggle setting. This option also lets you drag and drop materials between the various sample slots. When the Drag/Copy option is enabled, it leaves a copy of the material when it’s dragged to another slot. This option also allows you to drag a material to an object in the viewports. Dropping a material onto an object automatically assigns the material to that object.
The Drag/Rotate pop-up menu command (also found in the Options menu) lets you rotate the material object in the sample slot when you drag with the mouse. Dragging on the object rotates it about its X axis and Y axis, and dragging from the corner of the sample slot rotates it about its Z axis. This feature is useful for looking at how maps are applied. Holding down the Shift key constrains the rotation about a single axis. The Material Reset Sample Slot Rotation menu command resets the material object to its original orientation.
Chapter 19 Exploring the Material Editor 555
Figure 19-4: You can load a custom sample object to be displayed in the sample slots.
You can also drag materials from the sample slots back and forth among the Material/Map Browser, the Asset Manager Utility, and any rollouts where you can specify maps, such as the Environment Map button (found in the Environment dialog box, accessed via Rendering Environment), and the Projector and Shadow Map buttons (found in the rollouts for a selected light).
Naming materials
Every material has a name that appears beneath the sample slots in a drop-down list. This same name appears in the Material Editor’s title bar. You can rename a material by typing a new name in the material name drop-down list. This name appears in the Material/Map Navigator dialog box and in the Track View. When a material is saved to a Library with the Put to Library button, a dialog box opens that enables you to rename the material. You can see the name of any of the materials in the sample slots by moving the mouse over the top of the sample slot; the material name appears as a tooltip.
Note If you drag a material from one sample slot to another, a copy is made with the same name as the original. If one of these materials is changed and then applied to the scene, a warning dialog box appears stating that a material with the same name already exists in the scene. It also gives you the option of replacing or renaming the material.
Getting new materials
You load new materials into the sample slots by clicking the Get Material button (the leftmost button on the horizontal toolbar), choosing the Material Get Material menu command, or

556 Part IV Materials and Maps
pressing the G key. This opens the Material/Map Browser where you can select a new material by double-clicking it. The new material loads into the selected sample slot. The Material/Map Browser is covered later in this chapter.
Caution |
The Material/Map Browser holds materials and maps. If you select a material map, a 2D map |
|
is loaded into the sample slot. 2D maps cannot be applied directly to an object in the view- |
|
port. You can tell the difference between a map and material because maps are flat 2D |
|
bitmaps and materials are shown on an object like a sphere. |
Assigning materials to objects
When you select a material, you can apply it to the selected object in the viewports with the Assign Material to Selection button (the third button from the left on the horizontal toolbar under the sample slots) or with the Material Assign to Selection menu command.
Alternatively, you can drag a material from its sample slot and drop it on an object.
When you assign a material to an object in the scene, the material becomes “Hot.” A Hot material is automatically updated in the scene when the material parameters change. Hot materials have white corner brackets displayed around their sample slots. You can “cool” a material by clicking the Copy Material button (the fifth from the left) or choosing Material Make Material Copy menu command. This detaches the sample slot from the material in the scene to which it is applied, so that any changes to the material aren’t applied to the object.
Whenever a material is applied to an object in the scene, the material is added to a special library of materials that get saved with the scene. Materials do not need to be loaded in one of the sample slots to be in the scene library. You can also load materials into the scene library that aren’t applied to an object using the Put Material to Scene button (the second button from the left) or the Material Put to Scene menu command. You can see all the materials included in the scene library in the Material/Map Browser by selecting the Scene radio button.
In addition to the scene library, you can also put materials into a separate material library. The Put to Library button (the seventh from the left) or the Material Put to Library menu command places the current selected material into the default library. Clicking the Get Material button opens the Material/Map Browser where you can see the current library by clicking the Material Library radio button.
Picking materials from a scene
Another useful option is obtaining a material from an object in the scene. Clicking the eyedropper button to the left of the Material Name or choosing the Material Pick from Object menu command changes the cursor to an eyedropper. You can then click an object in one of the viewports, and the object’s material is loaded into the current sample slot.
Selecting objects by material
If you want to select all the objects in your scene with a specific material applied (like the shiny gold material), then select the material in the sample slots and click on the Select by Material button in the vertical set of buttons, or choose the Utilities Select Objects by Material menu command. This command opens the Select Objects dialog box with all the objects that have the selected material applied. Clicking the Select button selects these objects in the viewport.

Chapter 19 Exploring the Material Editor 557
Previewing materials and rendering maps
The Material Make Preview menu command, along with the Make Preview button and the P keyboard shortcut, opens the Create Material Preview dialog box, shown in Figure 19-5. Using this dialog box, you can create a preview of an animated material. The dialog box lets you specify the Preview Range and Frame Rate, as well as the Image Size, which is a percentage of the default resolution.
Cross- |
Animated materials are covered in Chapter 30, “Animation Basics.” |
Reference |
|
After you create a material preview, you can view the preview with the Material View Preview menu command. This opens the default media player and plays the animated preview. To save the preview as a file, use the Material Save Preview menu command. Preview files are saved as .AVI files.
The Utilities Render Map menu command (also found in the right-click pop-up menu) opens the Render Map dialog box, shown in Figure 19-5. This option is available only if the selected material has a map applied. The Render Map dialog box lets you select the Range of frames to include and the Dimensions of the rendered image. You can click the Files button to open a file dialog box where you can name the render map and specify the file type. The Render button renders the current map as a bitmap or an animation to the Rendered Frame Window and to the file (if selected).
Figure 19-5: The Create Material Preview and Render Map dialog boxes offer two ways to render a material.
Note |
You can save render maps as .AVI, .BMP, .CIN, .EPS, .FLC, .HDR, .JPEG, .PNG, .MOV, .SGI, .RGB, |
|
.RLA, .RPF, .TGA, .TIF, and .DDS files. |
558 Part IV Materials and Maps
Setting Material Editor options
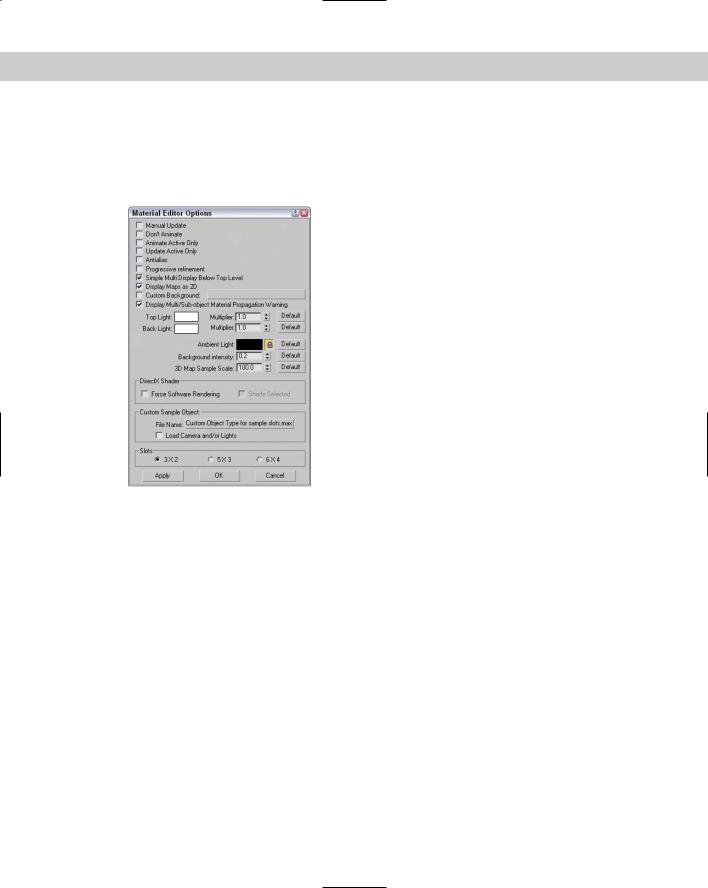
You open the Material Editor Options dialog box by clicking the Options button to the right of the sample slots, selecting Options from the Options menu, right-clicking the pop-up menu, or by just pressing the O key. Figure 19-6 shows this dialog box.
Figure 19-6: The Material Editor Options dialog box offers many options for controlling the Material Editor window.
The Material Editor Options dialog box includes options that control how the materials are displayed in the sample slots. These options are as follows:
Manual Update: Doesn’t update any changes in the sample slot until the slot is clicked on.
Don’t Animate: Causes materials not to animate when an animation is played or the Time Slider is dragged. It does, however, update these materials to the current frame.
Animate Active Only: Animates only the active sample slot if it contains an animated material. This option isn’t available when the Don’t Animate option is selected.
Update Active Only: Updates only the active sample slot when changes are made to the material.
Antialias: Enables anti-aliasing for all sample slots. Aliasing is a negative staircase-type effect that occurs for pixel-based images when adjacent pixels along the edges of an image are different colors. Anti-aliasing is a process for eliminating this distracting effect and smoothing the edges.

Chapter 19 Exploring the Material Editor 559
Progressive refinement: Causes materials to be rendered progressively. This causes the material to appear quickly as blocky sections and then slowly in more detail. This gives you a rough idea of how the material looks before the rendering is finished.
Simple Multi Display Below Top Level: Displays several different areas for only the top level when a Multi/Sub-Object material is applied.
Display Maps as 2D: Displays standalone maps in 2D and not on the sample object. This feature helps you to know when you’re looking at a map versus a material.
Custom Background: Enables you to use a custom background behind the sample slots. You can load the background using the button to the right of the option. Once changed, the new background is used in all sample slots where the background is enabled.
Display Multi/Sub-object Material Propagation Warning: Lets you to disable the warning screen that appears when you apply a Multi/Sub-object Material to an instanced object.
This dialog box also offers options to adjust the color and intensity of the Top and Backlights used to render the materials in the sample slots. The intensity of these lights is determined by the Multiplier values. You use the Ambient Light Intensity value to control the brightness of the Ambient light in the sample slots; use the lock icon to set the color to the same as the Diffuse color. The Background Intensity value sets the brightness of the background: A value of 0 produces a black background, and 1 produces a white background. The 3D Map Sample Scale option scales the maps applied to the sample object for all slots. By scaling the map, you can match it up with the scale of an object in the scene. You can reset all these options to their default values using the Default buttons on the right.
The Custom Sample Object button is for loading a Custom Sample Object (as discussed earlier) and includes options for specifying the number of sample slots.
Resetting materials
The Reset Material/Maps to Default Settings button (the fourth from the left) lets you reset the selected material to its default settings. If you apply the selected material to a material in the scene, then a dialog box appears that lets you reset just the sample slots or both the sample slots and the material applied to objects in the scene.
Removing materials and maps
If you accidentally apply an unwanted material to an object, you can replace the material with another material by dragging the new material onto the object. If you want to view the object color within the viewport, then open the Display panel, and in the Display Color rollout, select the Object color option for Wireframe and Shaded. The Material Color options display the material color in the viewports.
If you apply a material or map to an object that doesn’t look just right and tweaking it won’t help, you can always return to square one by removing the material or any mappings that have been applied to the object. The tool to remove materials and maps is the UVW Remove utility. You can access this utility by clicking the More button in the Utility panel and selecting UVW Remove from the list of Utilities.
560 Part IV Materials and Maps
This utility includes a single rollout that lists the number of objects selected. It also includes two buttons. The UVW button removes any mapping coordinates from the selected objects, and the Materials button removes any materials from the selected objects. This button restores the original object color to the selected objects. Alternatively, you can select the Set Gray option, which makes the selected object gray when the materials are removed.
Using the Fix Ambient utility
Standard material types always have their Ambient and Diffuse colors locked together. If you have older files with unlocked Diffuse and Ambient colors, the Fix Ambient utility can be used to locate and fix all materials in the scene with this condition. To access this utility, open the Utilities panel, click the More button, and select the Fix Ambient utility. Clicking the Find All button opens a dialog box that lists all materials in the scene with unlocked Diffuse and Ambient colors.
New |
The Fix Ambient utility is new to 3ds max 6. |
Feature |
|
Tutorial: Coloring Easter eggs
Everyone loves spring with its bright colors and newness of life. One of the highlights of the season is the tradition of coloring Easter eggs. In this tutorial, we use virtual eggs — no messy dyes and no egg salad sandwiches for the next two weeks.
To create our virtual Easter eggs and apply different colors to them, follow these steps:
1.Open the Easter eggs.max file from the Chap 19 directory on the CD-ROM. This file contains several egg-shaped objects.
2.Open the Material Editor by choosing Rendering Material Editor (or press the M key).
3.Increase the number of sample slots by right-clicking the active material and selecting 5×3 Sample Windows from the pop-up menu.
4.Select the first sample slot, and click the Diffuse color swatch in the rollout below it. From the Color Selector that appears, drag the cursor around the color palette until you find the color you want and then click Close.
5.In any viewport, select an egg and then click the Assign Material to Selection button in the Material Editor, or you can simply drag the material from its sample slot to the viewport object.
6.Repeat Steps 4 and 5 for all the eggs.
Figure 19-7 shows the assortment of eggs that we just created.