

- •Preface
- •About This Book
- •Acknowledgments
- •Contents at a Glance
- •Contents
- •Relaxing at the Beach
- •Dressing the Scene
- •Animating Motion
- •Rendering the Final Animation
- •Summary
- •The Interface Elements
- •Using the Menus
- •Using the Toolbars
- •Using the Viewports
- •Using the Command Panel
- •Using the Lower Interface Bar Controls
- •Interacting with the Interface
- •Getting Help
- •Summary
- •Understanding 3D Space
- •Using the Viewport Navigation Controls
- •Configuring the Viewports
- •Working with Viewport Backgrounds
- •Summary
- •Working with Max Scene Files
- •Setting File Preferences
- •Importing and Exporting
- •Referencing External Objects
- •Using the File Utilities
- •Accessing File Information
- •Summary
- •Customizing Modify and Utility Panel Buttons
- •Working with Custom Interfaces
- •Configuring Paths
- •Selecting System Units
- •Setting Preferences
- •Summary
- •Creating Primitive Objects
- •Exploring the Primitive Object Types
- •Summary
- •Selecting Objects
- •Setting Object Properties
- •Hiding and Freezing Objects
- •Using Layers
- •Summary
- •Cloning Objects
- •Understanding Cloning Options
- •Mirroring Objects
- •Cloning over Time
- •Spacing Cloned Objects
- •Creating Arrays of Objects
- •Summary
- •Working with Groups
- •Building Assemblies
- •Building Links between Objects
- •Displaying Links and Hierarchies
- •Working with Linked Objects
- •Summary
- •Using the Schematic View Window
- •Working with Hierarchies
- •Setting Schematic View Preferences
- •Using List Views
- •Summary
- •Working with the Transformation Tools
- •Using Pivot Points
- •Using the Align Commands
- •Using Grids
- •Using Snap Options
- •Summary
- •Exploring the Modifier Stack
- •Exploring Modifier Types
- •Summary
- •Exploring the Modeling Types
- •Working with Subobjects
- •Modeling Helpers
- •Summary
- •Drawing in 2D
- •Editing Splines
- •Using Spline Modifiers
- •Summary
- •Creating Editable Mesh and Poly Objects
- •Editing Mesh Objects
- •Editing Poly Objects
- •Using Mesh Editing Modifiers
- •Summary
- •Introducing Patch Grids
- •Editing Patches
- •Using Modifiers on Patch Objects
- •Summary
- •Creating NURBS Curves and Surfaces
- •Editing NURBS
- •Working with NURBS
- •Summary
- •Morphing Objects
- •Creating Conform Objects
- •Creating a ShapeMerge Object
- •Creating a Terrain Object
- •Using the Mesher Object
- •Working with BlobMesh Objects
- •Creating a Scatter Object
- •Creating Connect Objects
- •Modeling with Boolean Objects
- •Creating a Loft Object
- •Summary
- •Understanding the Various Particle Systems
- •Creating a Particle System
- •Using the Spray and Snow Particle Systems
- •Using the Super Spray Particle System
- •Using the Blizzard Particle System
- •Using the PArray Particle System
- •Using the PCloud Particle System
- •Using Particle System Maps
- •Controlling Particles with Particle Flow
- •Summary
- •Understanding Material Properties
- •Working with the Material Editor
- •Using the Material/Map Browser
- •Using the Material/Map Navigator
- •Summary
- •Using the Standard Material
- •Using Shading Types
- •Accessing Other Parameters
- •Using External Tools
- •Summary
- •Using Compound Materials
- •Using Raytrace Materials
- •Using the Matte/Shadow Material
- •Using the DirectX 9 Shader
- •Applying Multiple Materials
- •Material Modifiers
- •Summary
- •Understanding Maps
- •Understanding Material Map Types
- •Using the Maps Rollout
- •Using the Map Path Utility
- •Using Map Instances
- •Summary
- •Mapping Modifiers
- •Using the Unwrap UVW modifier
- •Summary
- •Working with Cameras
- •Setting Camera Parameters
- •Summary
- •Using the Camera Tracker Utility
- •Summary
- •Using Multi-Pass Cameras
- •Creating Multi-Pass Camera Effects
- •Summary
- •Understanding the Basics of Lighting
- •Getting to Know the Light Types
- •Creating and Positioning Light Objects
- •Viewing a Scene from a Light
- •Altering Light Parameters
- •Working with Photometric Lights
- •Using the Sunlight and Daylight Systems
- •Using Volume Lights
- •Summary
- •Selecting Advanced Lighting
- •Using Local Advanced Lighting Settings
- •Tutorial: Excluding objects from light tracing
- •Summary
- •Understanding Radiosity
- •Using Local and Global Advanced Lighting Settings
- •Working with Advanced Lighting Materials
- •Using Lighting Analysis
- •Summary
- •Using the Time Controls
- •Working with Keys
- •Using the Track Bar
- •Viewing and Editing Key Values
- •Using the Motion Panel
- •Using Ghosting
- •Animating Objects
- •Working with Previews
- •Wiring Parameters
- •Animation Modifiers
- •Summary
- •Understanding Controller Types
- •Assigning Controllers
- •Setting Default Controllers
- •Examining the Various Controllers
- •Summary
- •Working with Expressions in Spinners
- •Understanding the Expression Controller Interface
- •Understanding Expression Elements
- •Using Expression Controllers
- •Summary
- •Learning the Track View Interface
- •Working with Keys
- •Editing Time
- •Editing Curves
- •Filtering Tracks
- •Working with Controllers
- •Synchronizing to a Sound Track
- •Summary
- •Understanding Your Character
- •Building Bodies
- •Summary
- •Building a Bones System
- •Using the Bone Tools
- •Using the Skin Modifier
- •Summary
- •Creating Characters
- •Working with Characters
- •Using Character Animation Techniques
- •Summary
- •Forward versus Inverse Kinematics
- •Creating an Inverse Kinematics System
- •Using the Various Inverse Kinematics Methods
- •Summary
- •Creating and Binding Space Warps
- •Understanding Space Warp Types
- •Combining Particle Systems with Space Warps
- •Summary
- •Understanding Dynamics
- •Using Dynamic Objects
- •Defining Dynamic Material Properties
- •Using Dynamic Space Warps
- •Using the Dynamics Utility
- •Using the Flex Modifier
- •Summary
- •Using reactor
- •Using reactor Collections
- •Creating reactor Objects
- •Calculating and Previewing a Simulation
- •Constraining Objects
- •reactor Troubleshooting
- •Summary
- •Understanding the Max Renderers
- •Previewing with ActiveShade
- •Render Parameters
- •Rendering Preferences
- •Creating VUE Files
- •Using the Rendered Frame Window
- •Using the RAM Player
- •Reviewing the Render Types
- •Using Command-Line Rendering
- •Creating Panoramic Images
- •Getting Printer Help
- •Creating an Environment
- •Summary
- •Creating Atmospheric Effects
- •Using the Fire Effect
- •Using the Fog Effect
- •Summary
- •Using Render Elements
- •Adding Render Effects
- •Creating Lens Effects
- •Using Other Render Effects
- •Summary
- •Using Raytrace Materials
- •Using a Raytrace Map
- •Enabling mental ray
- •Summary
- •Understanding Network Rendering
- •Network Requirements
- •Setting up a Network Rendering System
- •Starting the Network Rendering System
- •Configuring the Network Manager and Servers
- •Logging Errors
- •Using the Monitor
- •Setting up Batch Rendering
- •Summary
- •Compositing with Photoshop
- •Video Editing with Premiere
- •Video Compositing with After Effects
- •Introducing Combustion
- •Using Other Compositing Solutions
- •Summary
- •Completing Post-Production with the Video Post Interface
- •Working with Sequences
- •Adding and Editing Events
- •Working with Ranges
- •Working with Lens Effects Filters
- •Summary
- •What Is MAXScript?
- •MAXScript Tools
- •Setting MAXScript Preferences
- •Types of Scripts
- •Writing Your Own MAXScripts
- •Learning the Visual MAXScript Editor Interface
- •Laying Out a Rollout
- •Summary
- •Working with Plug-Ins
- •Locating Plug-Ins
- •Summary
- •Low-Res Modeling
- •Using Channels
- •Using Vertex Colors
- •Rendering to a Texture
- •Summary
- •Max and Architecture
- •Using AEC Objects
- •Using Architectural materials
- •Summary
- •Tutorial: Creating Icy Geometry with BlobMesh
- •Tutorial: Using Caustic Photons to Create a Disco Ball
- •Summary
- •mental ray Rendering System
- •Particle Flow
- •reactor 2.0
- •Schematic View
- •BlobMesh
- •Spline and Patch Features
- •Import and Export
- •Shell Modifier
- •Vertex Paint and Channel Info
- •Architectural Primitives and Materials
- •Minor Improvements
- •Choosing an Operating System
- •Hardware Requirements
- •Installing 3ds max 6
- •Authorizing the Software
- •Setting the Display Driver
- •Updating Max
- •Moving Max to Another Computer
- •Using Keyboard Shortcuts
- •Using the Hotkey Map
- •Main Interface Shortcuts
- •Dialog Box Shortcuts
- •Miscellaneous Shortcuts
- •System Requirements
- •Using the CDs with Windows
- •What’s on the CDs
- •Troubleshooting
- •Index
534 Part III Modeling
7.From the Material/Map Browser that opens, select the Particle Age map. In the Particle Age Parameters rollout, select dark red, dark yellow, and black as colors for the ages 0, 50, and 100. You should use darker colors because the scene is lighted.
8.Click the Go to Parent button to access the Jet’s Exhaust material again, and then click the map button to the right of the Opacity setting. Select the Particle MBlur map.
9.In the Particle MBlur Parameters rollout, make Color #1 white and Color #2 black with a Sharpness value of 0.1. Then drag this material from its sample slot onto the particle system’s icon to apply the material (or click the Assign Material to Selection button if the emitter icon is still selected).
10.With the Shift key held down, drag the Super Spray icon in the Front viewport to the other exhaust port.
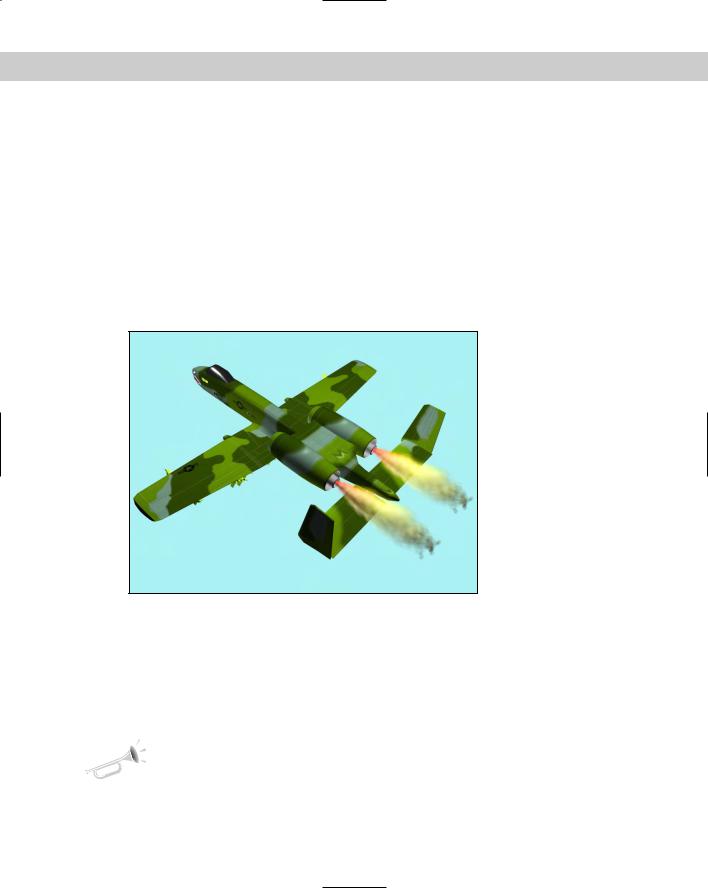
Figure 18-18 shows the jet at frame 30 with its fiery exhaust.
Figure 18-18: Realistic jet flames created using the Particle Age and
MBlur maps.
Controlling Particles with Particle Flow
The Particle Flow Source option in the Create Particles menu is more than just a new particle system — it is a whole new interface and paradigm that you can use to control particles throughout their life. This is accomplished using the Particle View window where you can visually program the flow of particles.
New |
The Particle Flow window is new to 3ds max 6. |
Feature |
|
Chapter 18 Creating Particles and Particle Flow |
535 |
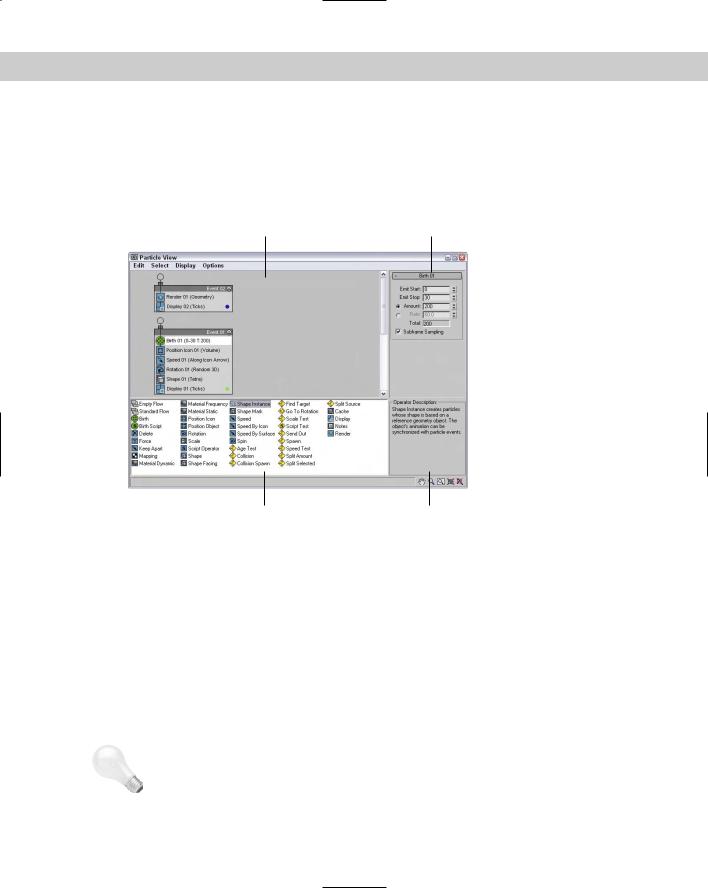
The Particle View window
The Particle View window, shown in Figure 18-19, is opened by clicking on the Particle View button in the Setup rollout when a Particle View Source icon is selected or by pressing the keyboard shortcut, 6. Pressing 6 opens the Particle View window even if its icon isn’t selected.
Event display |
Parameters |
Depot |
Description pane |
Figure 18-19: The Particle View window lets you program the flow of particles using a visual editor.
The Particle View window is divided into four different panes. The Event display contains all the event nodes. These nodes contain individual actions, and nodes can be wired to one another to define the flow. The Parameter pane in the upper-right corner displays the parameters in rollouts for the action that is selected in the Event display. The Depot pane is below the Event display pane and contains all the possible actions that can work with particles. In the lower right is a Description pane that offers a brief description of the action that is selected in the Depot pane. Except for the Event display pane, you can turn off the other panes using the Display menu.
In the lower-right corner of the window are several display tools. These tools can be used to navigate the Event display. The Display tools include Pan, Zoom, Region Zoom, Zoom Extents, and No Zoom. The No Zoom button eliminates all zooming and displays the nodes at their normal size.
Tip |
With the Particle View window open, you can Pan the Event display by dragging the Scroll |
|
Wheel on the mouse. |
536 Part III Modeling
The Standard Flow
When the Particle Flow Source icon is created and the Particle View window is first opened, two nodes appear in the Event display. These nodes are called a Standard Flow. These two nodes identify the Particle Flow Source and are wired to an event node containing a Birth action. The Birth action defines when particles Start and Stop and the Amount or Rate. You can change these values by selecting the Birth event in the Event display and changing its parameters in the rollout that appears in the Parameters pane.
Several other default actions appear in this default event node, including Position Icon, Speed, Rotation, Shape, and Display. Each of these events has parameters that you can alter that appear in the Parameters pane when the action is selected, and each event and action is identified with a number (such as 01) that appears next to its name. Each new event or action gets an incremented number. You can also rename any of these events if you right-click on the event and select Rename from the pop-up menu.
A new Standard Flow can be created using the Edit New Particle System Standard Flow menu command. An Empty Flow includes only the PF Source node. When a new Standard Flow (or Empty Flow) is created in the Particle Flow window, a PF Source icon is added to the viewports and if the PF Source icon is deleted in the viewports. The associated event nodes are also deleted in the Particle Flow window.
Working with actions
The Depot pane includes all the different actions that can affect particles. These actions can be categorized into Birth actions (identified with green icons), Operator actions (identified with blue icons), Test actions (identified with yellow icons), and Miscellaneous actions (which are also blue). Each of these categories can also be found in the Edit New menu.
New events can be dragged from the Depot pane to the Event display. If you place them within an existing node, a blue line appears at the location where the action will appear when dropped. The particles are affected within a node in the order from top to bottom in which they appear. If a new action from the Depot is dragged over the top of an existing action in the Event display, a red line appears on top of the existing action. When you drop the new action, it replaces the existing action.
Actions can also be dropped away from an event node, making it a new event node. If an event is a new node, then you can wire certain actions that are tested as true. For example, if you have a set of particles with a random speed assigned, then you could use a Test event to determine which particles are moving faster than a certain speed and wire those particles to change size using the new event node.
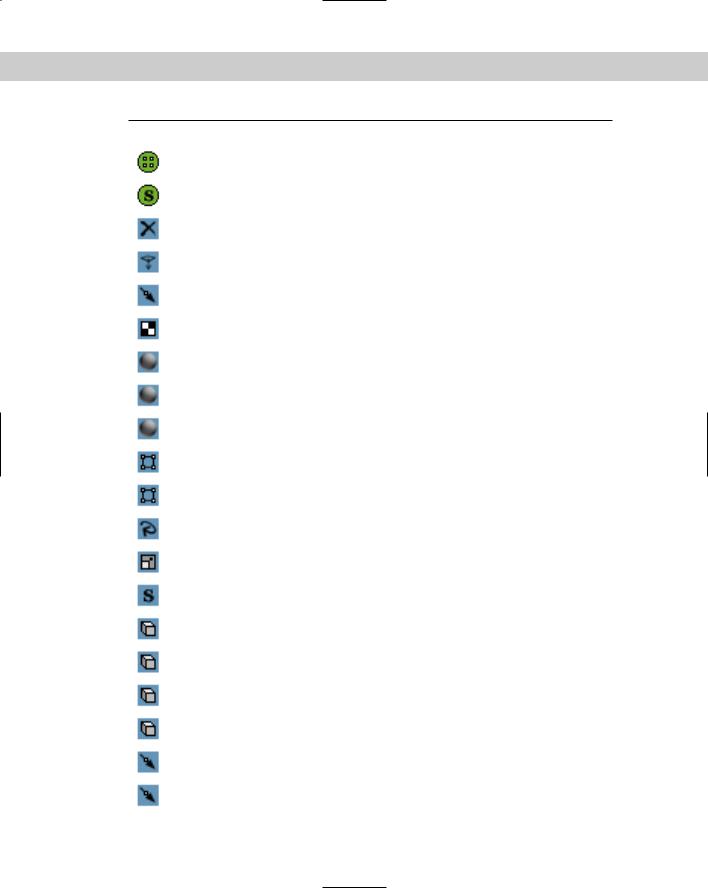
Clicking on the action’s icon disables the action. Table 18-1 provides a complete list of actions and their descriptions.
Table 18-1: Particle View Actions
Toolbar Button |
Name |
Description |
|
|
|
|
Empty Flow |
Creates an emitter icon, but includes no actions |
|
Standard Flow |
Creates an emitter icon wired to an event that |
|
|
includes default actions including Birth, Position |
|
|
Icon, Speed, Rotation, Shape, and Display |
Chapter 18 Creating Particles and Particle Flow |
537 |
Toolbar Button |
Name |
Description |
|
|
|
|
Birth |
Emits particles and defines the start, stop, and |
|
|
amount or rate |
|
Birth Script |
Emits particles based on a script |
|
Delete |
Removes particles from the flow, either All, Selected, |
|
|
or by Age |
|
Force |
Adds and subjects particles to Space Warp forces |
|
Keep Apart |
Prevents particle collisions by controlling particle |
|
|
speed |
|
Mapping |
Defines the mapping coordinates for the particles |
|
Material Dynamic |
Assigns material to a particle that can change during |
|
|
the life of a particle |
|
Material Frequency |
Assigns materials to subobjects based on defined |
|
|
amounts per Material ID |
|
Material Static |
Assign a material to a particle that is constant for the |
|
|
event |
|
Position Icon |
Defines the particle’s position relative to the emitter |
|
|
icon |
|
Position Object |
Defines the particles position relative to a scene |
|
|
object which acts as an emitter |
|
Rotation |
Defines the rotation of the particles |
|
Scale |
Defines the scale of the particles |
|
Script |
Allows the particles to be controlled with a script |
|
Shape |
Defines the shape of the particles; options include |
|
|
Vertex, Tetra, Cube, and Sphere |
|
Shape Facing |
Causes the particles to always face the camera’s |
|
|
view, let’s you select a camera or object to look at |
|
Shape Instance |
Allows the particle to be a separate scene object |
|
Shape Mark |
Creates a spot mark on a specified contact object |
|
Speed |
Defines the speed of the particles |
|
Speed By Icon |
Causes the particles to follow the trajectory of the |
|
|
viewport icon |
Continued

538 Part III Modeling
Table 18-1 (continued)
|
Toolbar Button |
Name |
Description |
|
|
|
|
|
|
Speed By Surface |
Sets the speed of a particle based on an object’s |
|
|
|
surface normals or to be parallel to its surface |
|
|
Spin |
Defines the amount and axis about which the |
|
|
|
particle spins |
|
|
Age Test |
Test for the particle’s age or its age in the current |
|
|
|
event |
|
|
Collision |
True if the particle collides with a selected deflector |
|
|
|
object |
|
|
Collision Spawn |
True if the particle collides with a selected deflector |
|
|
|
object; new particles are then spawned |
|
|
Find Target |
True if the particle is within the specified threshold |
|
|
|
of the target icon |
|
|
Go To Rotation |
True when the current rotation action ends and |
|
|
|
transitions to the next rotation |
|
|
Scale Test |
True if the particle is scaled to a specified size |
|
|
Script Test |
Tests the particles based on a script |
|
|
Send Out |
Sets all particles to true and moves them to the next |
|
|
|
event |
|
|
Spawn |
Creates new particles and moves them to the next |
|
|
|
event |
|
|
Speed Test |
True if a particle exceeds a specified speed |
|
|
Split Amount |
Used to send a fraction or every nth particle to the |
|
|
|
next event |
|
|
Split Selected |
True is particle is selected |
|
|
Split Source |
True based on the particle’s origin emitter |
|
|
Cache |
Records particle positions for quicker viewport |
|
|
|
playback |
|
|
Display |
Defines how the particles are displayed in the |
|
|
|
viewports |
|
|
Notes |
Allows notes to be added to the event node |
|
|
Render |
Defines how the particles are rendered |
|
|
|
|

Chapter 18 Creating Particles and Particle Flow |
539 |
Tutorial: Creating an avalanche
One of the cautions that come with particles is that if you’re not careful, you can quickly spawn enough particles to bring any system to its knees. Using the particle spawn feature is one of the worst offenders. For this tutorial, we use a Collision Spawn action to create an avalanche, but be sure to keep the number of spawned particles in check.
To use Particle Flow to make an avalanche effect, follow these steps:
1.Open the Avalanche.max file from the Chap 18 directory on the CD-ROM. This file includes a simple hillside covered with snow.
2.Select Create Space Warps Deflectors SOmniFlect and drag in the Top viewport to create a spherical deflector that covers the entire hill. Click the Select and Scale tool and scale in the Z-axis the SOmniFlect sphere down in the Left viewport until it is roughly the same thickness as the hill object. Then rotate the SOmniFlect until it is aligned parallel to the hill.
3.Select Create Particles Particle Flow Source and drag in the Top viewport to create the emitter icon. Scale and rotate the emitter icon so it is positioned inside the SOmniFlect object on the uphill side pointing downhill.
4.Click the Particle View button in the Command Panel to open the Particle View window (or press 6). Select the Shape01 action and set the Shape to Sphere and the Size to 5.0. Select the Speed01 action and set the Speed value to 100. Click on the colored dot to the right of the Display01 action and select white as the new color.
5.Select the Collision Spawn action from the Depot pane and drop it in Event01 beneath the Display01 action. The select the Collision Spawn action, click the By List button in the Parameters pane, and select the SOmniFlect object. Then disable the Test True for Parent and Spawn Particles option, enable the Spawn On Each Collision option, and set the Offspring value to 10.
Figure 18-20 shows an avalanche of snowballs as if rages down a snowy hillside.
Using Particle Flow helpers
In addition to the Standard Flow event, several other actions create an icon in the viewports that are controlled using the action parameters. One of these helpers appears when the Find Target action is added to an event node. This helper is a simple sphere, but all particles in the scene are attracted to it. It can also be animated.
The Speed By Icon action creates an icon that forces particles to follow its trajectory path.
Wiring events
Each new event node that is created has an input that extends from the upper-left corner of the node, and each Test event that is added has an output that extends to the left of its icon, as shown in Figure 18-21. Test action outputs can be wired to event inputs by dragging from one to the other. The cursor changes when it is over each.
Once wired, all particles that are tested to be true are transferred to the new event node and are subject to the actions in the wired event node.
540 Part III Modeling
Figure 18-20: Using the Collision Spawn and a well-placed deflector, you can create an avalanche effect.
Event output
Event input
Figure 18-21: Event outputs can be wired to event inputs.
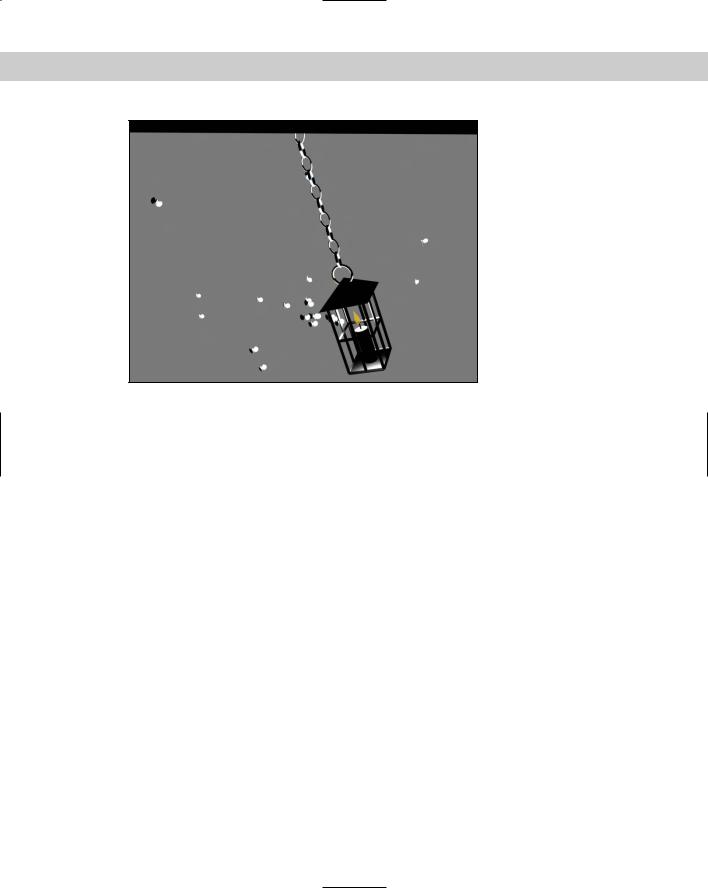
Tutorial: Moths chasing a light
Another cool feature that the Particle Flow interface makes available is the ability to have particles chase a target object. In this example, we use the Target event to make some annoying bugs follow a lantern’s light.
To use Particle Flow to make several bugs chase a light, follow these steps:
1.Open the Moths chasing light.max file from the Chap 18 directory on the CD-ROM.
This file includes a simple lantern created from primitives that is suspended from a chain and animated rocking back and forth. The file also includes a simple moth.

Chapter 18 Creating Particles and Particle Flow |
541 |
2.Select Create Particles Particle Flow and drag in the Front viewport to create the emitter icon. Click the Particle View button to open the Particle View interface.
3.In the Event01 node, select the Birth01 action and set the Emit Stop to 100 with an Amount of 50.
4.Drag the Position Object action from the Depot pane and drop it on top of the Position Icon action to replace it. Select the new Position Object action, click the By List button under the Emitter Objects list in the Parameters pane, and select the Sphere01 object.
This sphere surrounds the lantern and is the source of the moths. It has a material with an Opacity setting of 0 applied so that it is not visible in the scene.
5.Select the Rotation action in the Event01 node and change the Orientation Matrix option to Speed Space Follow. This rotates the moths as they follow the swinging lantern.
6.Drag the Shape Instance action from the Depot pane and drop it on top of the Shape action to replace it. Select the new Shape Instance action, click the Particle Geometry Object button in the Parameters pane, and select the moth object in the viewports.
7.Drag the Find Target action from the Depot pane and drop it at the bottom of the Event01 node. This adds a new Find Target icon to the viewports. Select the Find Target icon in the viewports and move it to the lantern flame’s position. Select Group Attach and click the lantern object to add the Find Target icon to the lantern group. This makes the target move with the lantern. Enable the Use Cruise Speed option, and then set the Speed to 1000 with a Variation of 50 and the Accel Limit to 5000 with an Ease % of 50. You also need to enable the Follow Target Animation option.
8.Drag the Material Dynamic from the Depot pane to the Event Display pane and drop it outside the Event01 node to create a new node called Event02. In the Parameters pane, enable the Assign Material button and click the material button. Select the Flash material from the Material/Map Browser (select the Material Editor option to see the sample slot materials).
9.Drag the Age Test action from the Depot pane and drop it below the Material Dynamic action. Then select Event Age from the drop-down list in the Parameters pane and set the Test Value to 2.
10.Finally, drag the Delete action from the Depot pane and drop it away from the other events. Then wire Event02 to the new event node and select the Selected Particles Only option in the Parameters pane.
Figure 18-22 shows several moths anxiously pursuing the swinging lantern.
Debugging test actions
Any test action can be made to return a True or False value if you click the left (for True) or right (for False) side of the test action’s icon in the Particle View interface. This lets you debug the particle flow. Tests that are set to be true show an icon with a green light and tests set to be false show a red light icon.
Tutorial: Firing at a Fleeing Spaceship
Well, it is about time for a space scene, and we all know that lots of particles float around out in space — stars, asteroids, comets, and so forth. It’s all great stuff to animate. For this scene, we use the Particle Flow feature to fire laser blasts on a fleeing spaceship.
542 Part III Modeling
Figure 18-22: All the moths in this scene are particles and are following a target linked to the lantern.
To use Particle Flow to fire on a fleeing spaceship, follow these steps:
1.Open the Fleeing spaceship.max file from the Chap 18 directory on the CD-ROM.
This file includes a spaceship model created by Viewpoint Datalabs that has been animated as if it were fleeing.
2.Select Create Particles Particle Flow Source, and drag in the Front viewport to create the emitter. With the Select and Move (W) button selected, move the emitter until it is aligned with the end of the laser gun. Then click the Select and Link button, and drag from the emitter to the gun object to bind the emitter to the gun.
The emitter now moves with the animated laser gun.
3.With the Particle Flow Source icon selected, open the Modify panel and click on the Particle View button in the Setup rollout (or press the 6 key) to open the Particle View interface.
4.In the Event01 node, select the Birth 03 event; in the Parameters panel, set the Emit Stop to 100 and the Amount to 50. This produces a laser blast every two frames. Click the blue dot in the lower-right corner of the Event node, and select a red color from the Color Selector that appears.
5.Select Create Standard Primitives Cylinder, and drag in the Front viewport to create a Cylinder object. In the Hierarchy panel, select the Affect Pivot Only button and rotate the Cylinder’s Pivot Point until its Y axis points at the spaceship. Then in the Particle

Chapter 18 Creating Particles and Particle Flow |
543 |
View window, drag the Shape Instance event from the depot and drop it on top of the Shape event in the Event 01 node. This replaces the Shape event with a Shape Instance event. In the Parameters rollout, click on the Particle Geometry Object button and select the Cylinder object. Select the Rotation event, and delete it with the Delete key.
6.Select Create Space Warps Deflectors SOmniFlect, and drag in the Top viewport to create a spherical deflector that encompasses the space ship. Click on the Select and Non-Uniform Scale button, and scale the X and Z axes until the deflector just fits around the spaceship. Then link the deflector Space Warp to the spaceship.
7.In the Particle View window, drag the Collision event from the depot to the bottom of the Event 01 node. In the rollout, below the Deflectors list, click the Add button, and select the SOmniFlect01 object surrounding the spaceship.
8.Drag a Spawn event from the depot to the event display, and then connect the Collision event by dragging from its output to the input of the new Spawn event. Then click on the color for the new event particles, and change it to orange. Select the Spawn 01 event, enable the Delete Parent option, and set the Offspring to 200 and the Variation % to 20. Then set the Inherited % to 50 with a Variation of 30.
9.Drag the Delete event to both the bottom of the Event 02 node, select the By Particle Age option, and set the Life Span to 20 and the Variation to 30. Drag a Shape event to the Event 02 node, and set the Shape to Sphere and the Size to 0.5.
10.Finally, click the Play button to see the resulting animation.
Figure 18-23 shows the final Particle View flow, and Figure 18-24 shows a frame of the animation in the viewport. You can still do several things to improve this animation, such as adding a Glow Render Effect to the laser blasts and using the Particle Age material with some transparency to improve the explosion’s look.
Figure 18-23: The Particle View window shows the flow of the particles in the animation.